Four Lights, Donut Sticks, and a Drizzle of Chocolate Sauce
April 15, 2020Food Photography

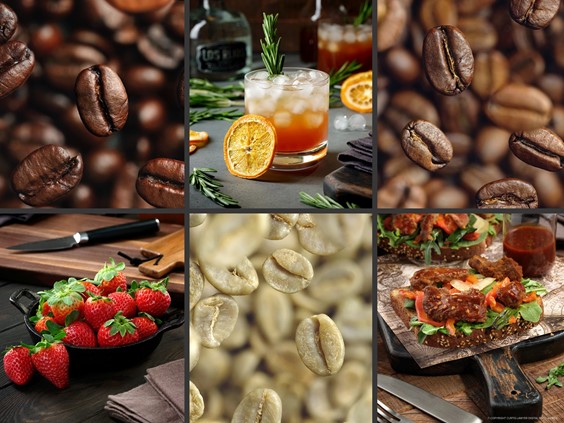
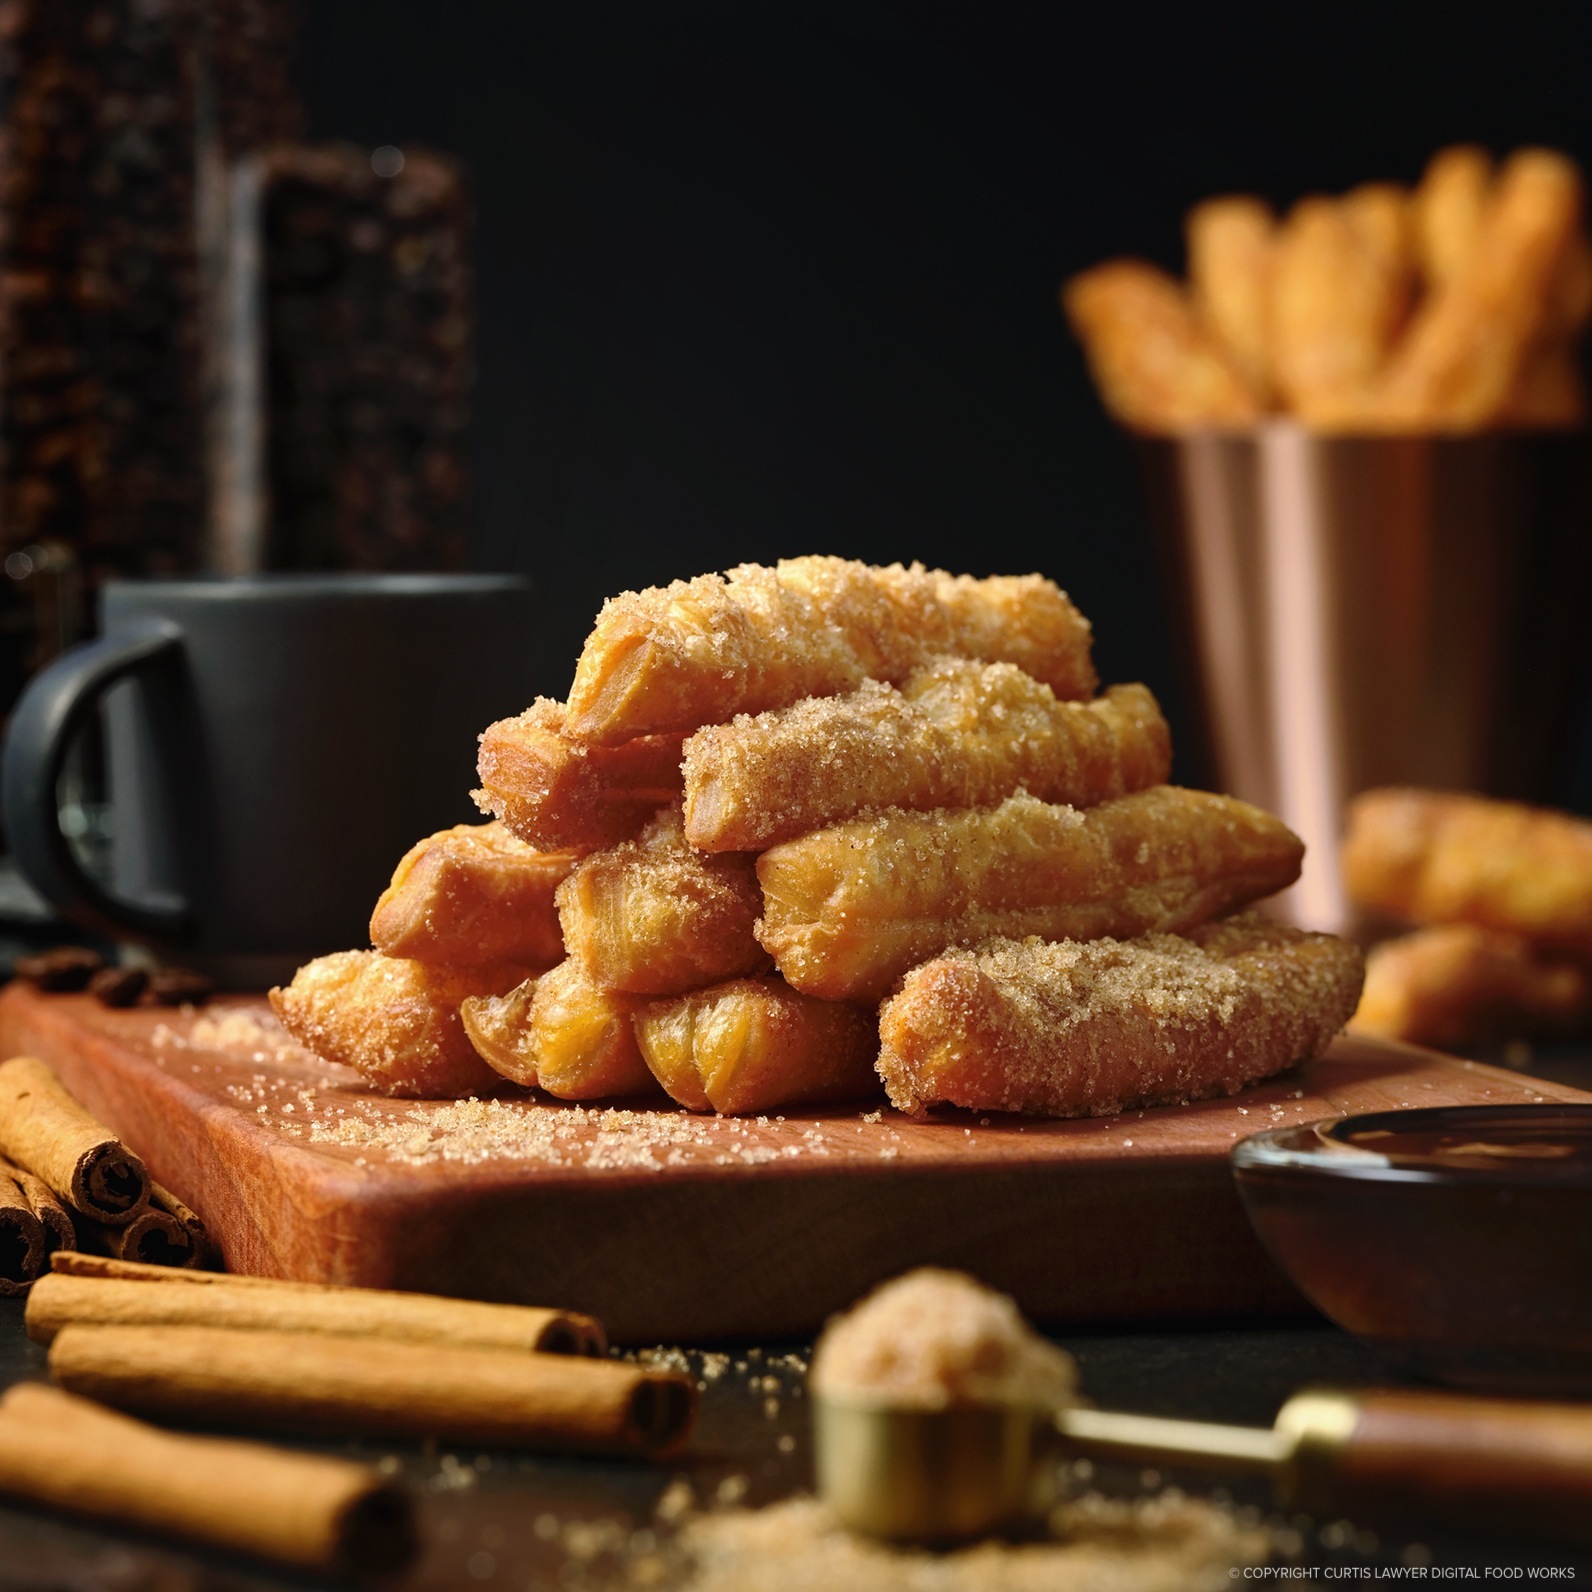
This is the "hero" photo — Sugar and Cinnamon Donut Sticks with a Drizzle of Chocolate Sauce.
Our main subject today is a stack of cinnamon and sugar donut sticks… that eventually get a nice drizzle of chocolate. Naturally, the light set up has to be ready to go long before the chocolate shows up… that perfect drip and drizzle of chocolate pouring out of the measuring spoon is an illusive thing that you have to be ready for!
The Lighting Diagrams
Giving power settings is not super useful because all lighting gear is a little different, but the Main Light which is Flash #1 in this case is pretty much at full power, while the other three lights in the scene are very much under that, and are just providing accent and fill light. It's important to note, that when no flashes are on… the photo would be totally dark. 100% of the light in the photo is coming from the flash units.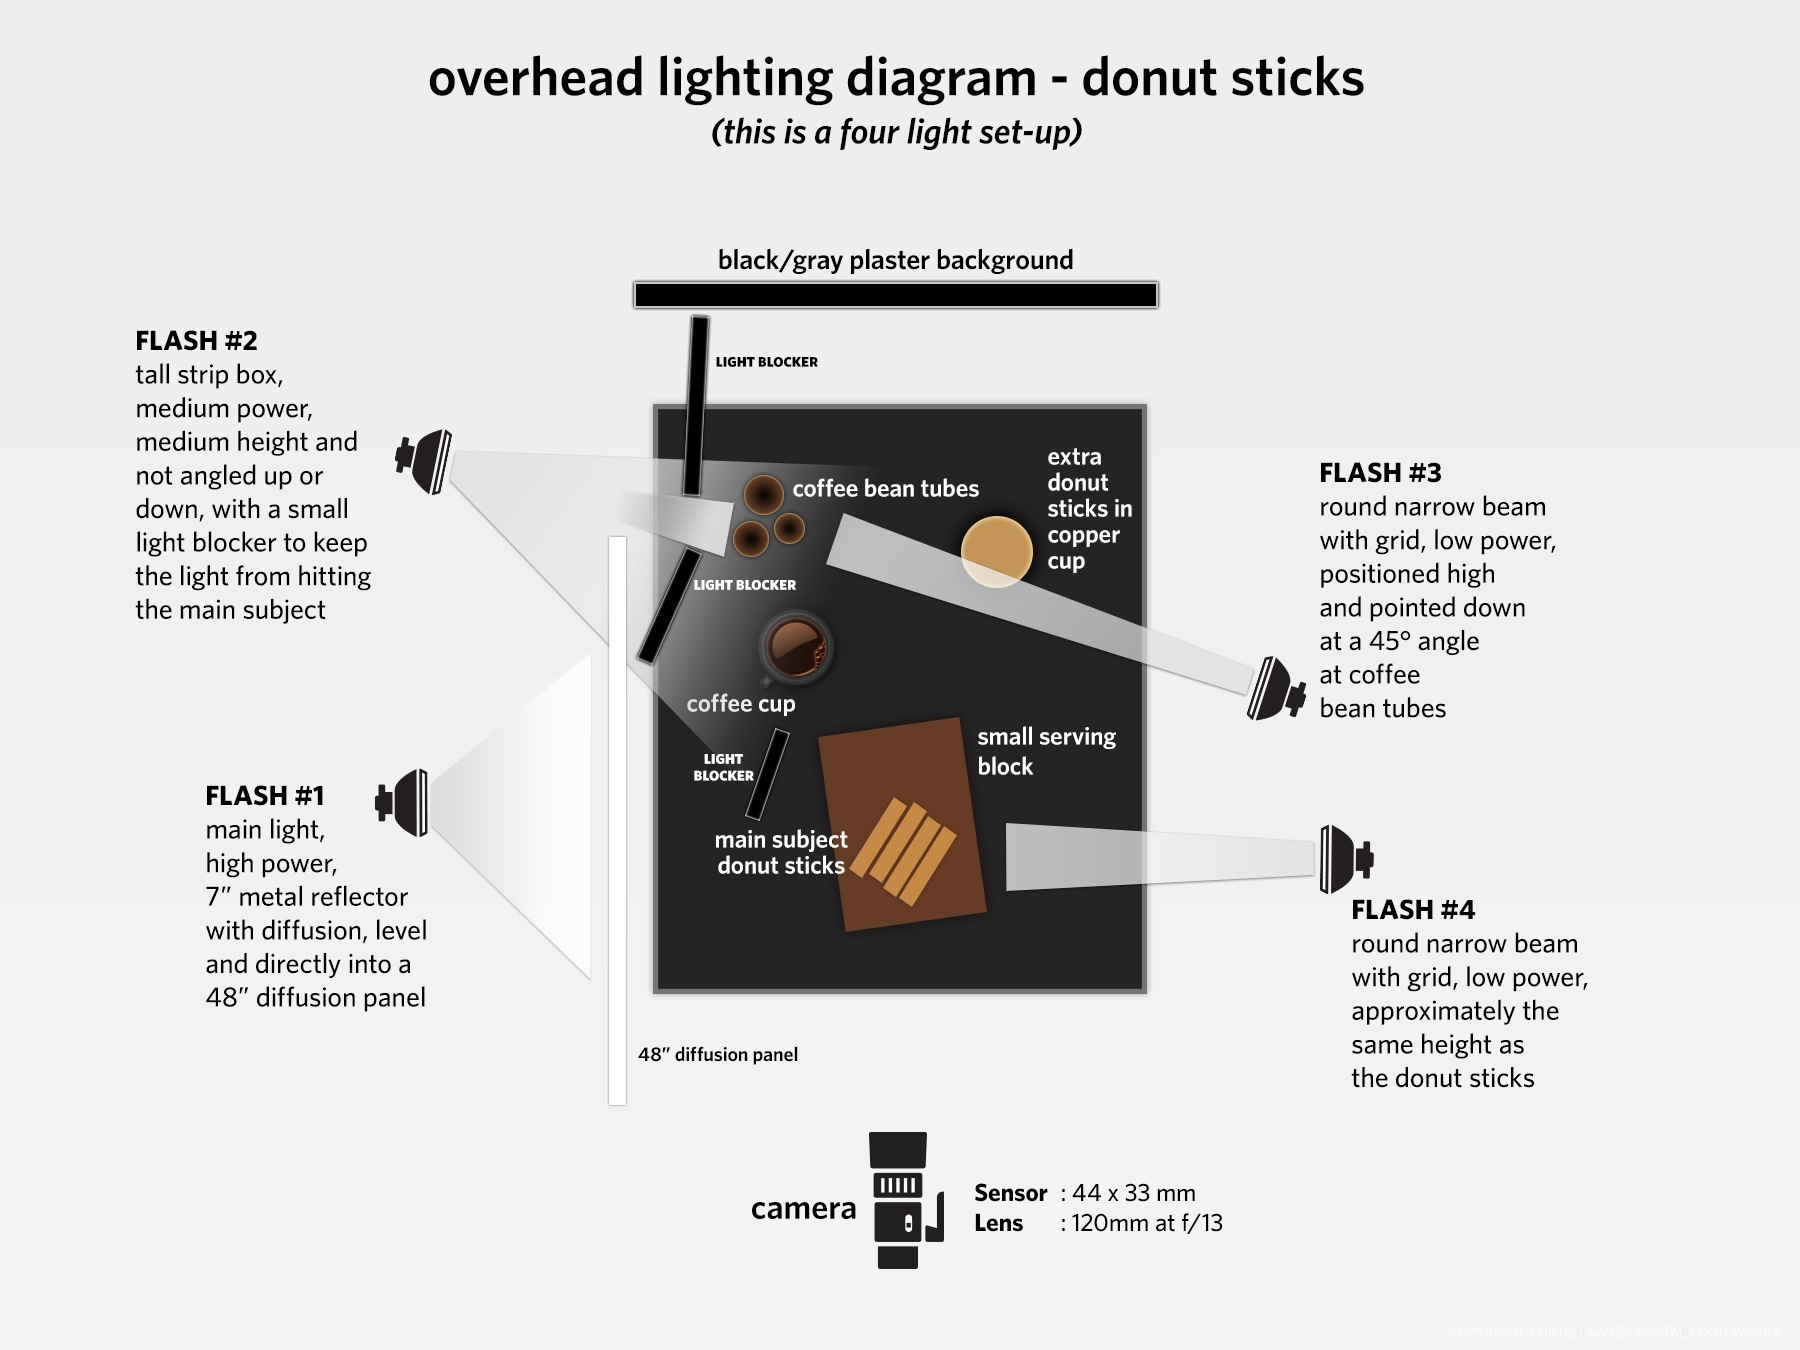
An overhead layout showing where all four flash units are positioned, and what modifiers were used on each.
Let's do a little side-by-side here, with the lighting diagram and a photo of the scene from each light. Hopefully, this will show what each of the lights are doing by itself, from where it's positioned. These are all taken at the "final" power settings… so what you see is actually the amount of light that's being added to the final photo.
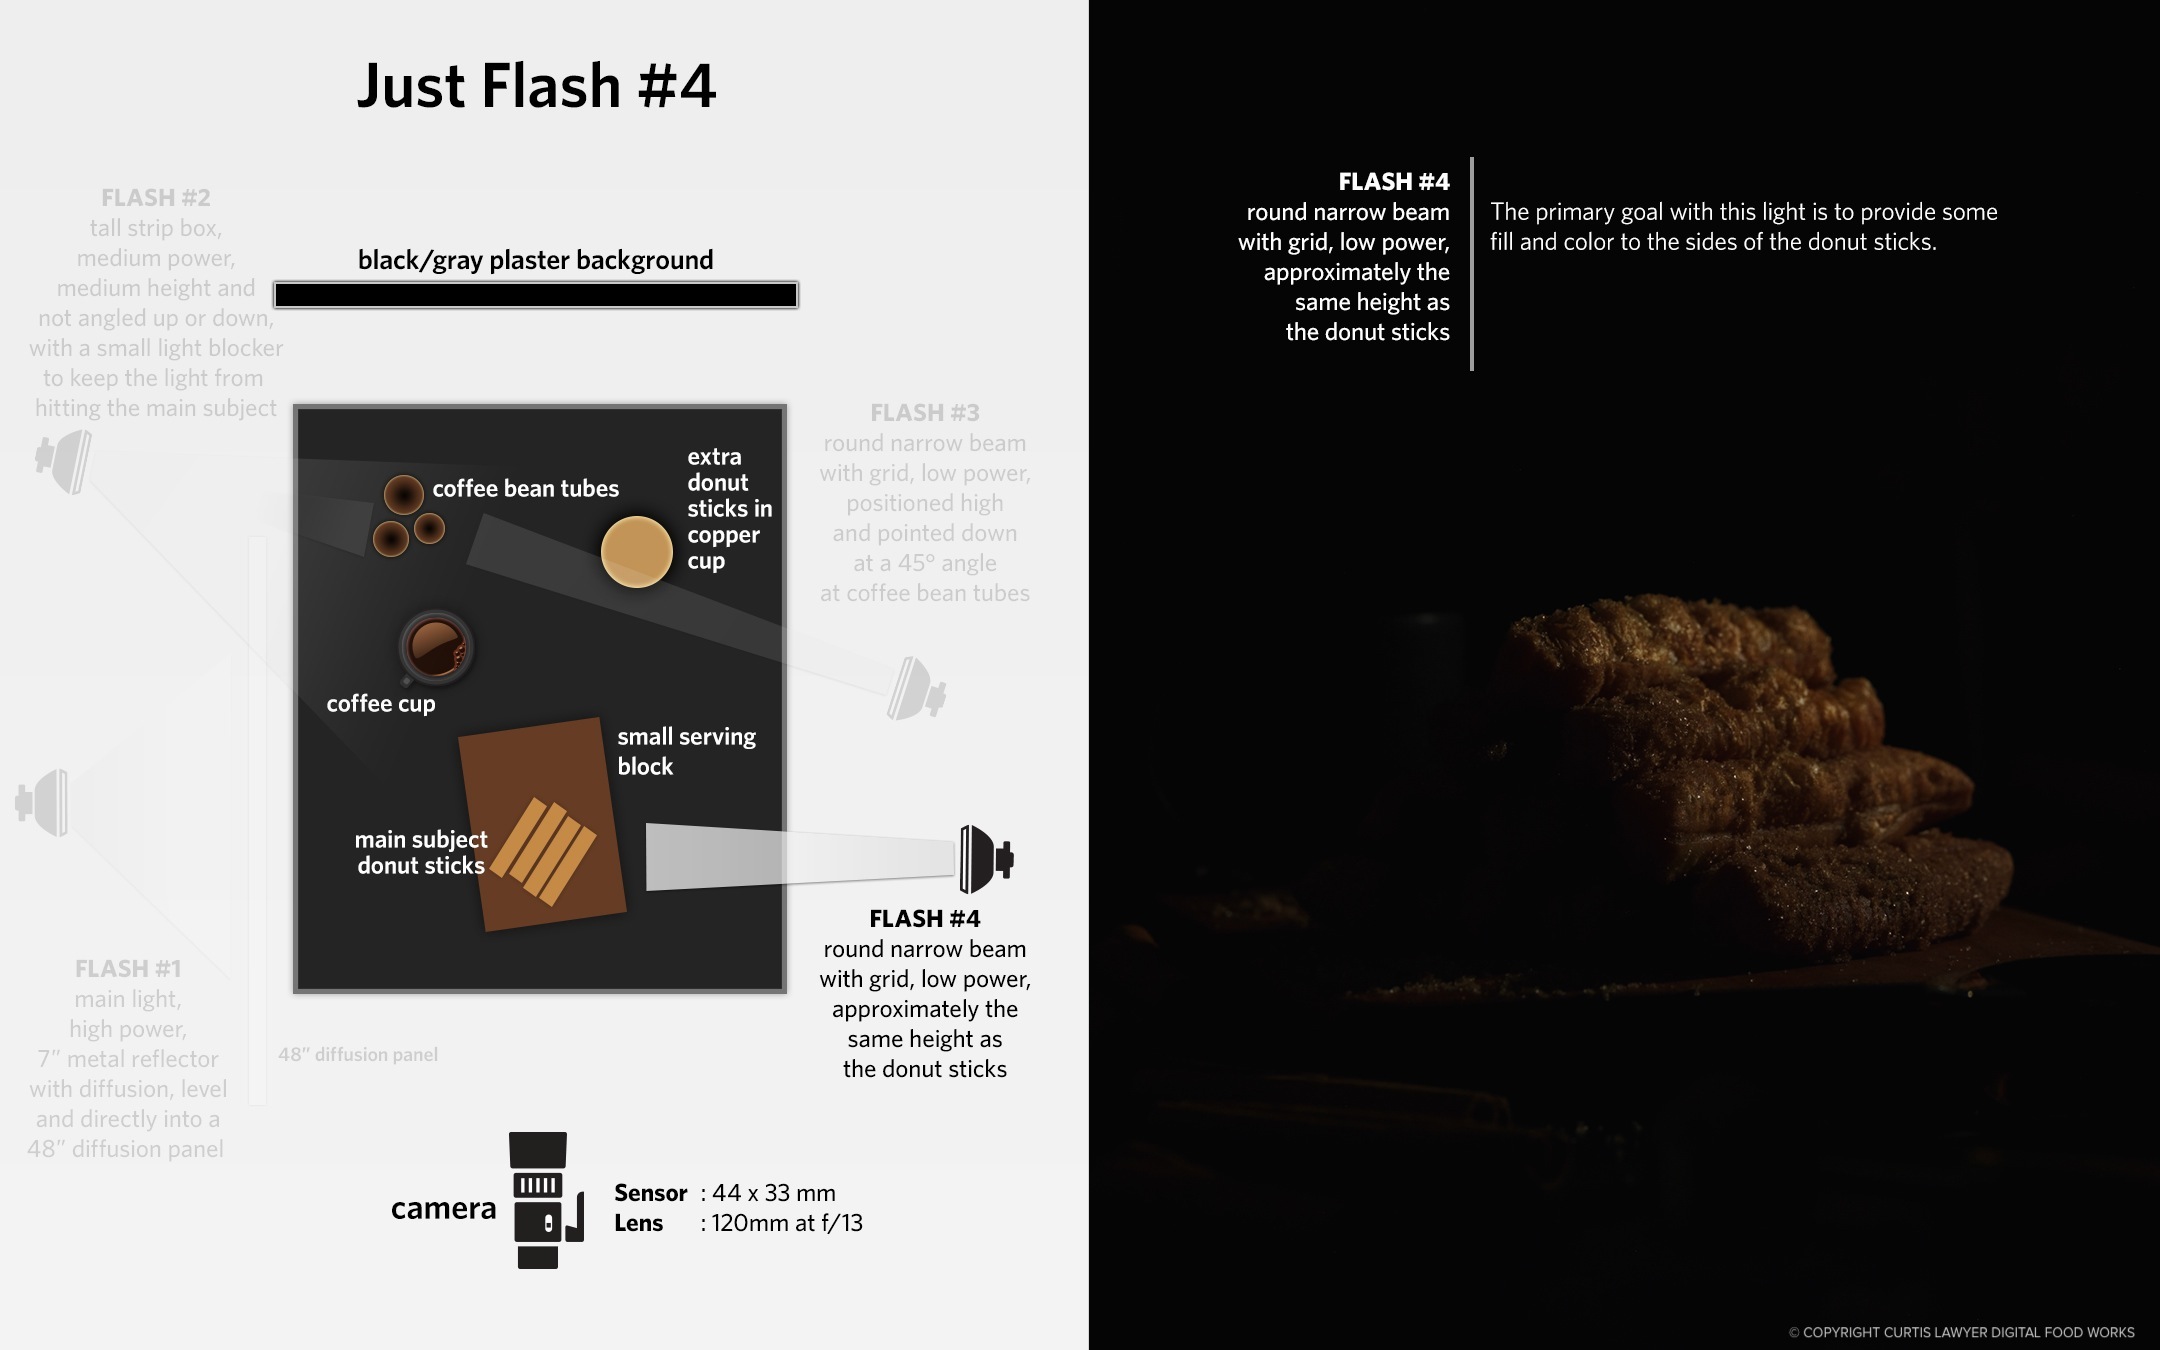
Flash #4 is providing fill and color to the sides of the donut sticks.
The main goal of Flash #4 is to provide a little bit of color and illumination to the "shadow" side of the main subject. Because our main light (Flash #1 at the highest power setting) is directly to the left of the subject, the right side of the donut stick stack is in it's own shadow. Flash #4 provides a little extra light on just that side of the donut sticks.
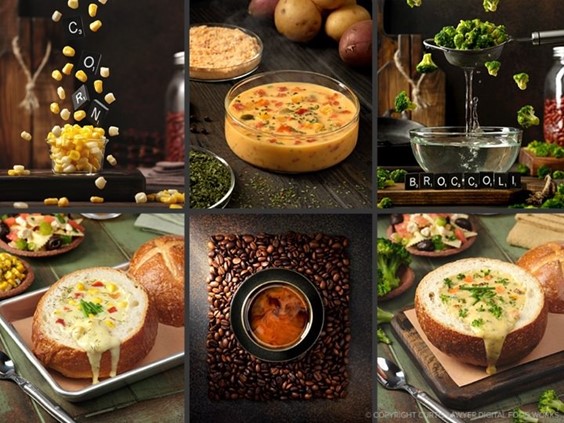
Flash #3 is for the coffee beans in the glass tubes. It's the tallest light in this set up, and pointing down at the coffee beans at a 45 degree angle, and positioned behind the main subject.
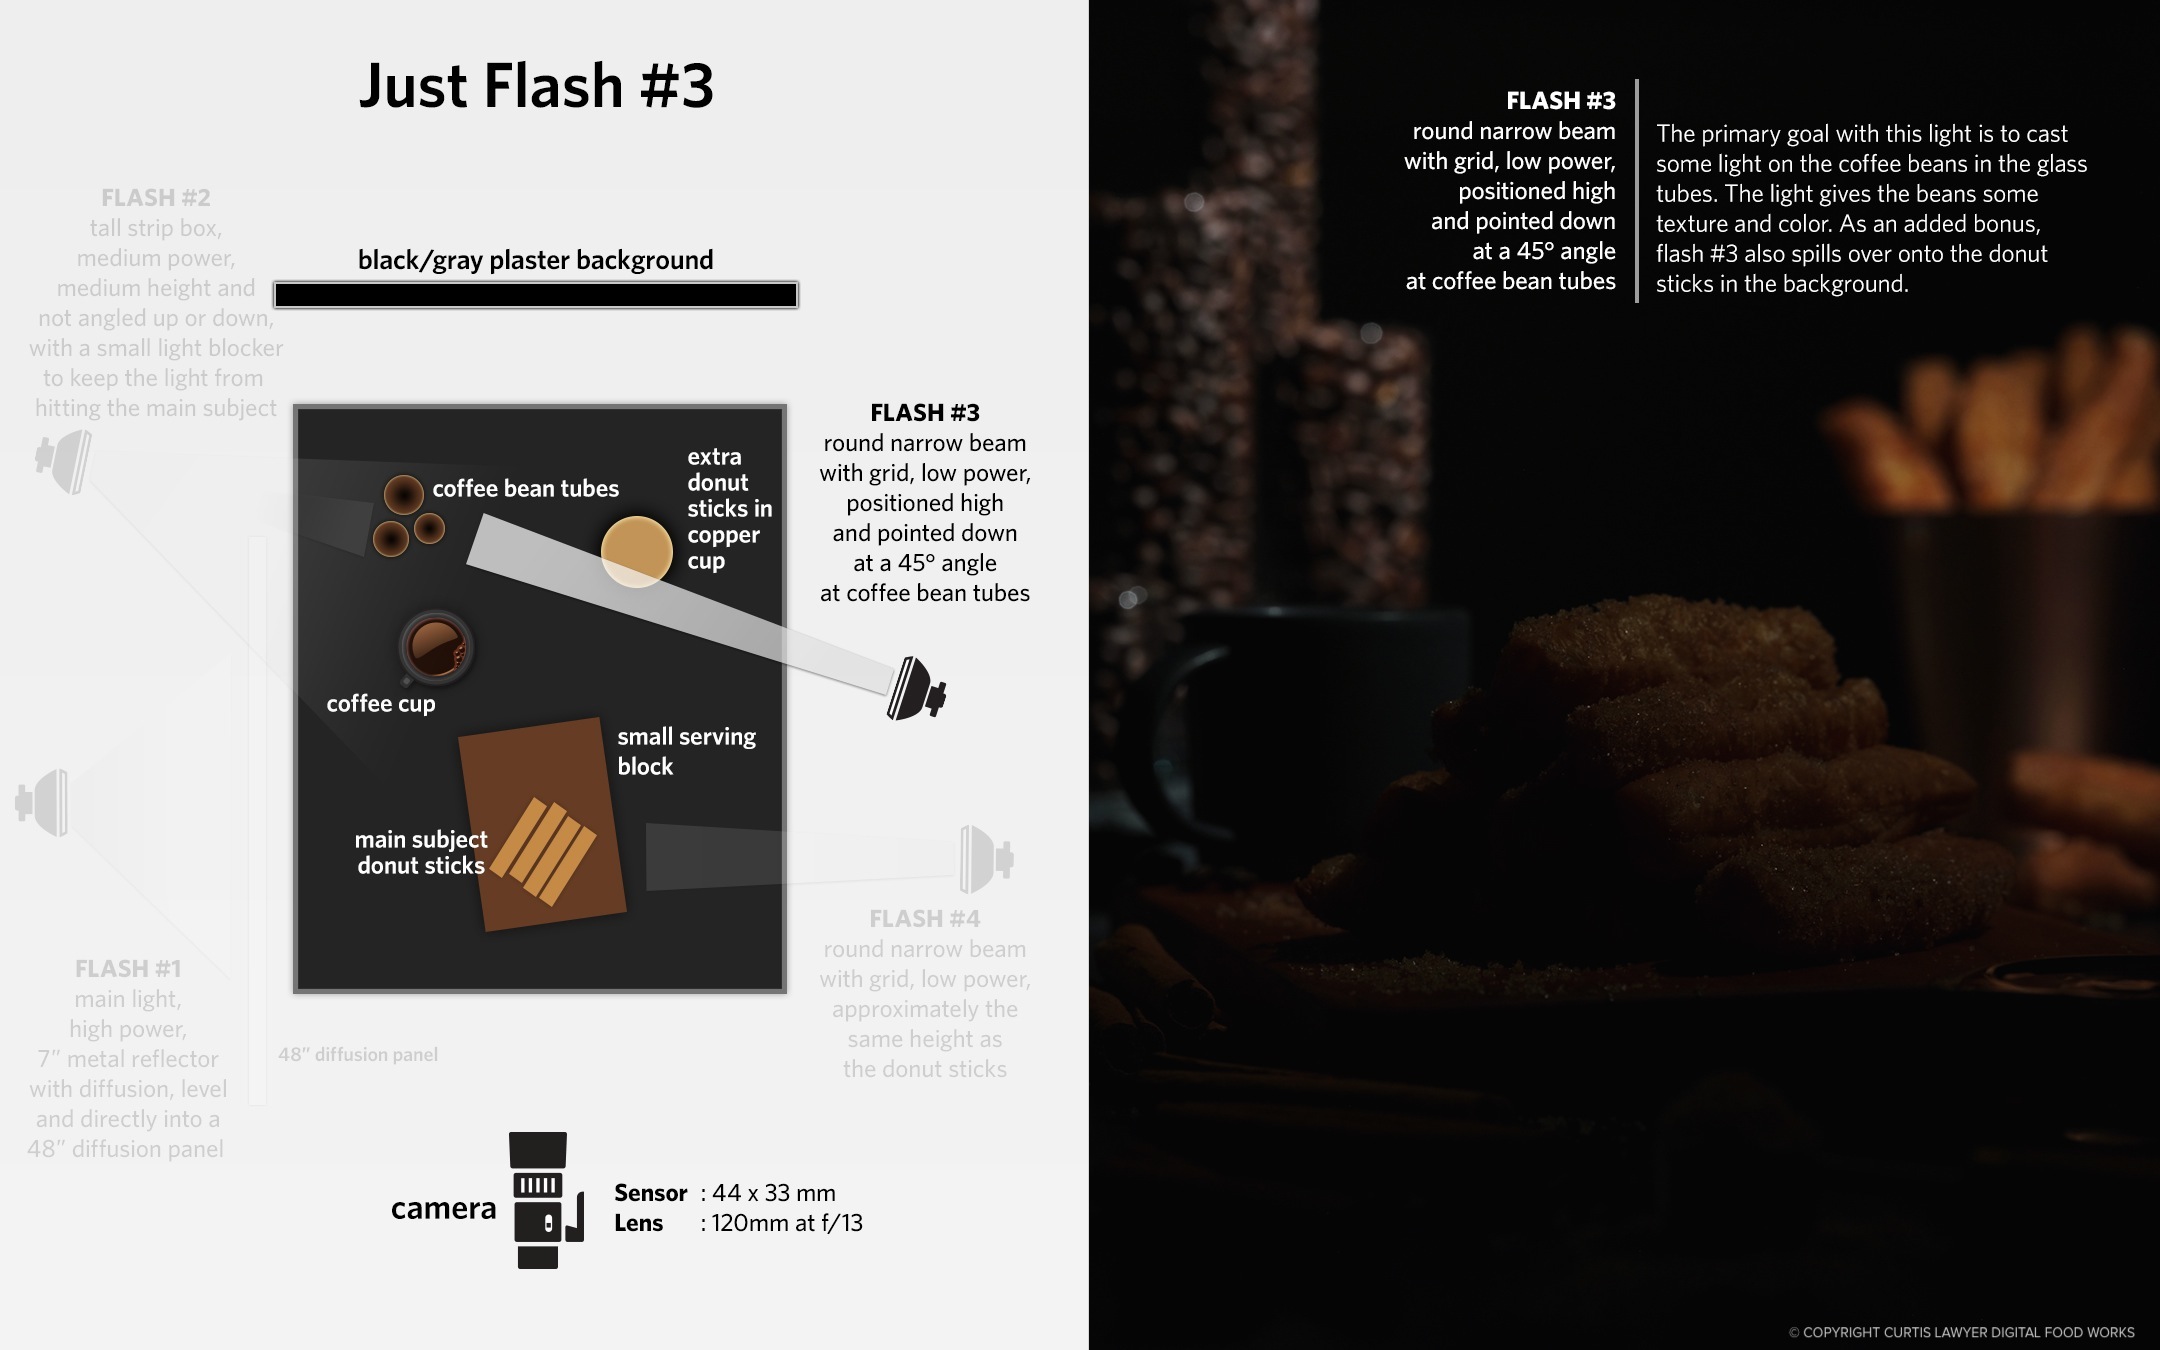
Flash #3 is casting some illumination on the coffee beans that are in glass tubes. As an extra bonus, the light from Flash #3 is also spilling over onto the donut sticks in the background.
This light is allowing us to see the actual beans in the tubes, instead of just dark glass. Here again, the right side of the tubes are casting a shadow on themselves. Without a little extra light on the right hand side, they would just look like black tubes. An added bonus from this light is that a little bit of illumination is spilling over onto the donut sticks in the copper cup in the background. Flash #3 is helping to illuminate both background objects.
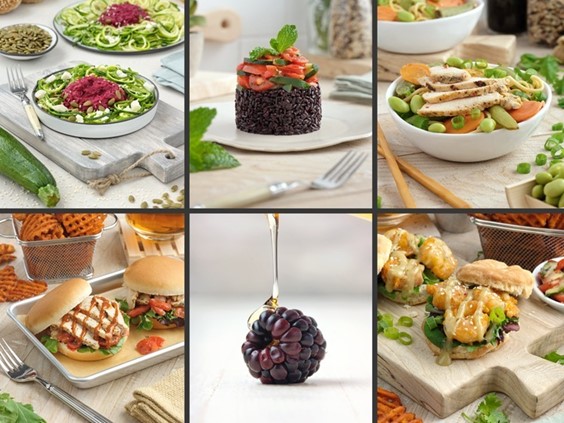
The next Flash we're going to look at is #2. Like the main light, it's on the left hand side of the main subject, but positioned behind the donut sticks, and sort of pointing in their general direction.
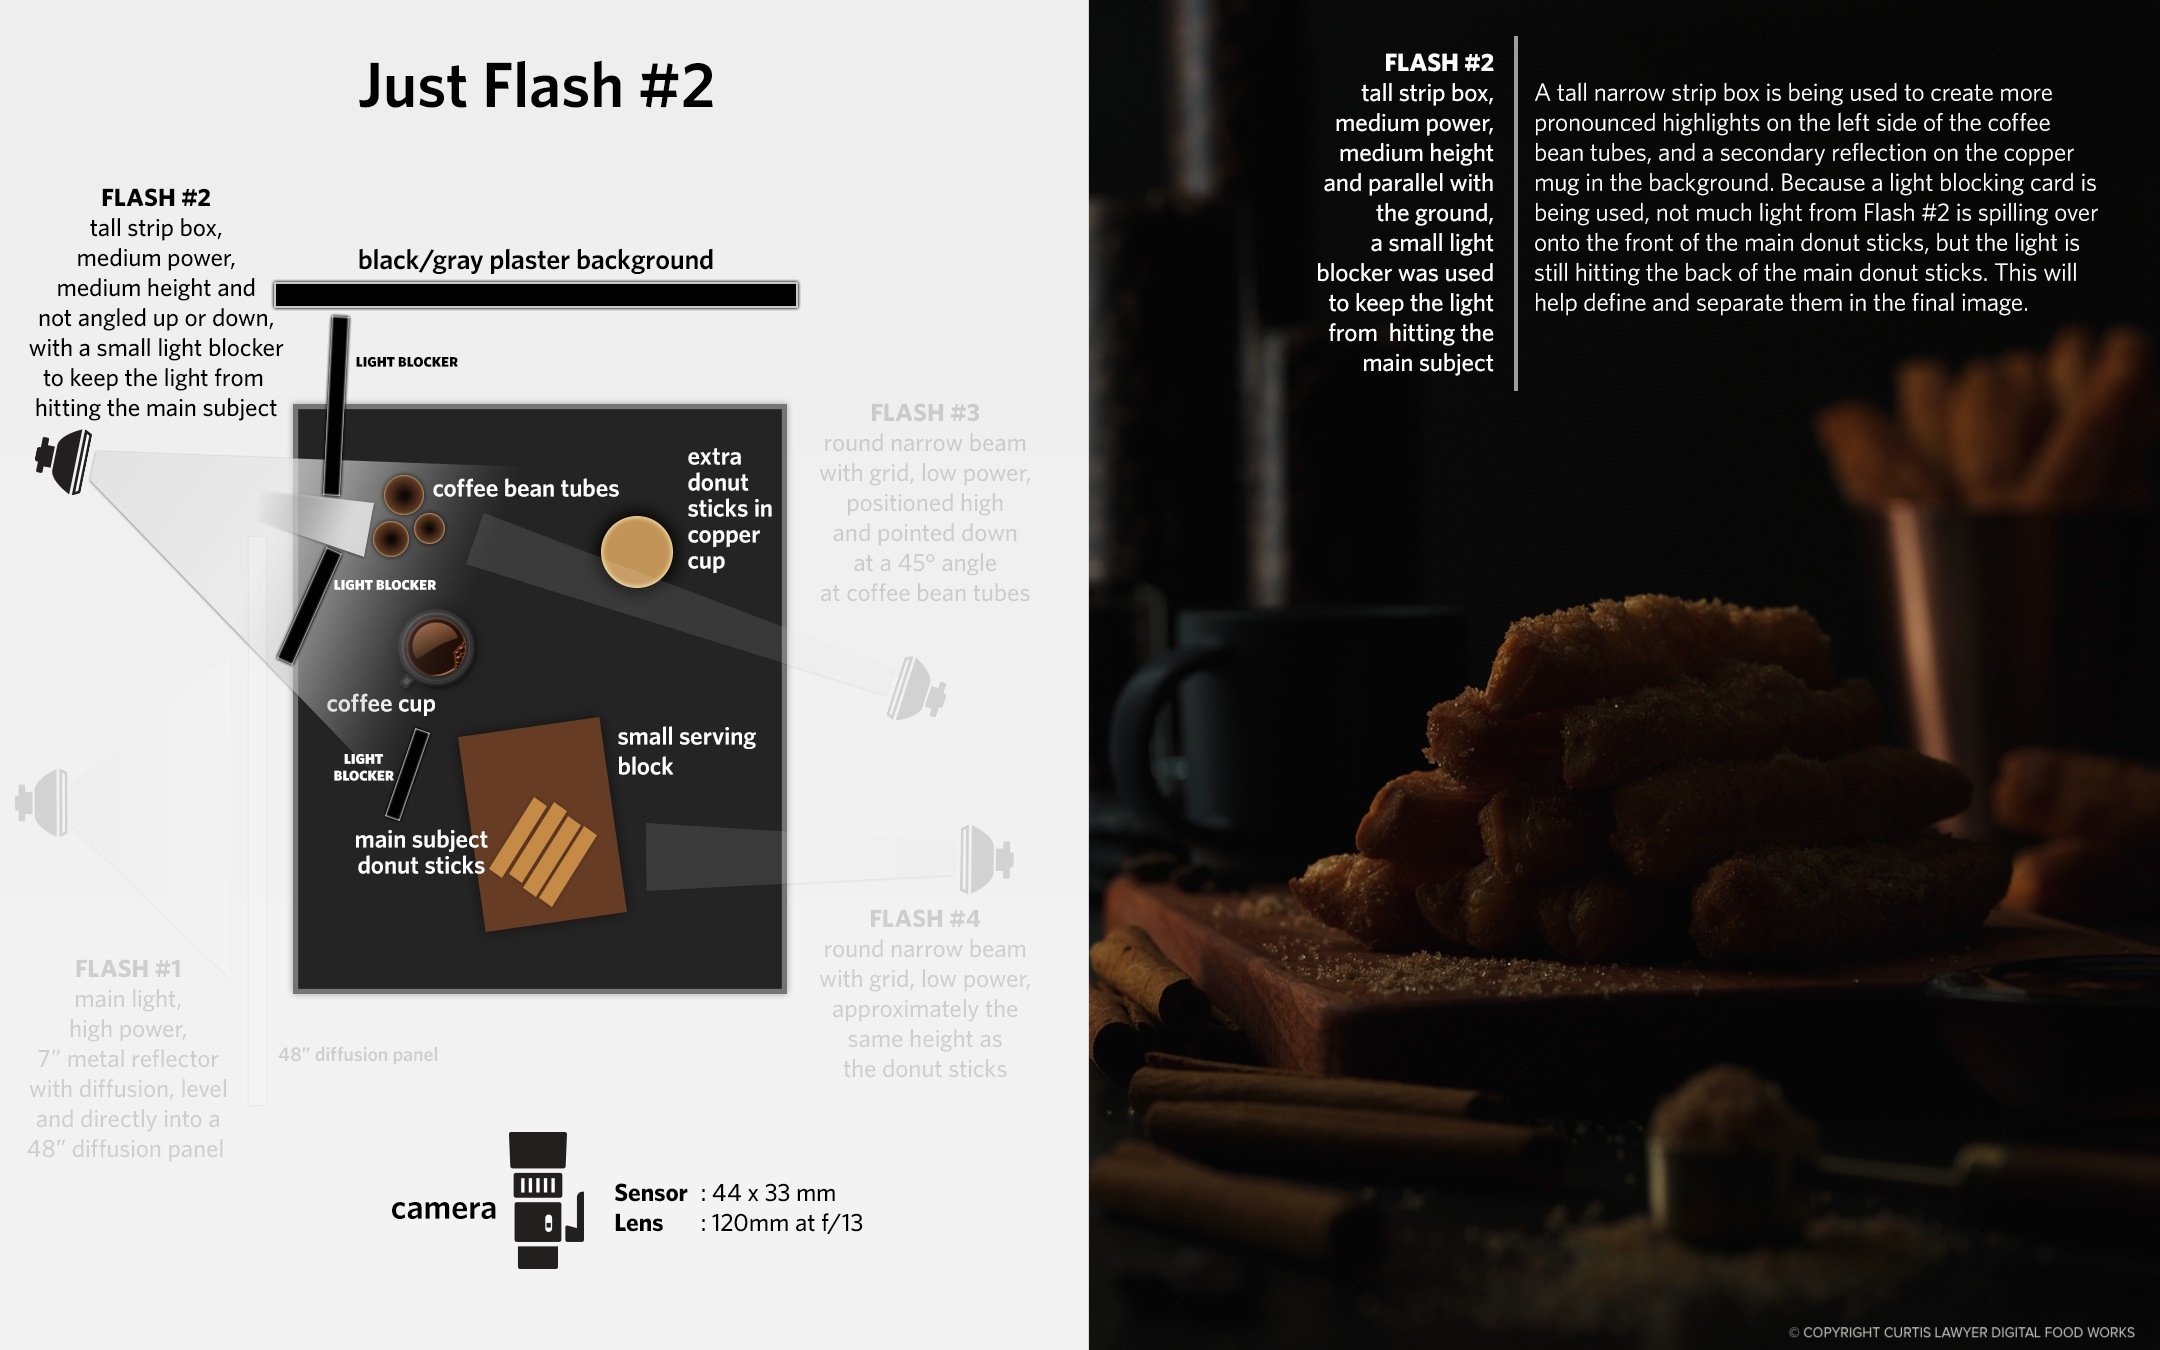
Flash #2 is a tall strip box that is providing a tall thin highlight to the glass tubes in the back of the photo, along with a secondary golden highlight on the copper mug in the back. A dark card was used to block the light from spilling over onto the front of the main subject, but the light is still hitting the back of the subject. This little extra outline will help visually separate the donut sticks from the background in the final photo.
The modifier on this light is a tall strip box… about 42" tall and around 18" wide. This light is creating a tall white reflection on the coffee tubes, and a tall gold reflection on the copper mug in the background. This will help define those as glossy surfaces, but isn't so distracting that it takes away attention from the main subject.
This light also dumped a lot of light on the main subject… but that's not quite where I wanted the "main subject" light coming from. So a small piece of black foam board was placed between Flash #2 and the main subject, to limit the amount of light hitting the front of the serving board. A small amount of light is still hitting the back of the donuts though, but that's a good thing. It will help define the edge of the stack, when all the flashes are turned on.
Which brings us to Flash #1, the Main Flash at the highest power setting.
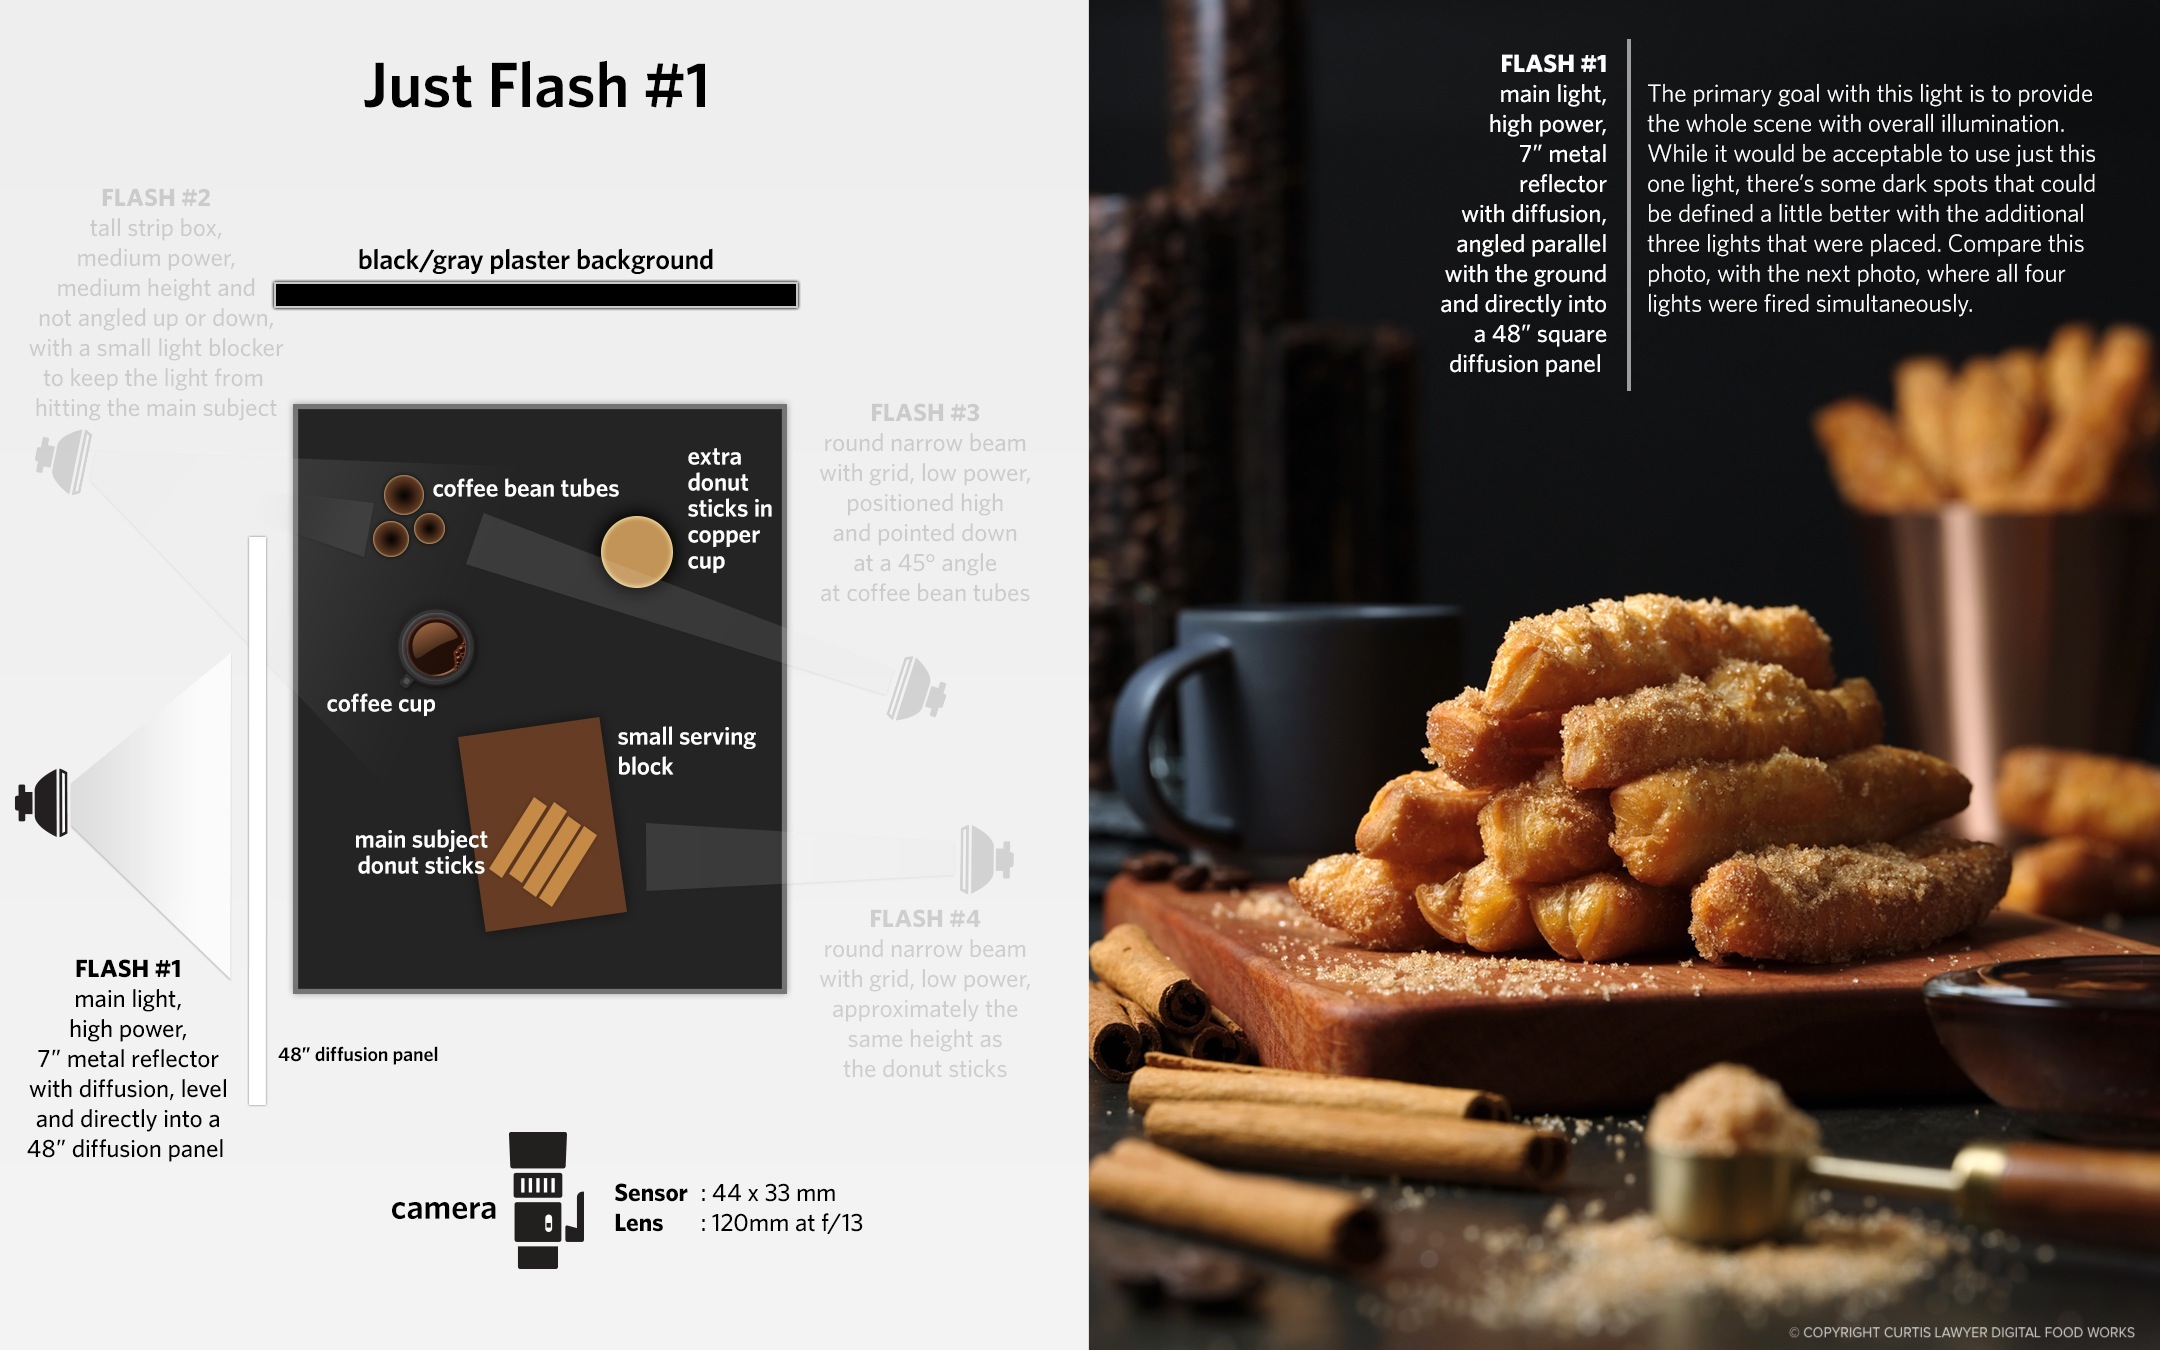
Flash #1 provides the most light for the entire scene. There are a couple of issues though... you can't really see the coffee beans in at least one of the tubes, the edge and shimmer of the copper cup in the background... just isn't very interesting (even for a background element), and the "shaded side" of the donut sticks (far right) is a little too dark. I'd like the donut sticks to be just slightly brighter and have more contrast than other things in the scene, because they are the main subject.
The origin of this flash is a 7" metal reflector, that's simply pointed into a 48" diffusion panel. The setup provides a lot of really nice, even light across the whole scene. This is actually the first light that I set up, and the other lights are added as I start looking at the first couple of photos.
Take a look at the coffee beans in the tubes though. There's one tube that's so dark, you can't even really see that there's coffee beans in it… that's where Flash #3 adds in a little more color and texture. The tubes themselves are a little flat and uninteresting though… and that's where Flash #2 does it's thing. It creates tall white reflections on the left side of the glasses and helps the copper cup look a little more interesting too, by adding a second, brighter reflective ripple.
Finally, while it's not actually too bad, the right side of the donut sticks seems a little dark. Ideally, in a dark photo, I would like the main subject to be a little brighter and to have a little more contrast than other things in the scene. That would help define it as the "main" point of the photo.
Here's the photo with all four flashes turned on.
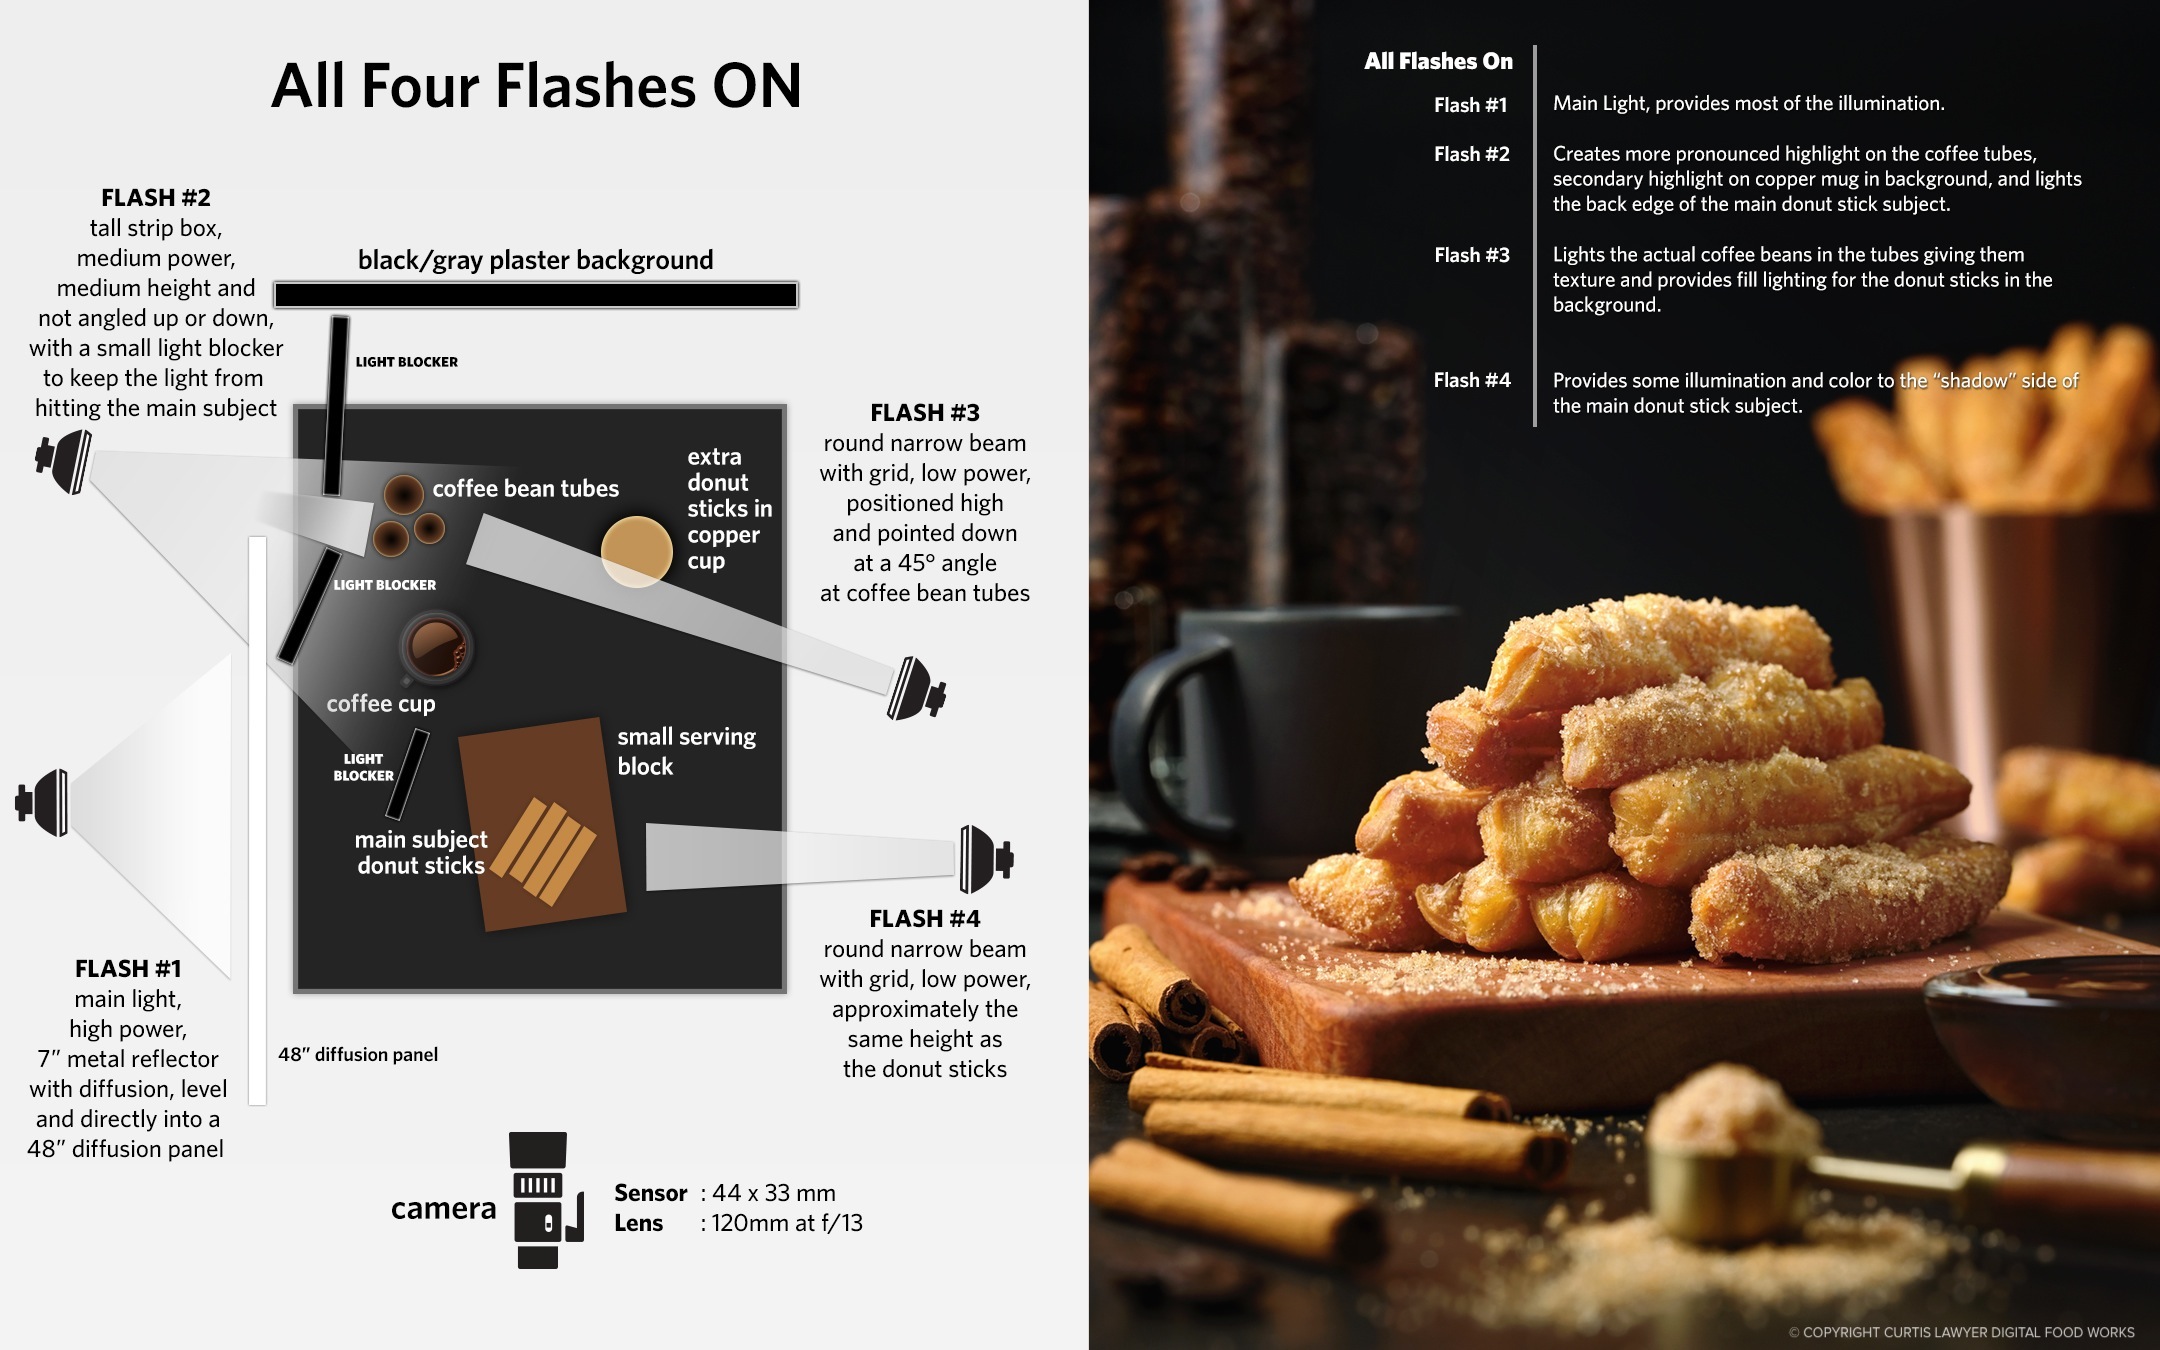
The difference between having just one light (Flash #1) and all four flashes on is subtle, but it seems to me there's more interest and balance in all areas of the photo with all four flashes on. You can see the coffee beans, the shape of the copper cup in the background, and all visible sides of the donut sticks are evenly balanced.
Back to the Photos
In the next photo, I've overlaid a small part of the photo where just Flash #1 is being used (the main light)… with a photo where all four flashes have been turned on (the "final" lighting setup). There's a slider control in the center that can be dragged back and forth to compare the difference between the two photos.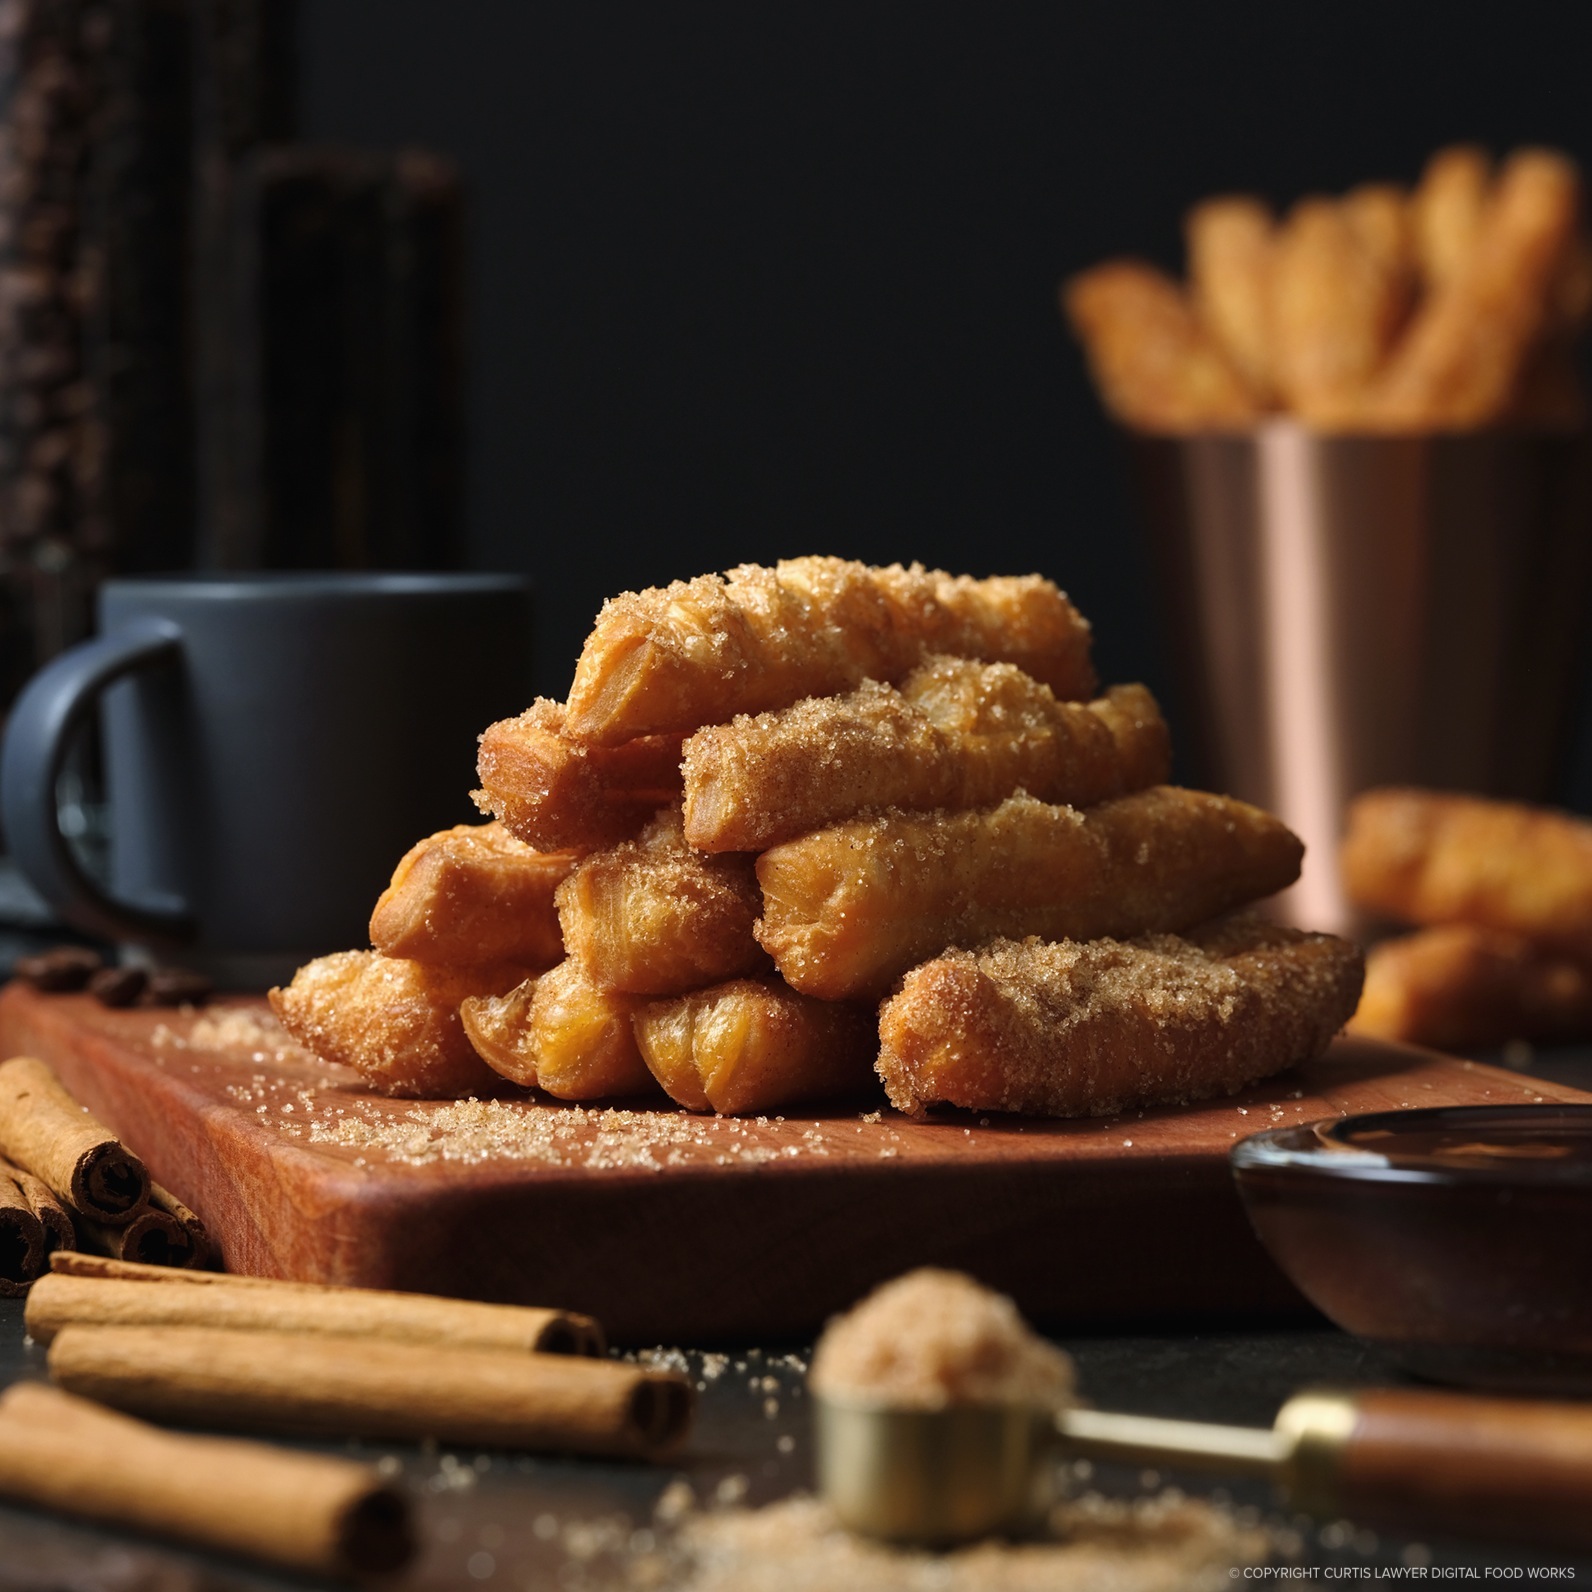 ONE LIGHT
 ALL FOUR LIGHTS
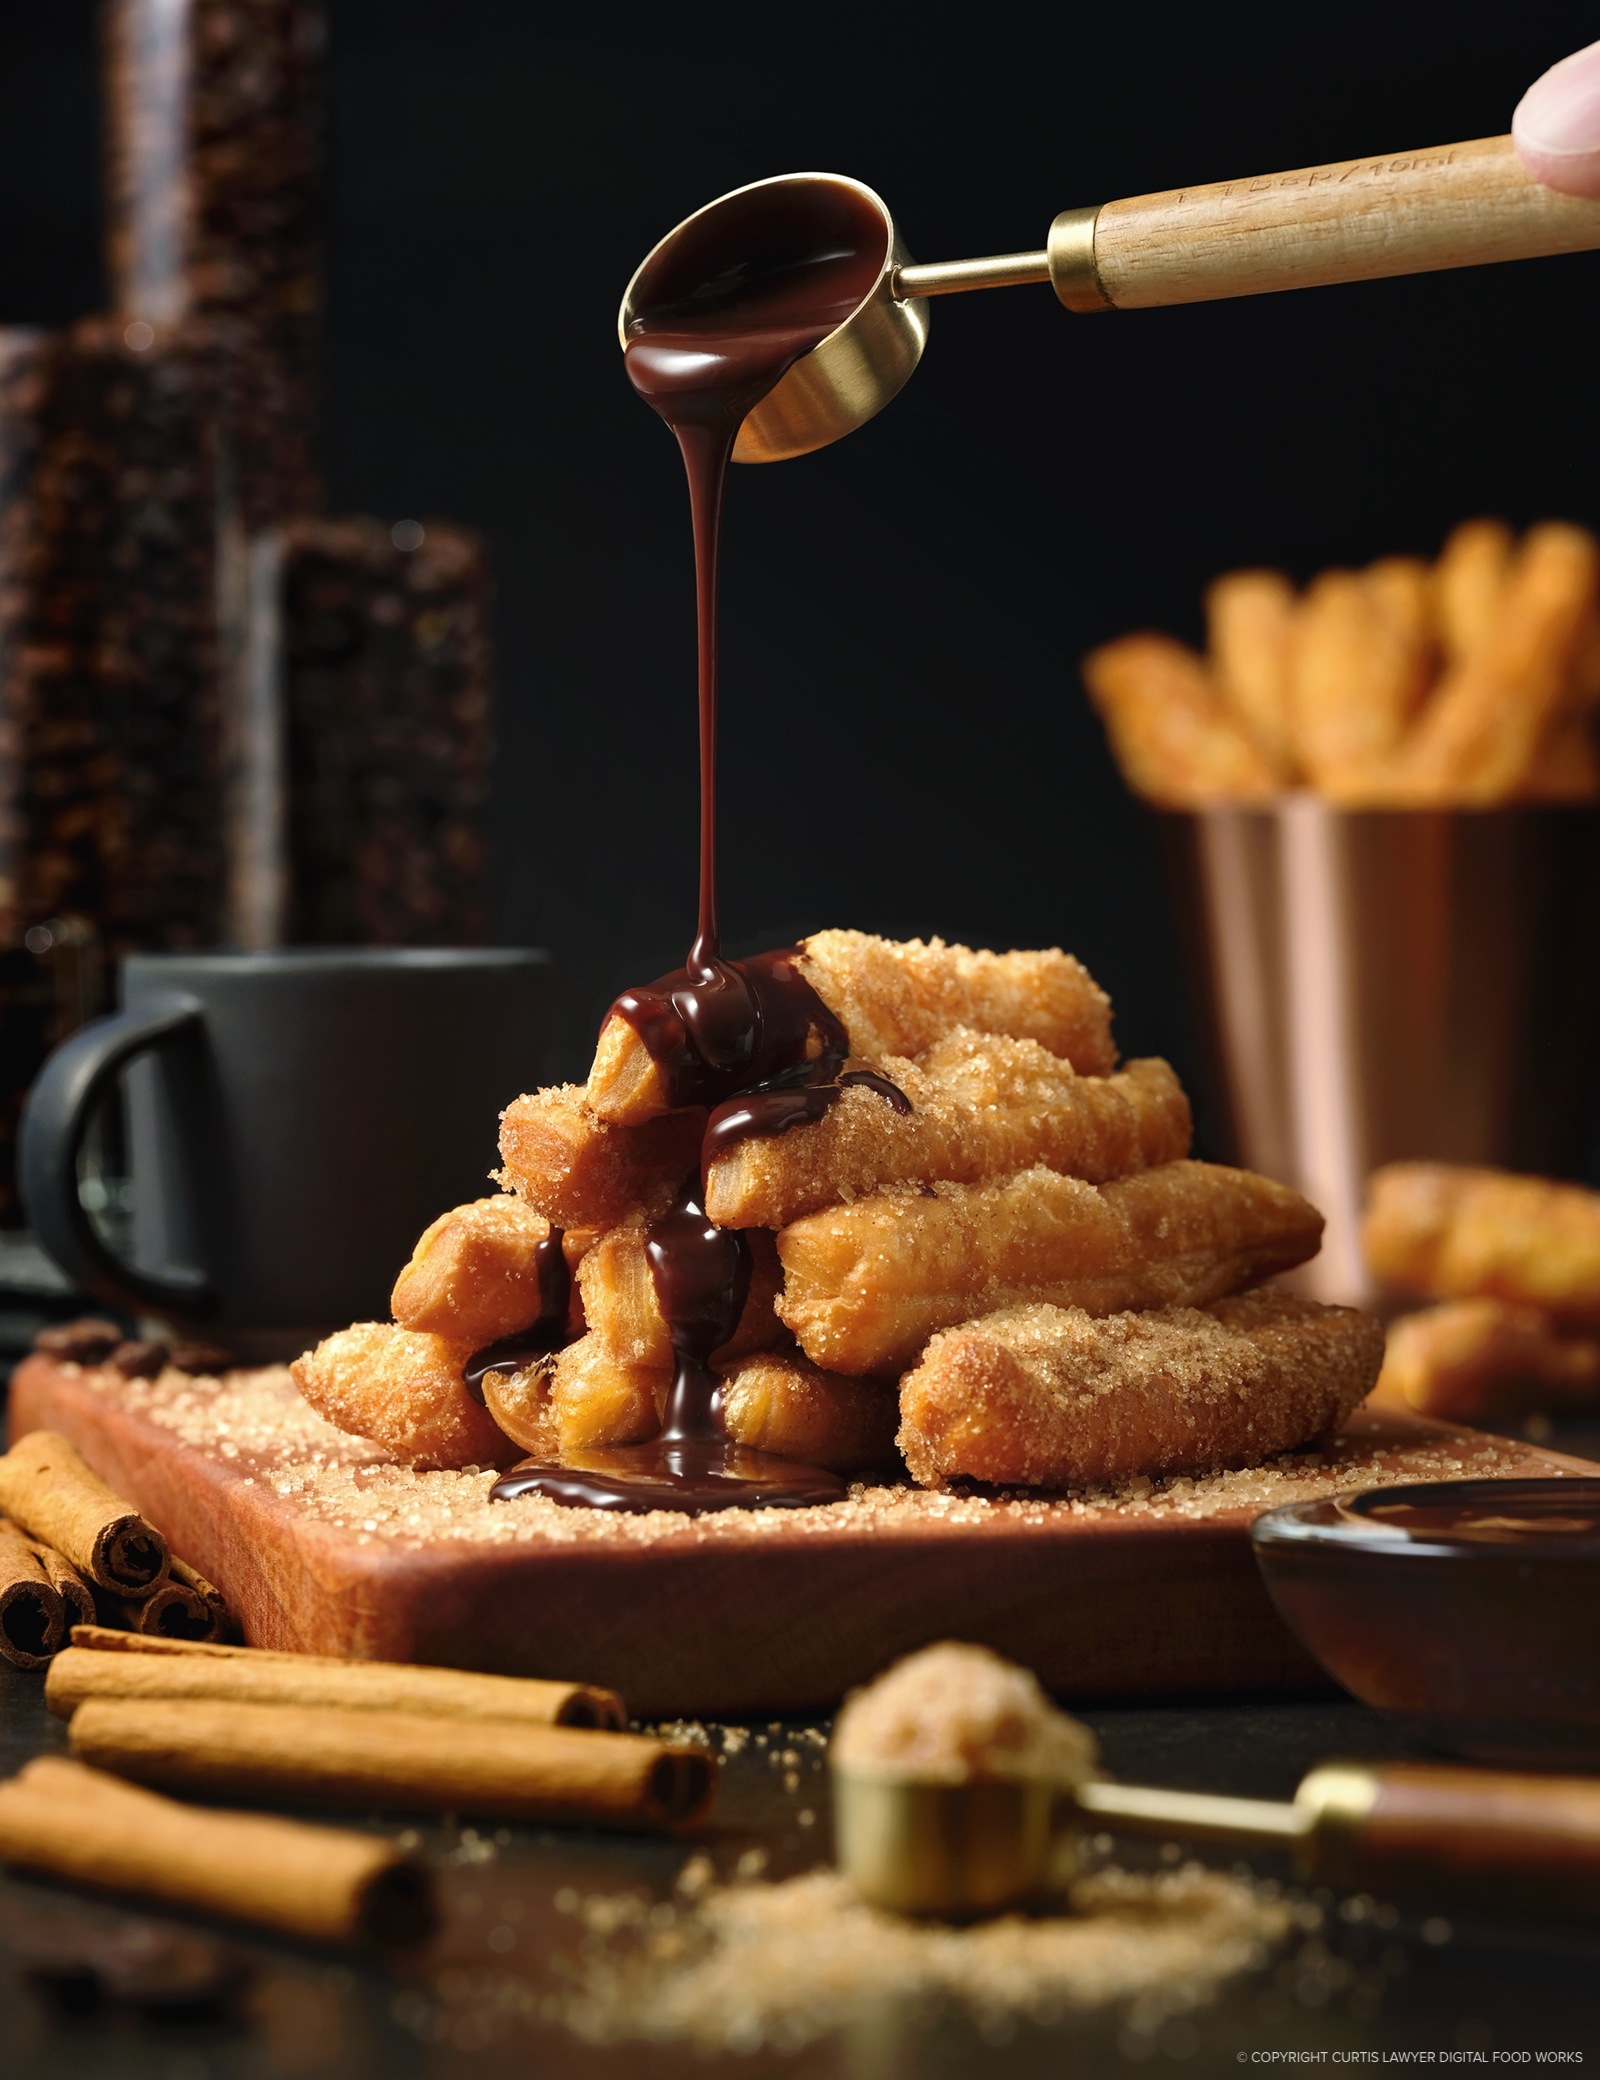
The "Full Drizzle" was actually one of the first shots with chocolate. Because there's no "undo" button with chocolate ... getting that perfect drip for the "hero" shot was going to have to be a composite photo. The top half would be the perfect drip while the bottom half would be from a previous pre-chocolate photo.
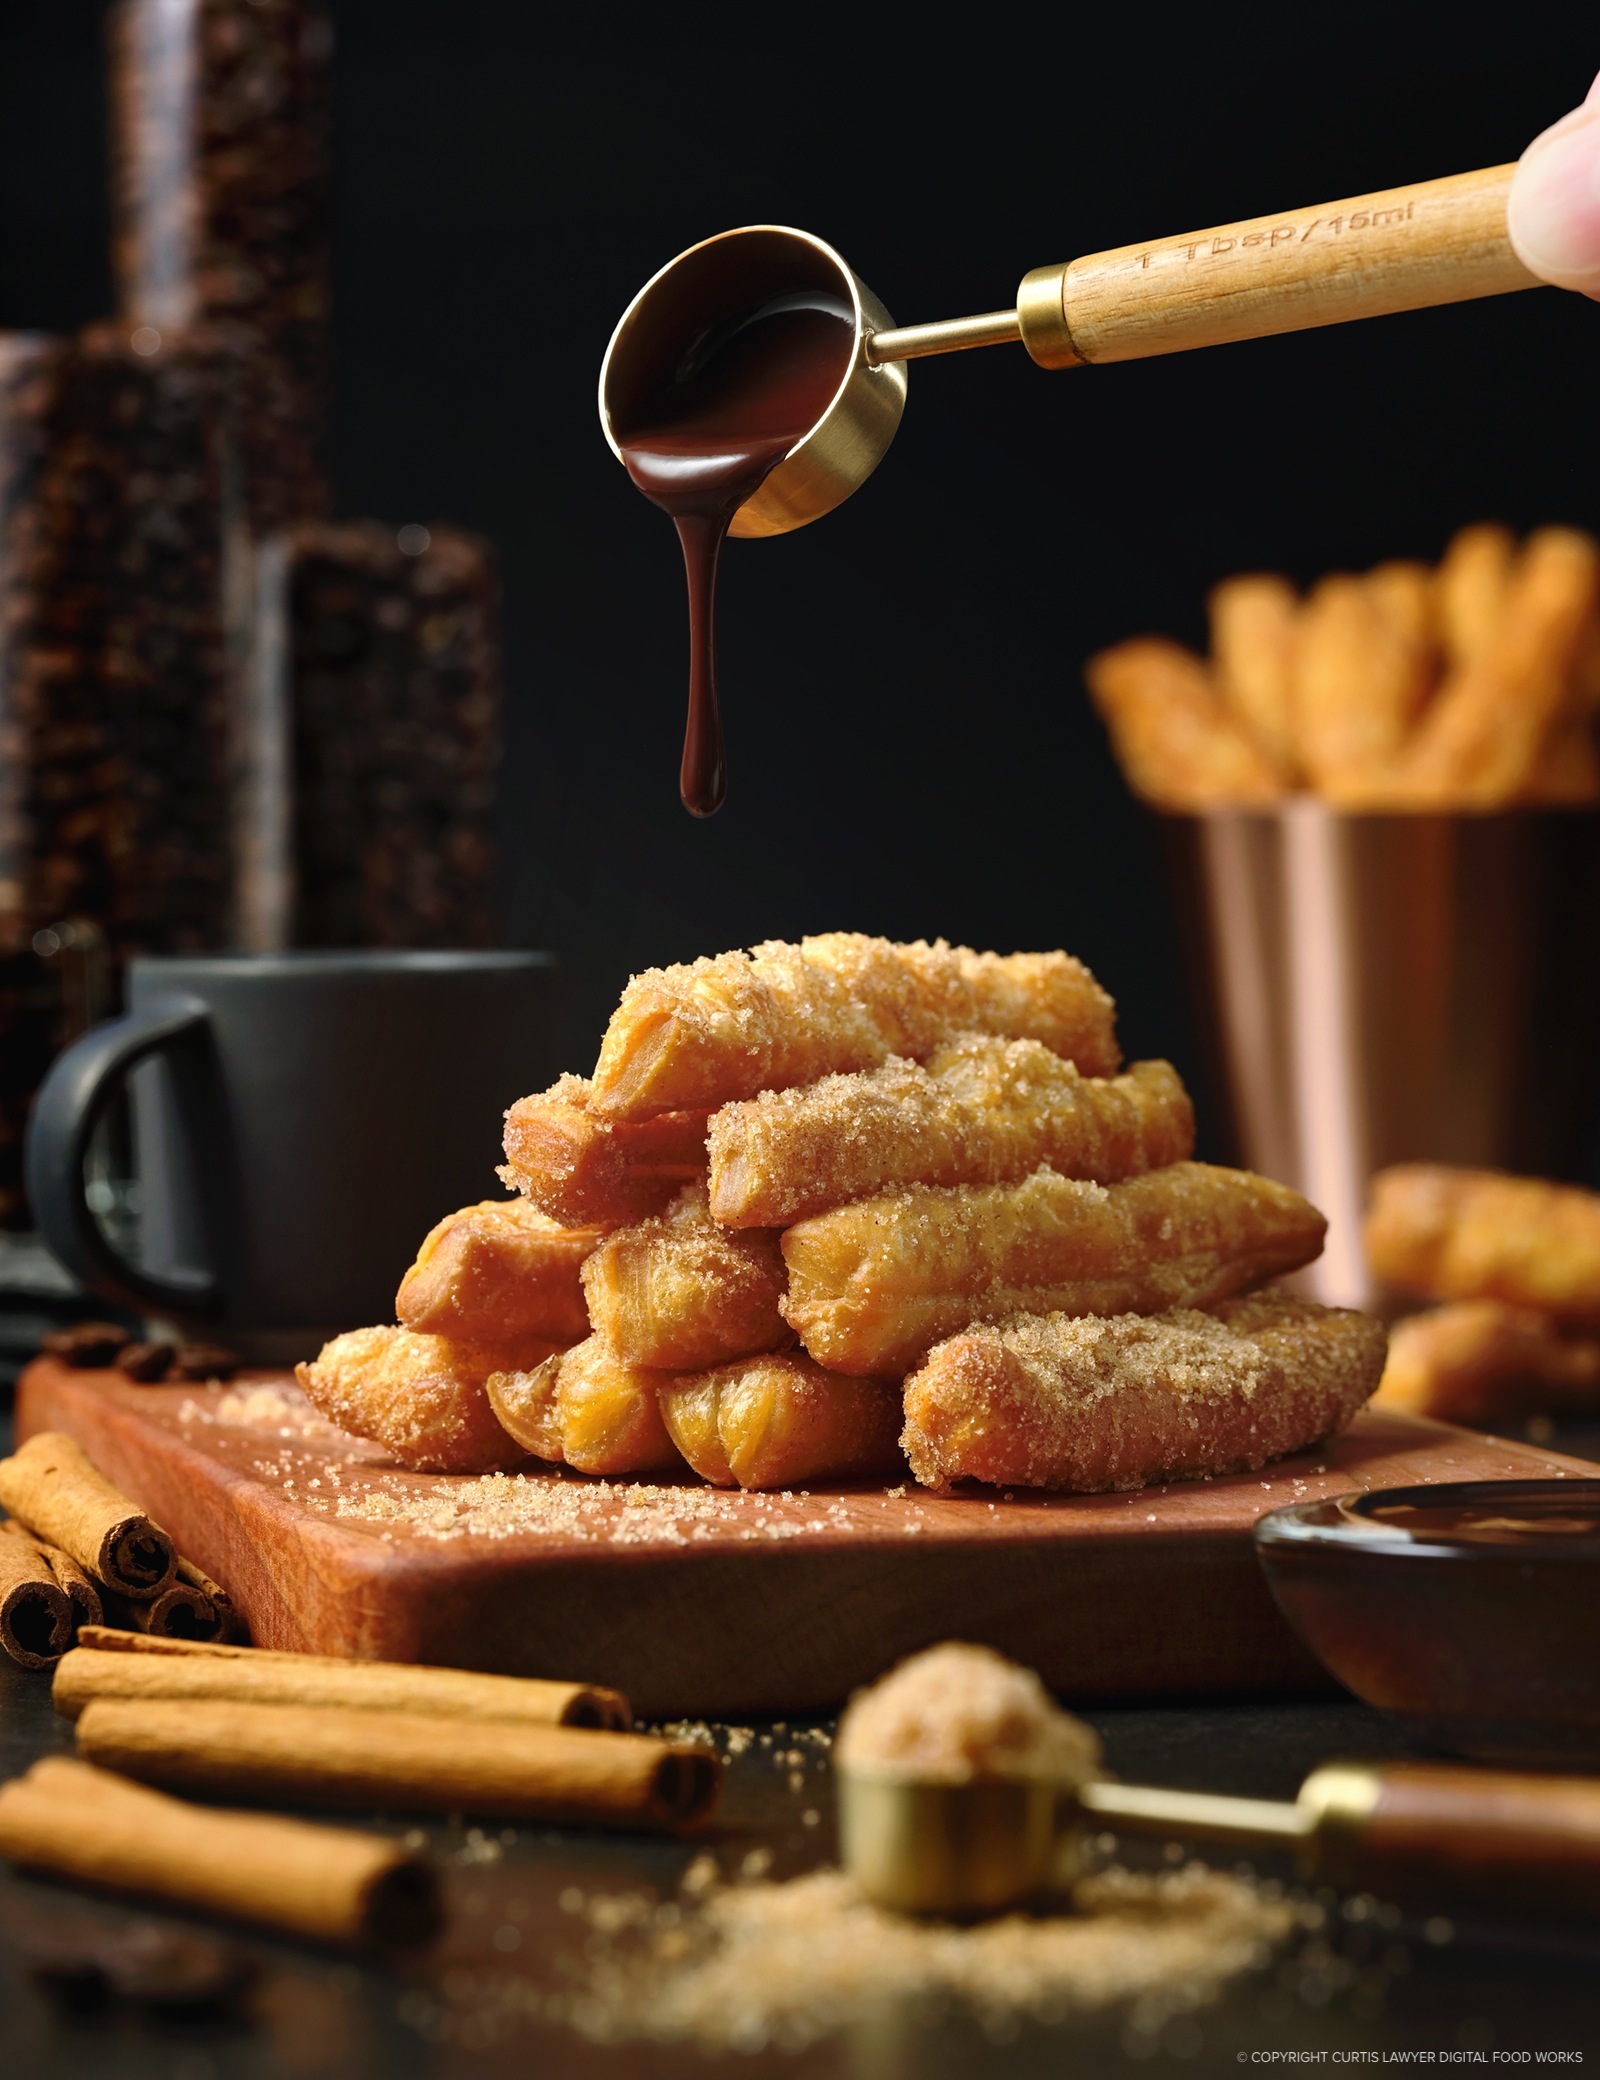
The only thing left, is to start pouring the chocolate sauce!
The "drip in mid air" photo that I'm using as the hero shot, was actually a "second take". The first time around, I didn't catch the droplet at the end in a good spot — but the drizzle and ooziness of chocolate over the donut sticks was great! So the photo with the chocolate sauce — running from the spoon all the way down to the donut sticks and covering them, was the first photo. Since there's no "undo" button for chocolate sauce… I had to figure out a way to get that "perfect drop in mid air" photo… without the donuts already being covered with chocolate.
Fortunately, the perfect mid-air drip wouldn't touch the donuts at all — and I had already taken several photos of the setup with just the donut stick stack without any chocolate. So… if the table and camera didn't move at all, I could easily combine the top drip area of one photo, with the bottom donut sticks area of another photo, and that — is actually what makes up the "hero" image.
Here's another, larger look at the hero photo for "Sugar and Cinnamon Donut Sticks with a Drizzle of Chocolate Sauce".
Click here to check out some of the other Food Photography articles that I've posted here on the Digital Food Works site!