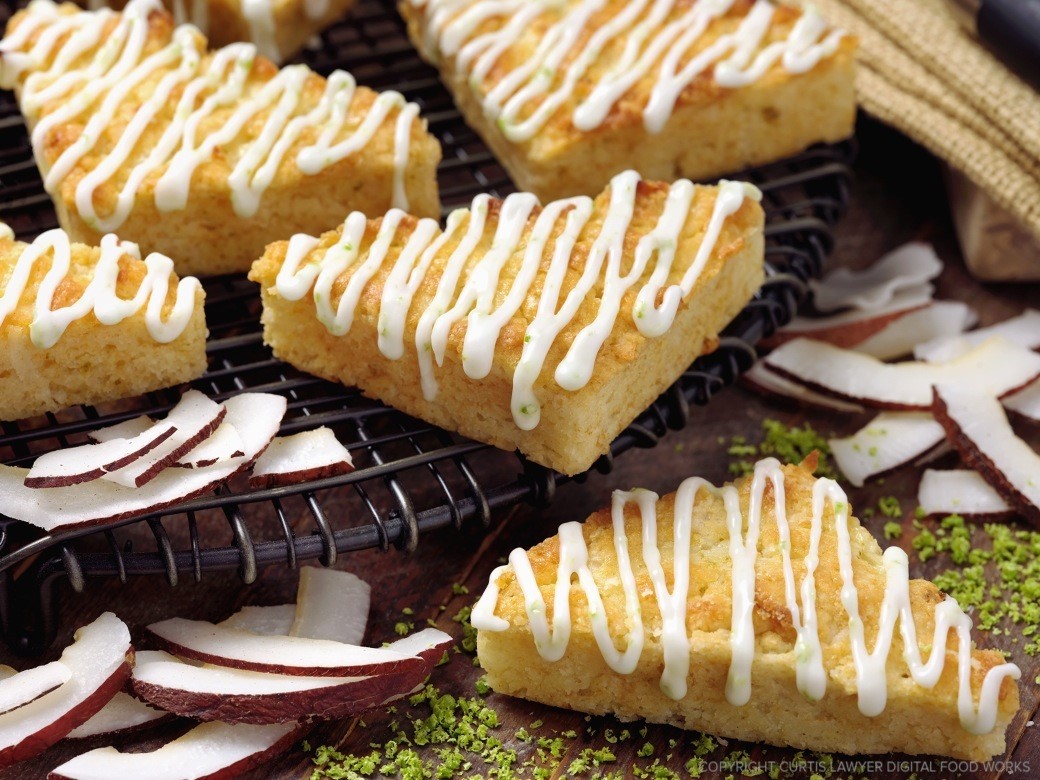
Get whisked away to the tropics with this great little eggless pastry that features two best friends… lime and coconut. While we do add some Tequila to the glaze, I wouldn't quite call these little triangles of tropical goodness traditional "margarita scones" just yet. Thanks to the natural oils in shredded coconut, these sweet bakery treats stay moist and true to the "breakfast or afternoon tea" scone idea, without some of the tart or saltier notes that are associated with a lime margarita.
 About Digital Food Works
This recipe was developed by Curtis Lawyer for use on the Digital Food Works website. DFW provides photography, design, and ideation services for businesses with things to eat and drink!
I've never really gotten to a place where I've had quintessentially perfect looking scone dough. It's usually too sticky or too dry and there's not enough room in the kitchen to figure it out… to really get your elbows into it and have a mixing/fixing station, forming station, and baking areas. I just want to have fun mixing different flavor combinations and then eat a couple fresh scones!
A breakthrough moment for me in scone-world came with the discovery of a cast iron triangle shaped baking tray! No, it's not traditional — but it does make really symmetrical, pretty looking mini-scones — even if your dough isn't quite right.
That really is one of the best parts about scones… if you have a good base recipe… and even if the dough seems too dry or really wet and sticky, and you could never form a traditional disc out of it … the scones usually still end up tasting pretty good.
I just loosely fill the mini-triangles in the tray about 2/3rds of the way up, don't form or pack or push the dough into place — the heat of the oven takes care of melting the butter and naturally filling in the triangle form. Artisanal? Maybe not, but it does bring the "fun" back into scone making, and makes flavor combination experiments so much easier!
This recipe was developed by Curtis Lawyer for use on the Digital Food Works website. DFW provides photography, design, and ideation services for businesses with things to eat and drink!
Recipe Notes
Scone "dough" (for the lack of a better term), can be really sticky stuff… and it's not super fun to work with. Traditionally, the dough is worked together to form a flat disk about seven inches (180mm) in diameter and about an inch and a half thick (i.e. sort of like a really thick pizza), and cut into eight slices or wedges, which is where that traditional triangle shape comes from.I've never really gotten to a place where I've had quintessentially perfect looking scone dough. It's usually too sticky or too dry and there's not enough room in the kitchen to figure it out… to really get your elbows into it and have a mixing/fixing station, forming station, and baking areas. I just want to have fun mixing different flavor combinations and then eat a couple fresh scones!
A breakthrough moment for me in scone-world came with the discovery of a cast iron triangle shaped baking tray! No, it's not traditional — but it does make really symmetrical, pretty looking mini-scones — even if your dough isn't quite right.
That really is one of the best parts about scones… if you have a good base recipe… and even if the dough seems too dry or really wet and sticky, and you could never form a traditional disc out of it … the scones usually still end up tasting pretty good.
I just loosely fill the mini-triangles in the tray about 2/3rds of the way up, don't form or pack or push the dough into place — the heat of the oven takes care of melting the butter and naturally filling in the triangle form. Artisanal? Maybe not, but it does bring the "fun" back into scone making, and makes flavor combination experiments so much easier!
Ingredients
For the Scones
- 2 cups all-purpose flour
- 1⁄2 cup cold butter, cut into small cubes
- 1 tablespoon baking powder
- 1⁄2 teaspoon salt
For the Glaze
Step by Step Instructions
1
Mix the Dry Ingredients
Sift the flour, baking powder, and salt into the primary mixing bowl.
2
Cut in the Butter
Using really cold butter (even frozen if you like), cut the butter into the smallest cubes you can before placing them into the bowl with the dry ingredients. Once in the bowl, use a pastry knife to cut the butter into the flour. If you're not using frozen butter, you might be able to just use a fork to press the butter into the flour. We're not "mixing" anything, but trying to get the butter into the smallest pieces possible, and make sure each small pebble of butter is coated in flour. Don't spend too much time here, a couple minutes at most… butter melts fast. Once finished, no butter should be visible, you'll just see what looks like lumpy flour.
3
Freeze It
Stick the whole bowl back in the freezer for five minutes. We want to make sure that butter is not melting until it gets in the oven.
4
Add Mix-Ins
The fun part! Toss in the shredded coconut, lime zest, and sugar. Lightly and quickly just make sure everything is evenly spaced within the flour. No stirring… just lightly toss in.
5
Add the Wets
Here is where things get interesting… and with this recipe, particularly so — because heavy cream and lime juice are not best friends. Evenly drizzle in the heavy cream (save a couple tablespoons for brushing on top of the scones) and then the lime juice over the dry ingredients, and using a silicone spatula, quickly fold everything together. Remember… no stirring… just keep folding everything together until all the parts are evenly distributed. Don't spend more that 60 seconds here… the butter is melting.
6
Divide and Fill the Baking Pan
No matter if your dough is a little wet and sticky or really dry an crumbly, the triangle shaped baking pan will save the day! Even if you're using a no-stick pan, you may want to coat the sides with a little baking spray or a separating solution so the scones don't stick to the insides.
Fill each cavity in the pan about 2/3'rds full of dough. There's no need to shape it or push and pack the dough in every corner. The most loose the dough is, the better. The heat of the oven will melt everything together and the pan will take care of the shape.
Fill each cavity in the pan about 2/3'rds full of dough. There's no need to shape it or push and pack the dough in every corner. The most loose the dough is, the better. The heat of the oven will melt everything together and the pan will take care of the shape.
7
Brush on Heavy Cream
Just before going into the oven, dab or brush on a thin layer of heavy cream on the top of each scone. This will help brown the scone tops a little bit.
8
Bake
Make sure you pre-heat the oven to 400°(f), and bake the scones at 400°(f) for 19-21 minutes. I know, that's oddly specific. It changes a little bit depending on how much the butter has already melted. 20 minutes seems about right, anything past 25 minutes and these will start to burn. Remember, because we're using a cast iron (or aluminum) baking pan, it will hold it's heat and continue to bake a little while after you remove it from the oven.
9
Remove and Cool
These can cool in the baking pan for around five minutes, but I like removing them from the pan to cool completely. With oven mitts on (because the baking pan will still be hot), I put a cookie sheet over the top of the pan, and do a quick flip. Most of the time, they all fall out clean! I quickly go in and flip them back over by hand, to let them completely cool on a wire rack or plate.
10
The Glaze
Glaze isn't an exact science either, you kind of have to go by feel. I usually start with a 1/4 cup of the confectioners sugar in a small bowl, and mix in all the liquids. In this case, the juice from one lime (about 2 teaspoons), the zest from one lime, and 1 teaspoon of Tequila. Gently stir this mix until the sugar is completely dissolved. This will be too runny to use, so continue by adding the remaining sugar until the glaze starts to thicken. I like to have something that's close to the consistency of toothpaste. Occasionally, it will take an additional tablespoon or two of confectioners sugar to get it just right.
11
Apply the Glaze
If you have a piping bag, those work great! But a zip lock baggie will work just as well. Once the scones are completely cool... fill the bag with the glaze and snip off the smallest tip of the bag that you can. Gently squeeze out the glaze onto the scones… as much or as little as you like! This base recipe is not too sweet on it's own and was created knowing that we would be adding the glaze as an overall part of the pastry.
Additional Notes

Our base "no-egg scone" recipe was created with the idea that icing or glaze would be added to the top of the pastry. Therefore, it's a little "less sweet" by itself. If you like pastries that aren't very sweet though… it's totally great just by itself!