Three Flash Lighting Setup with a Salmon Salad
February 24, 2021Food Photography
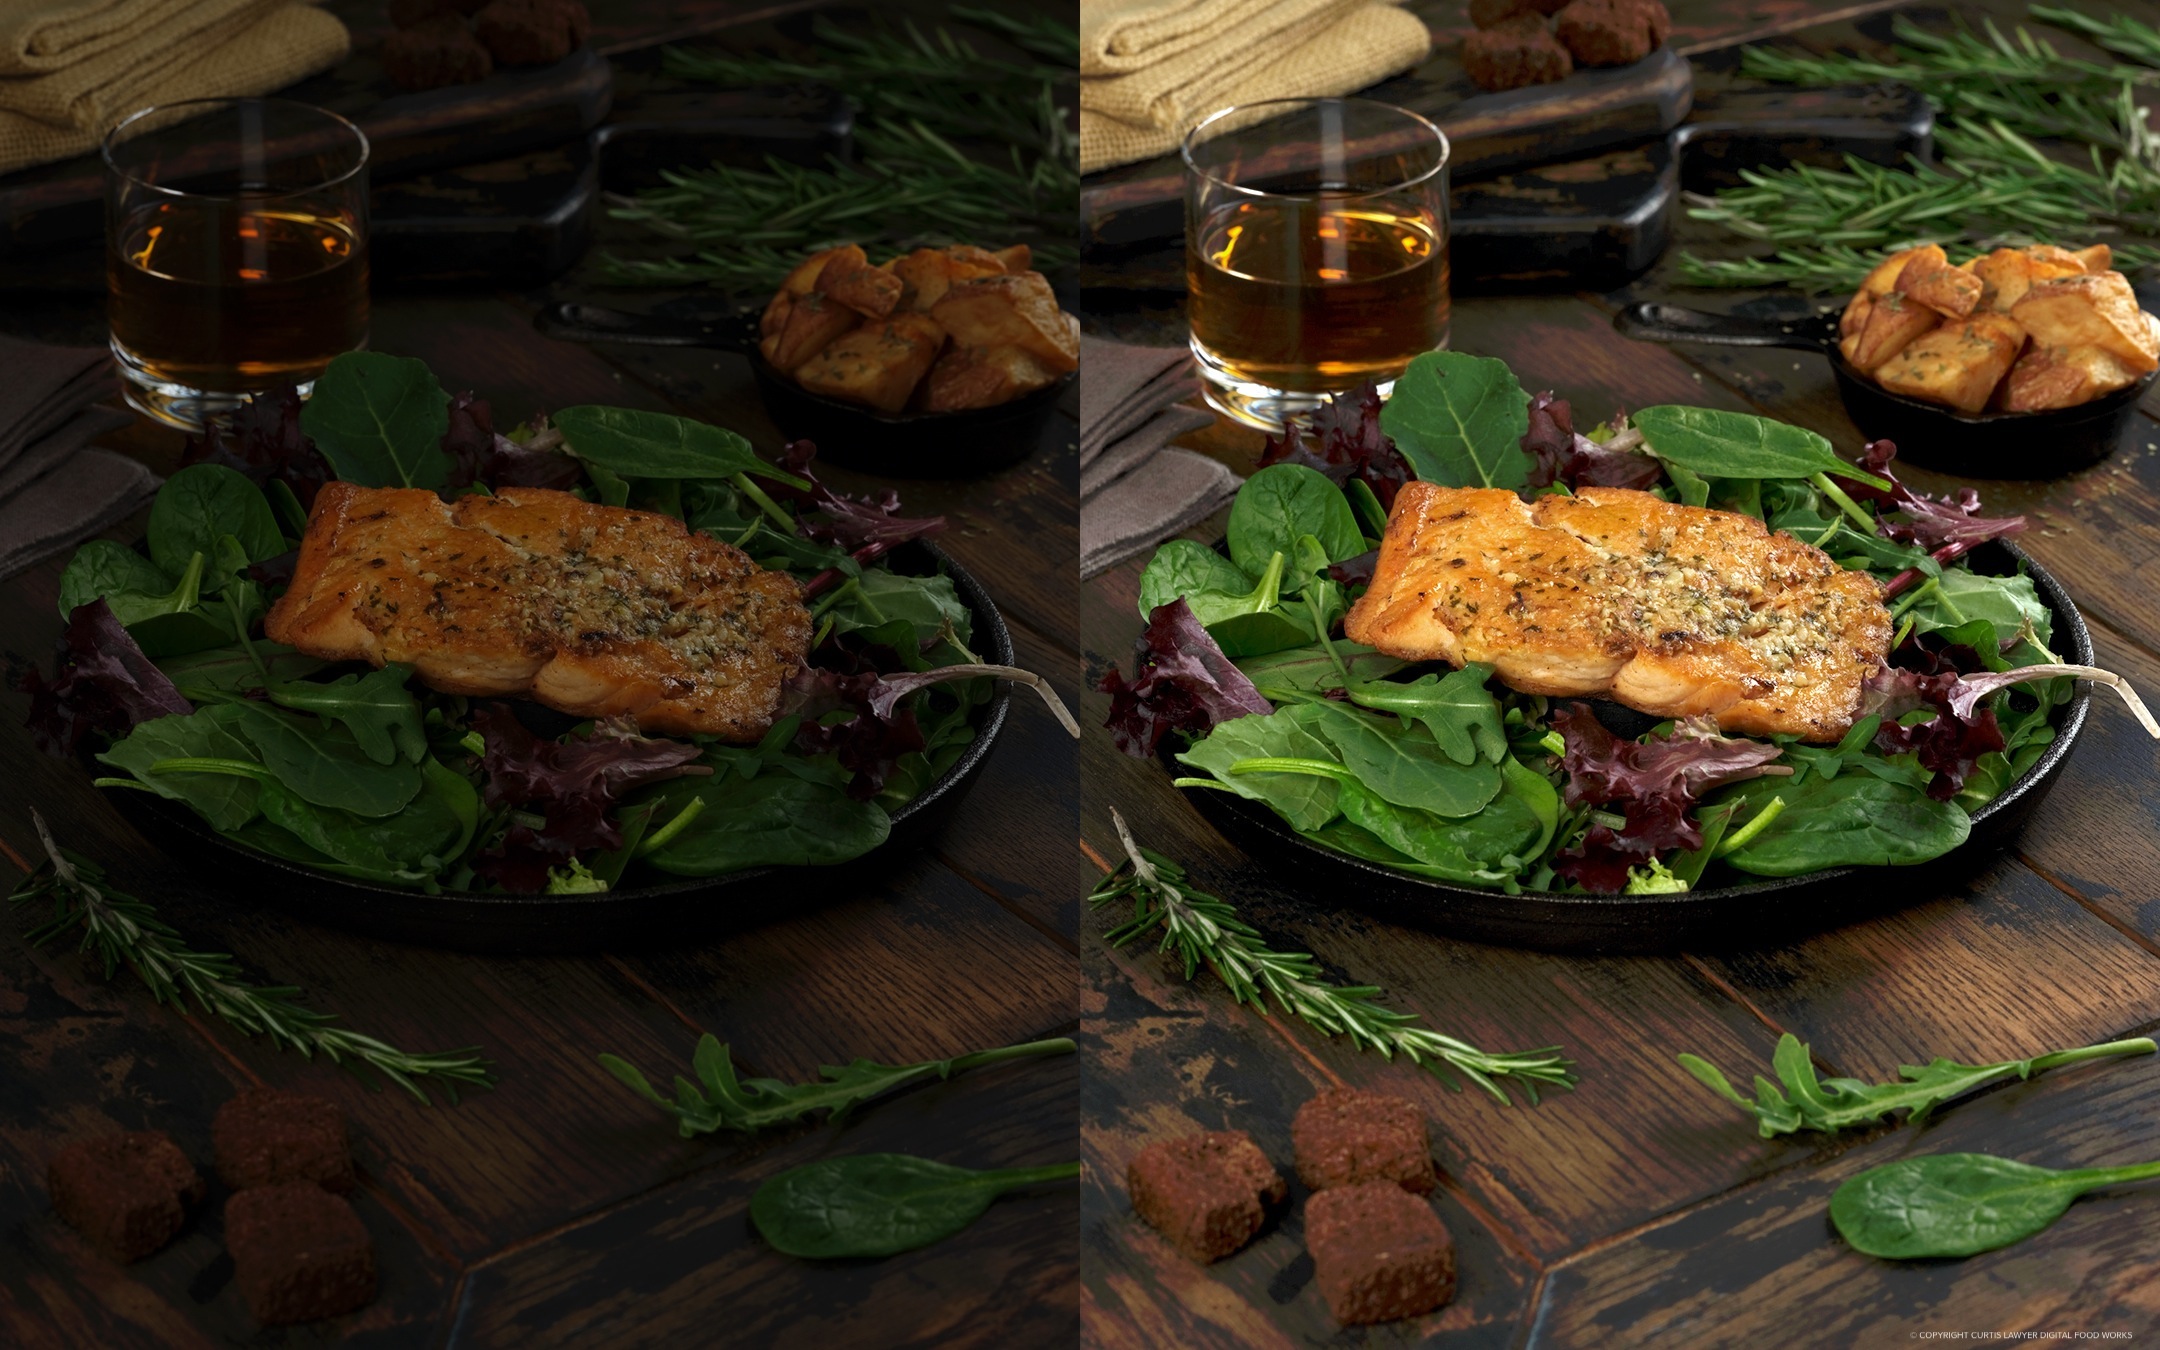
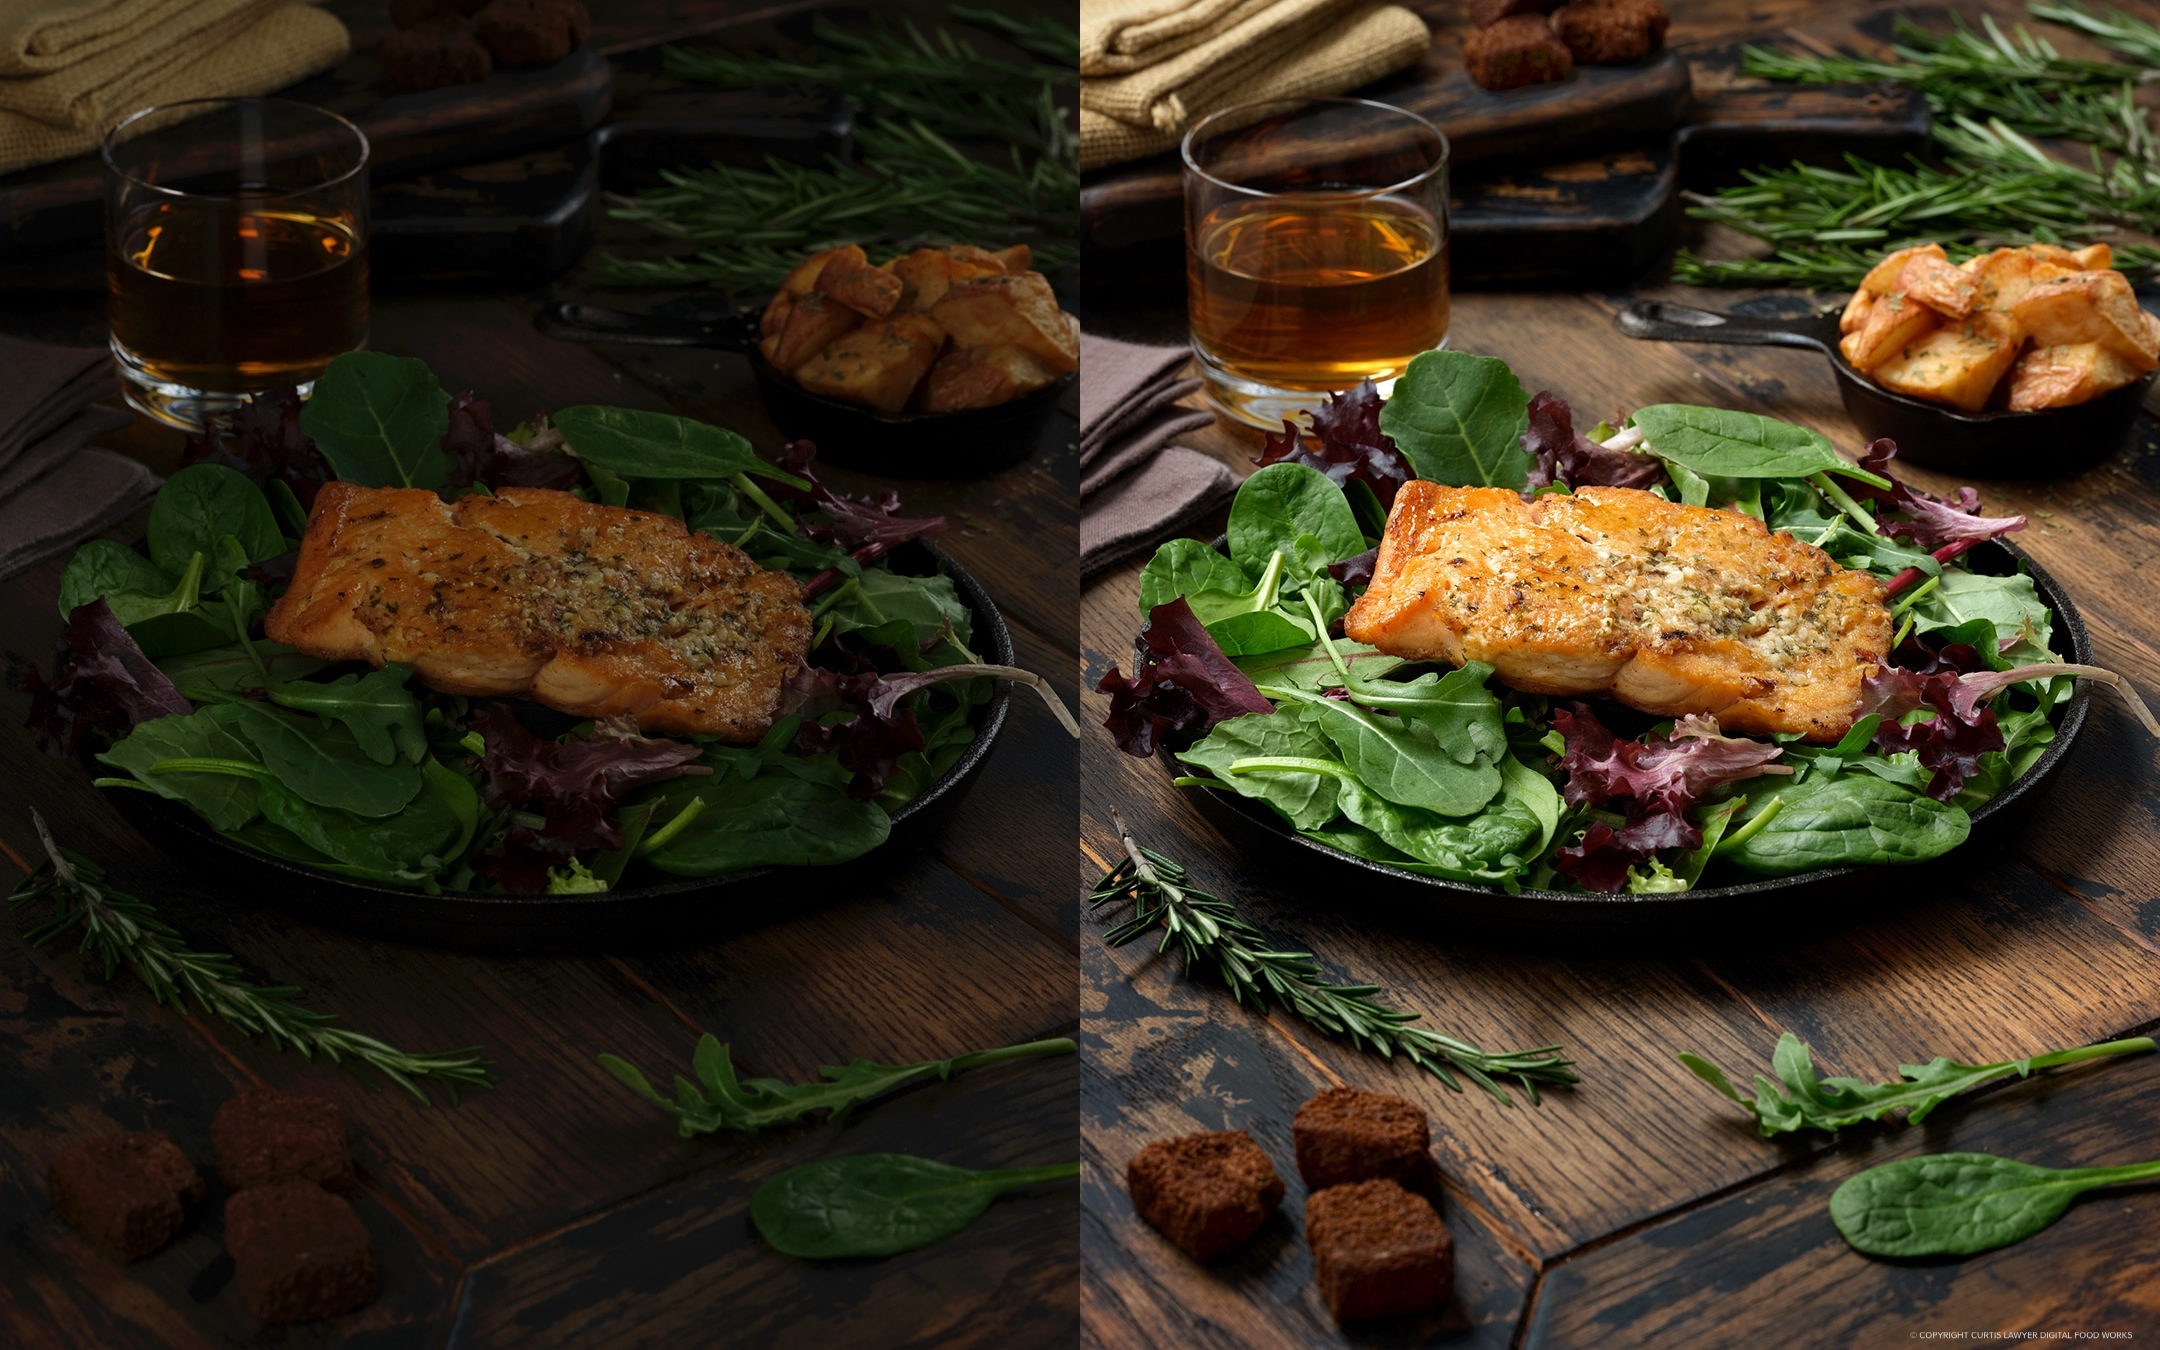
 Hummmm… it seems like I haven't posted a lighting set-up article in a while… so today, we'll take a quick, comparative look at what each of the three lights adds to this salmon salad photo. What's interesting to me in this photo is that the "one light" photo, just using the main light — is actually really useable. Adding the other two "fill" lights brings out the color and a little more texture on the main subject (the salmon) but even without them, it's a totally usable photo.
It's worth noting, that when I say "light" I'm talking about off-camera flash units. I almost always use flashes for still photography work, and while I have 200w, 600w, and 1200w power options to choose from — this photo could be shot with just three 200w flashes… you might not be able to get down to ISO100 with 200w units, but cameras are so good these days, bumping the ISO up to 400 or 640 would still produce an amazing image.
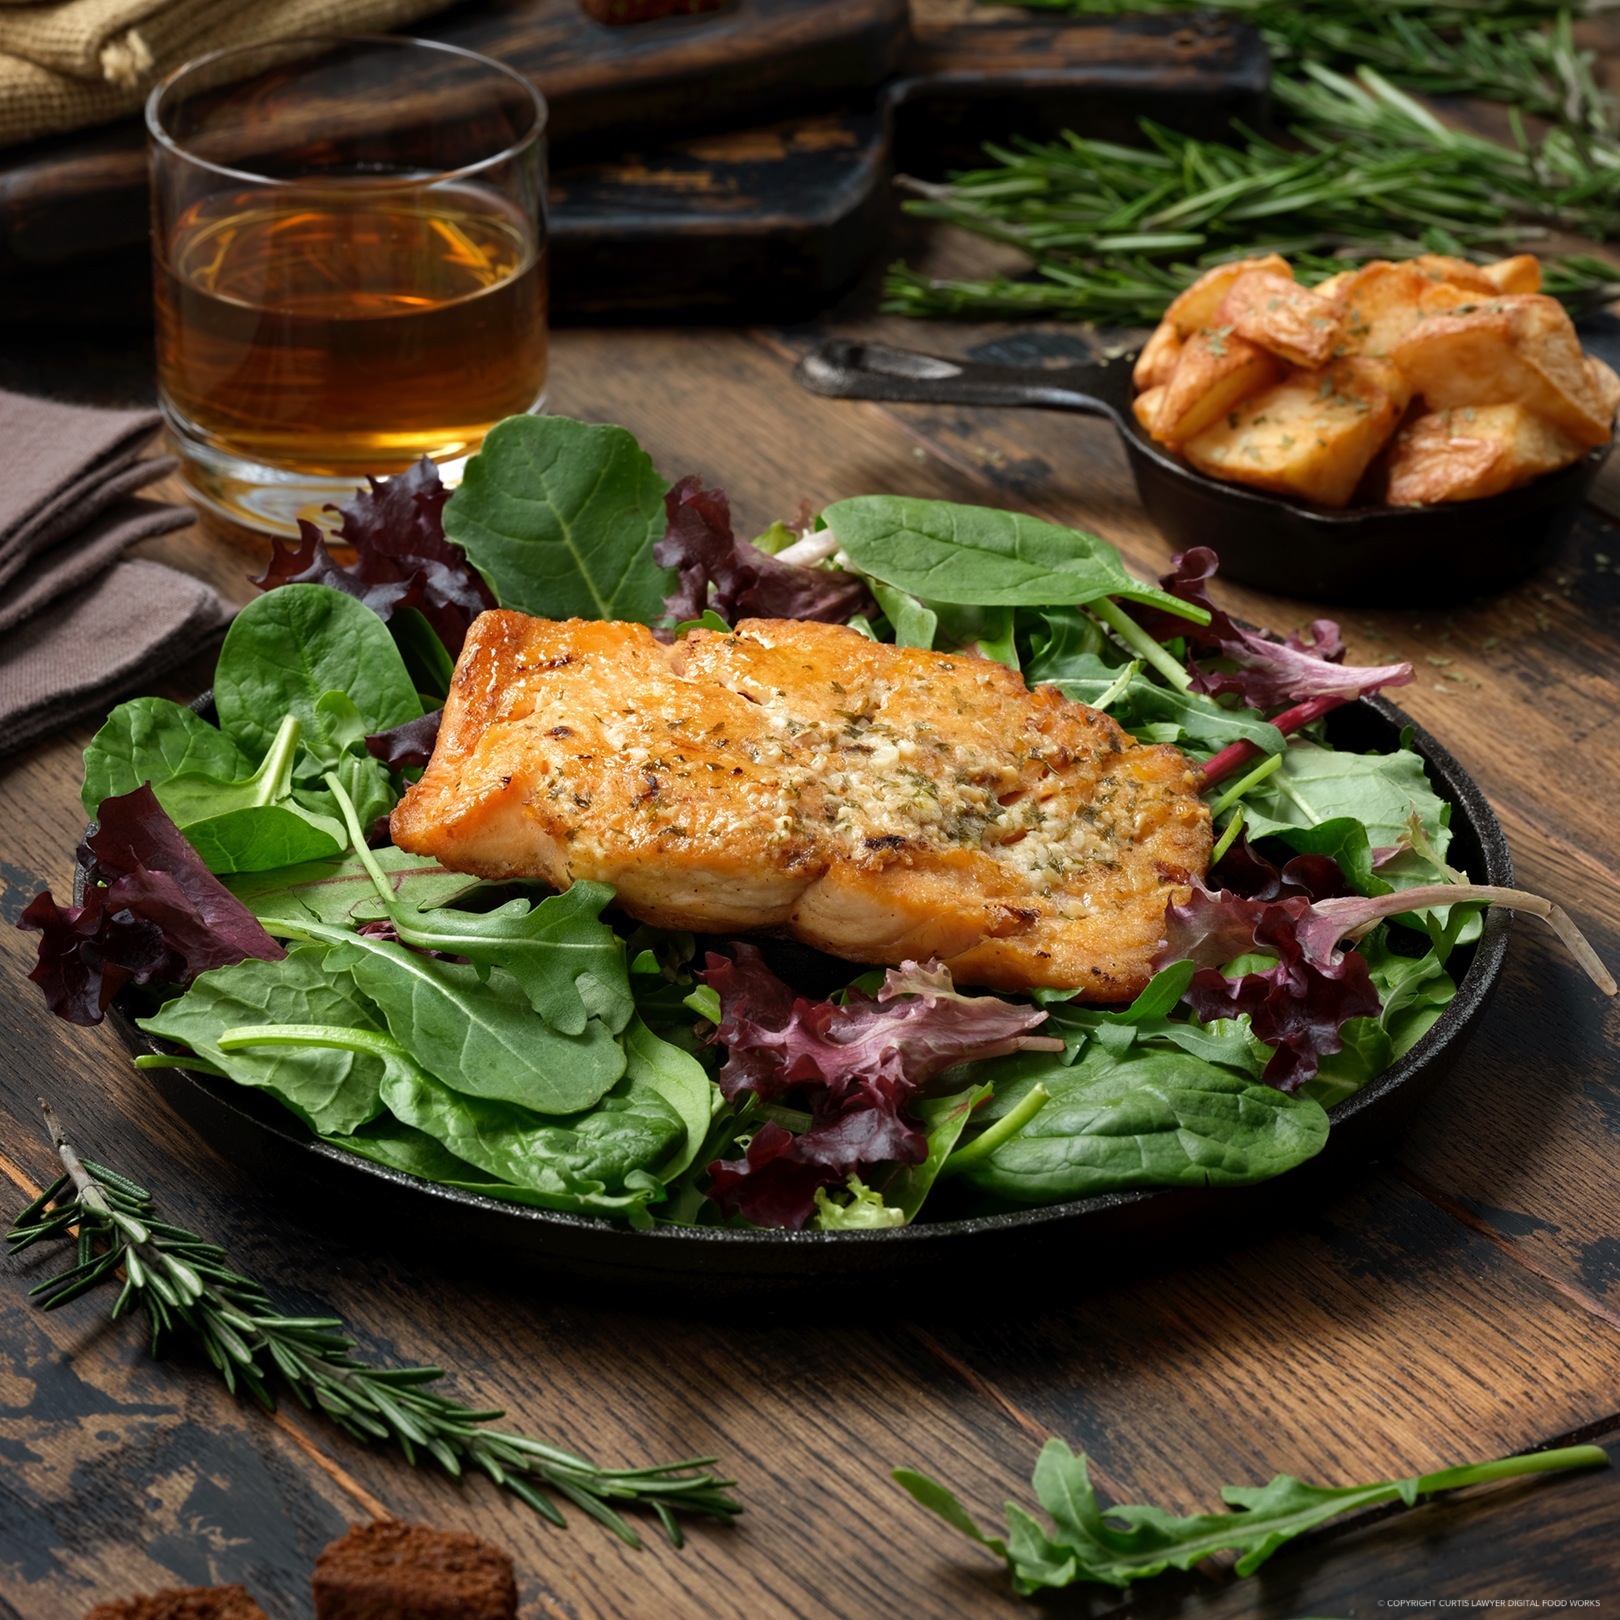
Let's take a larger look at the lighting diagram and the "final" photo.
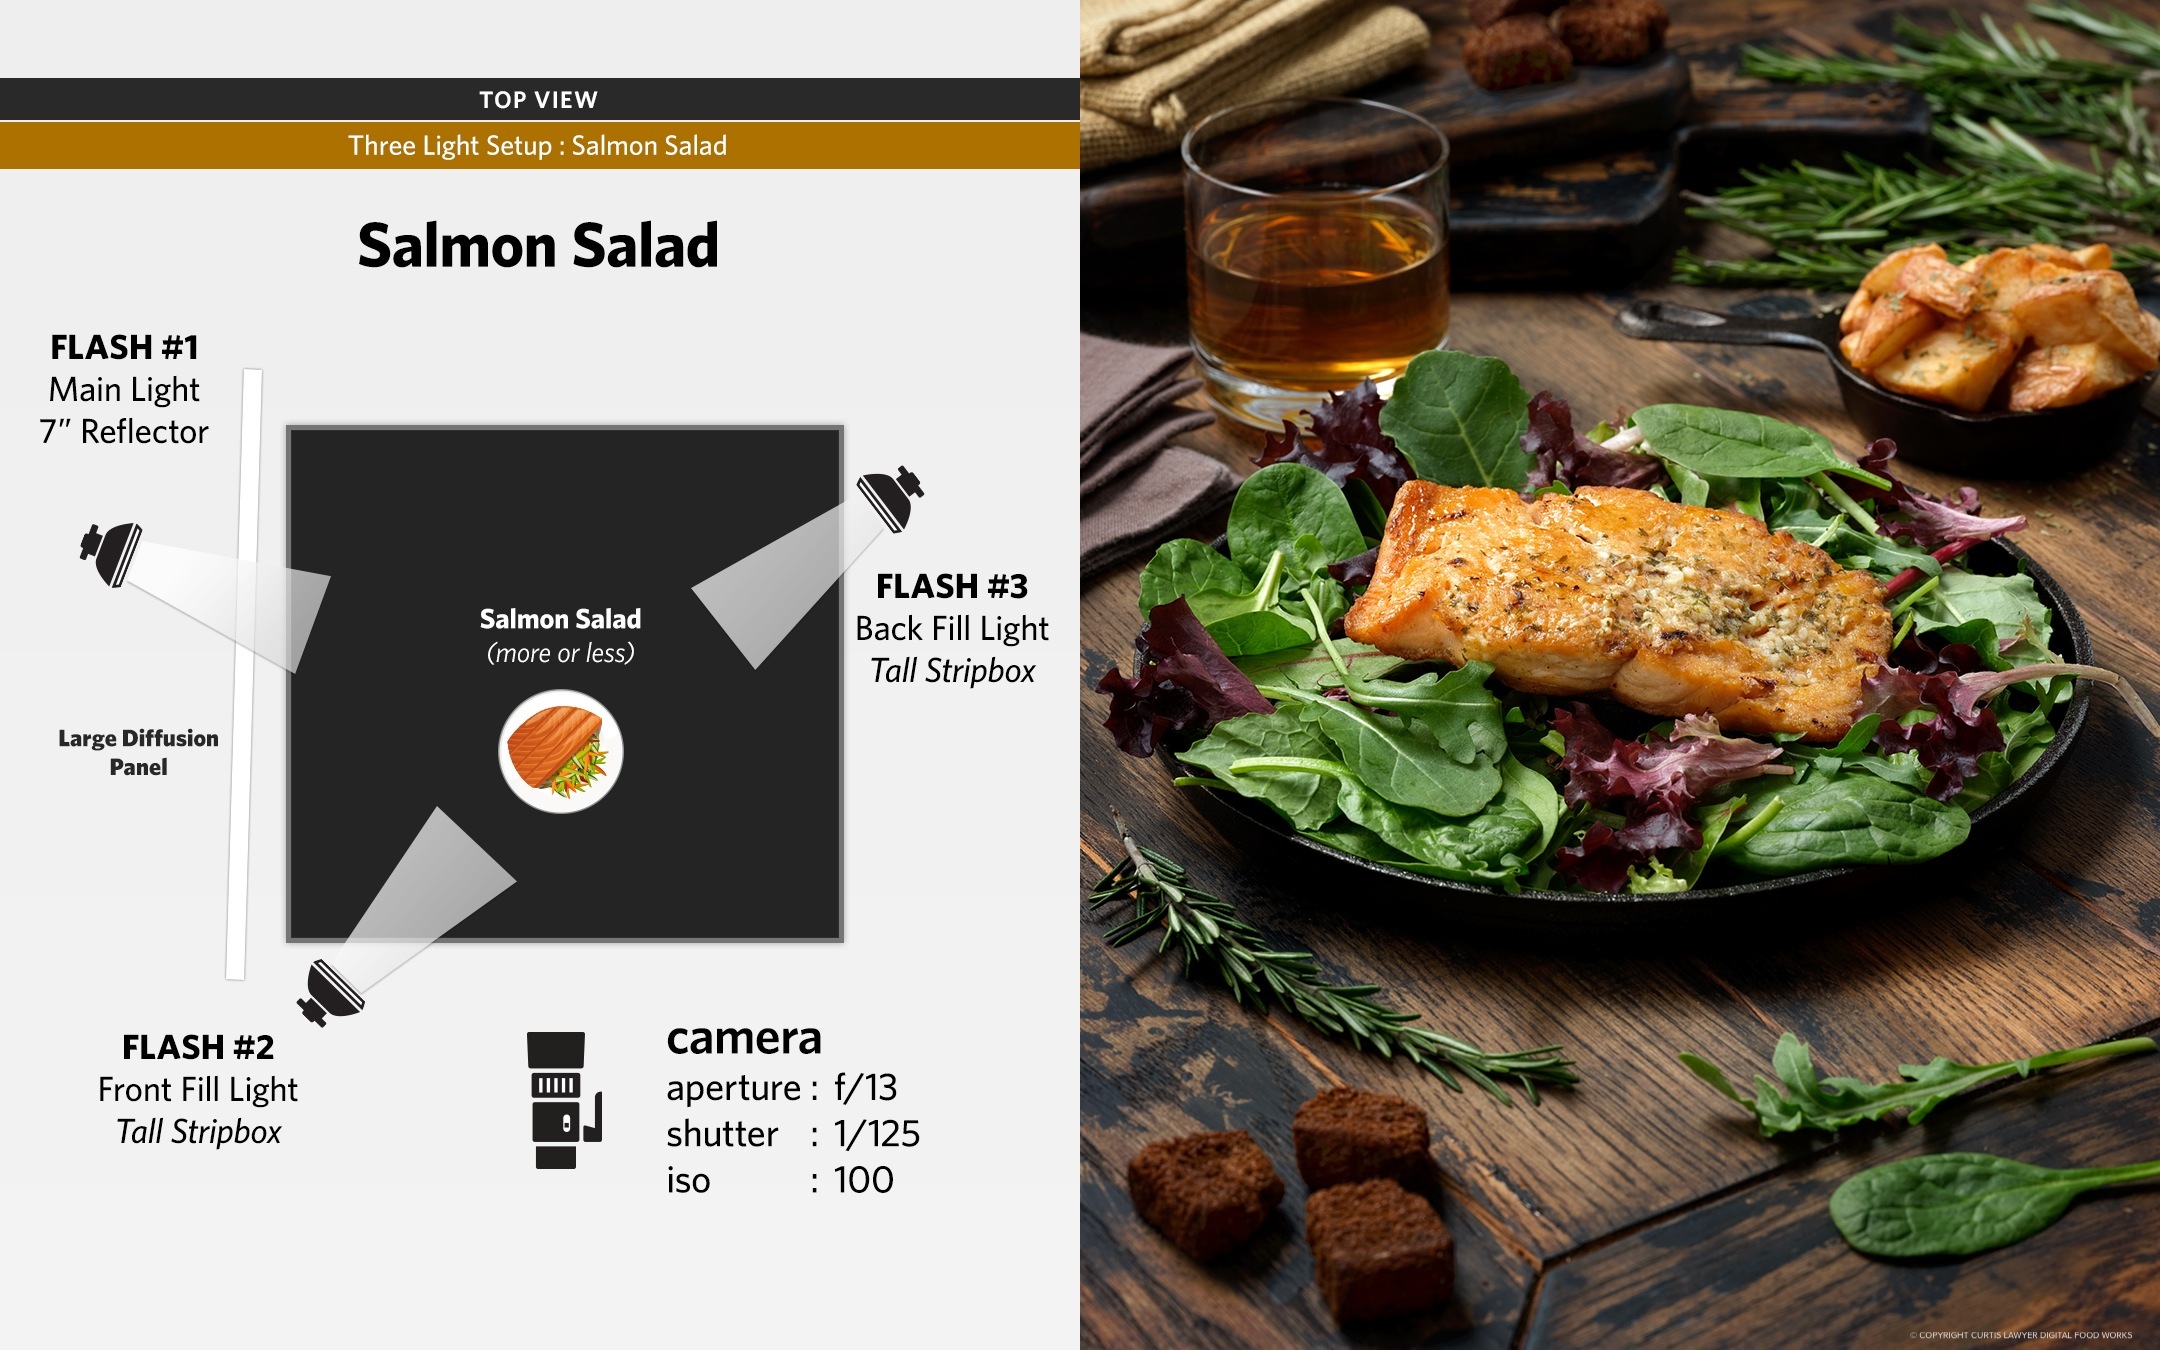
Here's a look at the lighting diagram for this scene (left), along with the final image (right).
And now let's take a look at the scene with just the "main light" and the final "three light" photo side-by-side.
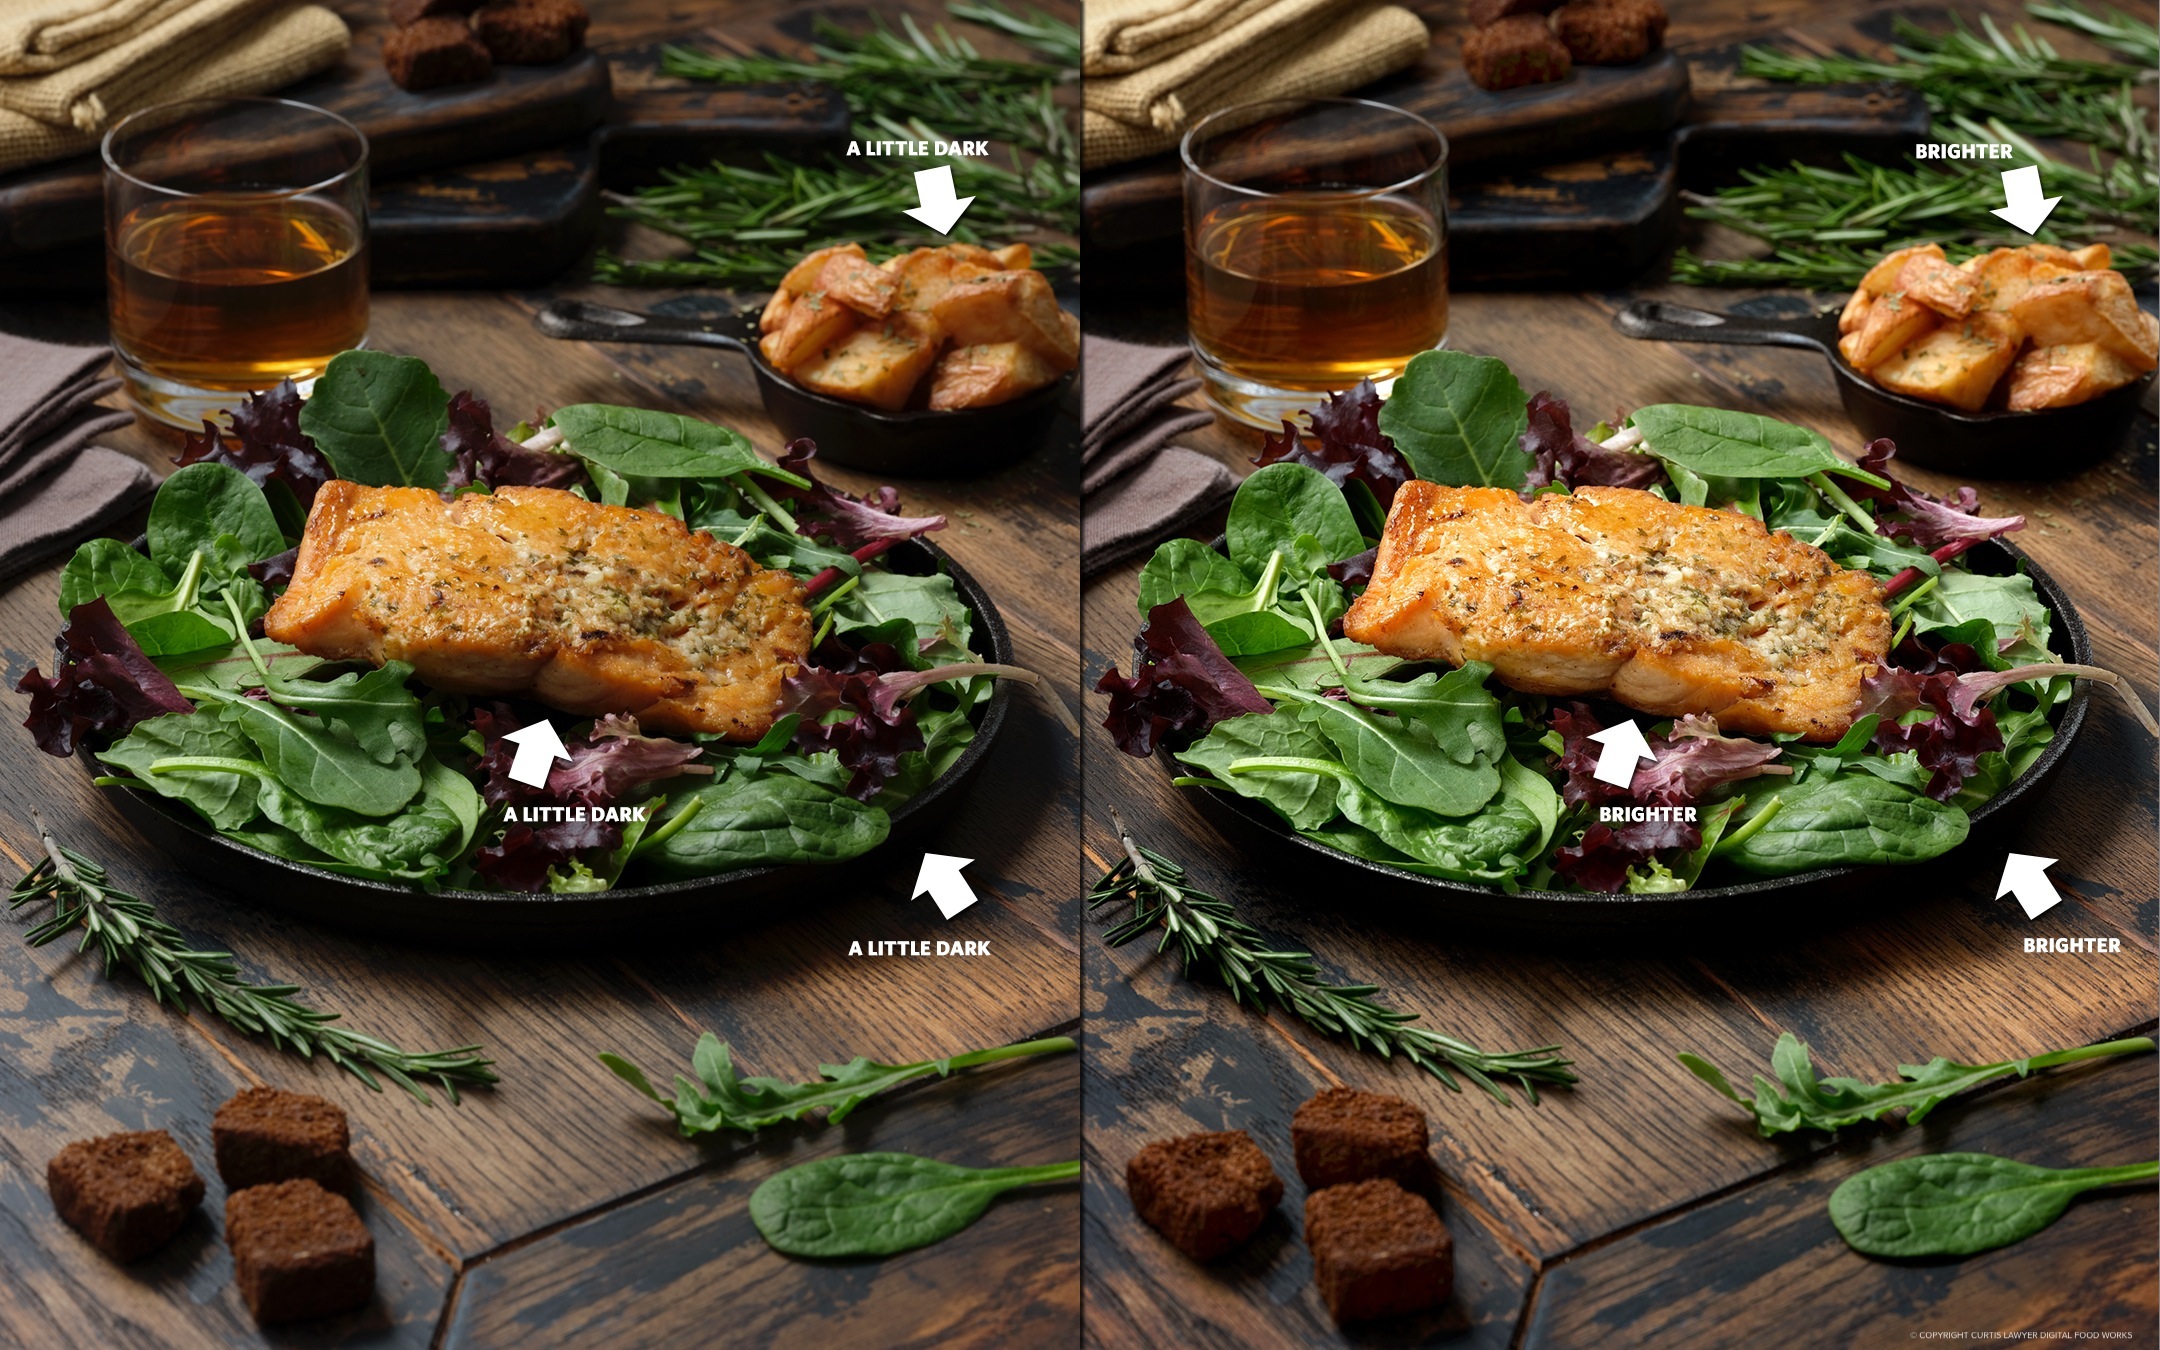
The photo on the left was taken with just the main light (flash #1) on, while the photo on the right was taken with all three flashes on. The extra flashes were used to brighten up the murky areas of the photo.
As I mentioned above, I think the one main light photo is totally useable. If I was using just one light, I would maybe move that one light a little more forward, so it was directly to the side of the salmon. That would help fill in the shadow that the salmon is casting on itself.
That's really the most pronounced difference when looking at the two photos side-by-side. The two additional lights brighten up the main subject… the front fill light especially, adds some needed color and illumination on the side of the salmon that's facing the camera.
Let's look at just the amount of light and color that "Flash #2, the Front Fill Light" is adding to the scene, and where it's positioned on the lighting diagram.
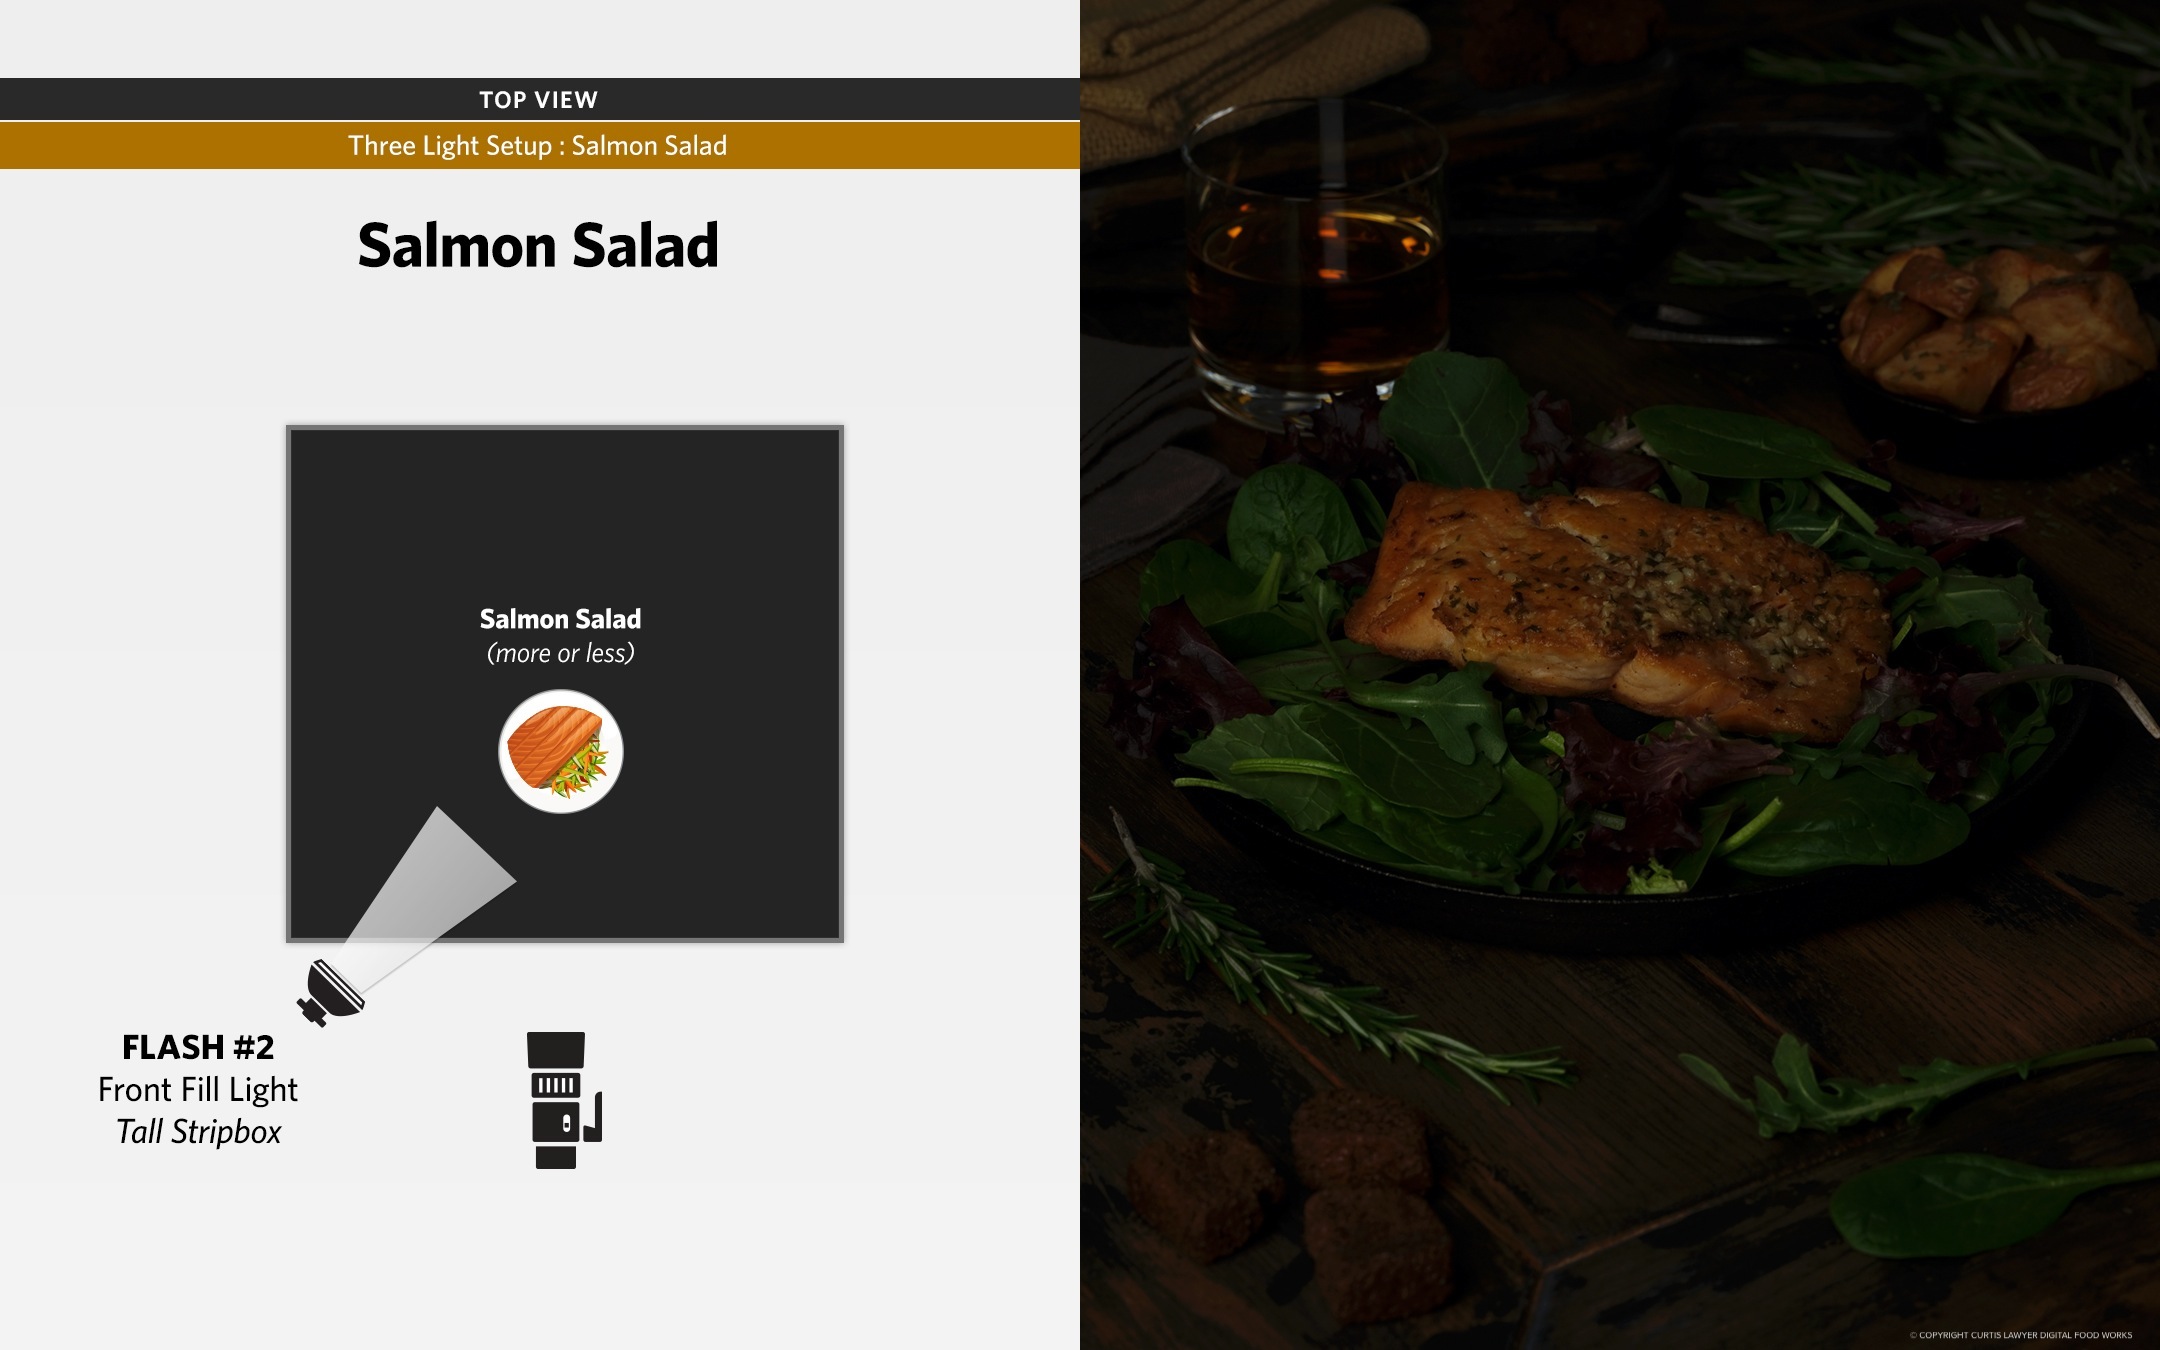
Here's the scene with just Flash #2. This flash is positioned in front and to the left of the main subject.
It's really not adding much in the way of illumination. Because of where it's positioned, it's really adding the most light to the front flank of the salmon and a little color to the top of the fish.
Now let's take a look at "Flash #3, the Back Fill Light".
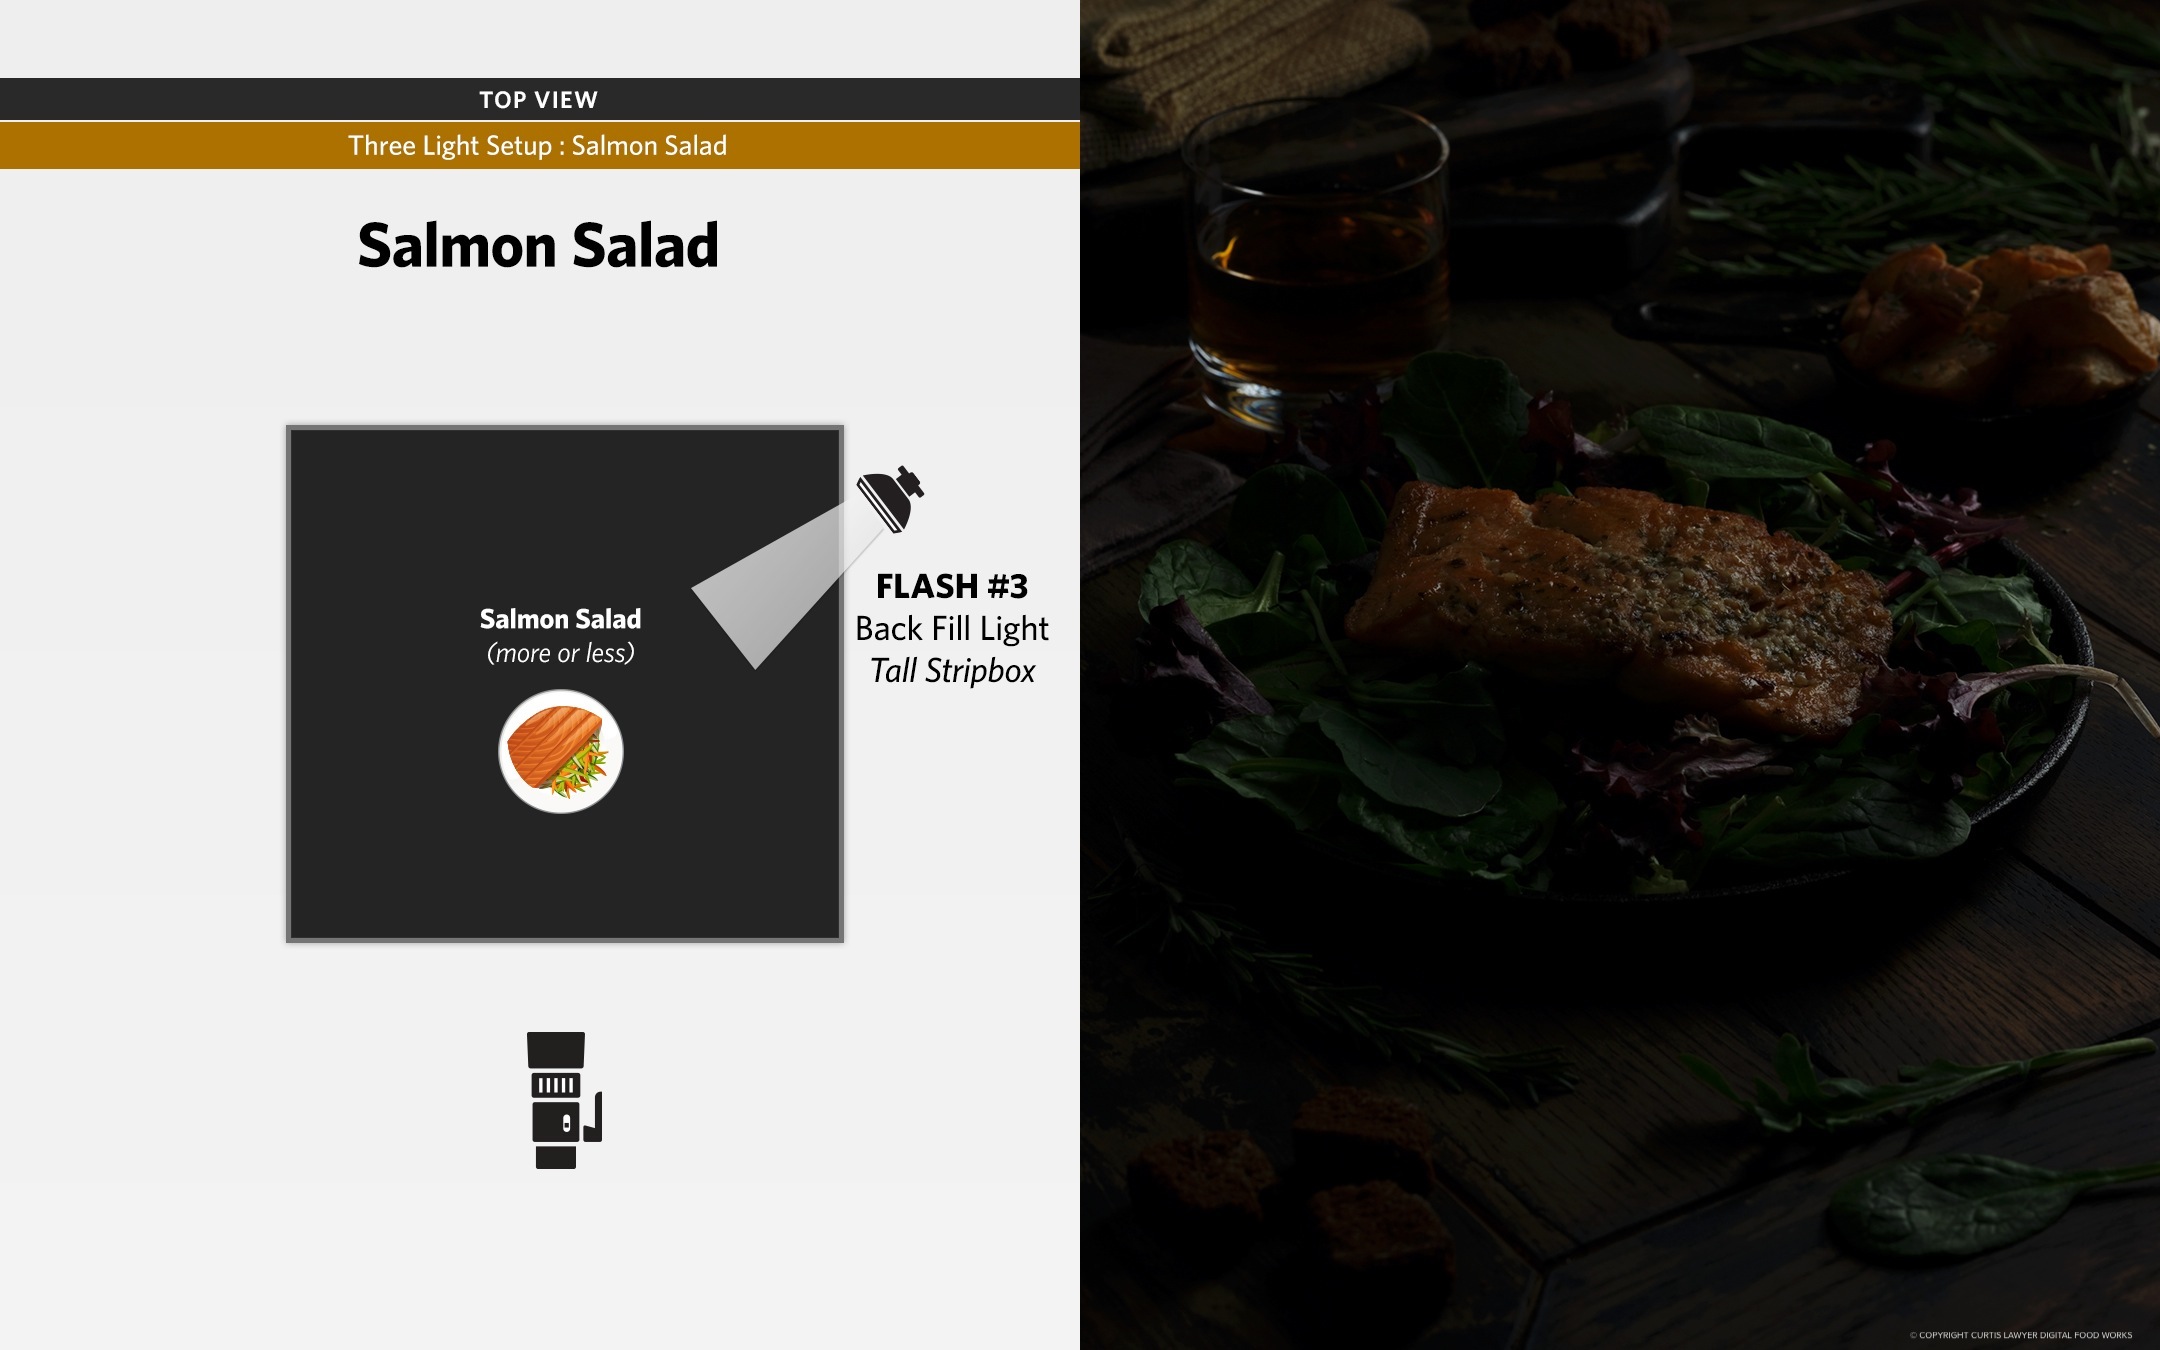
Here's what the photo would look like if Flash #3 were the only light used. This light is positioned behind and to the right of the main subject.
The back light is the only light that's positioned to the right of the salmon, it's also a little more "behind" the salmon than the main light on the left. The back fill light is doing a couple different things.
First, it's defining the edge of the plate a little more than just the main light does. The back flash illuminates the right edge of the plate. When we take a look at the photo using just the main light to the left of the plate, it's a little hard to see the difference between the top edge of the plate, the side of the plate, and where the plate starts falling off into it's own shadow.

Just the Main Light (Flash #1) was used for the photo on the left, while the photo on the right was taken with Flash #3 only.
The back light is also adding a little color and shadow texture to the garlic and seasoning on the top of the salmon. It gives that area a little "sparkle". Sometimes, seasoning and toppings can end up making the whole subject look cold if they're not clearly defined.
As an extra bonus, the back light is adding some color and illumination to the roasted potatoes in the background. Because they're a little out of focus, the potatoes could end up looking like a beige pile of roasted "something" in the background. While those potatoes "could" end up being distracting if they're too bright — a little extra definition around the edges helps define them as "roasted potatoes".
Next up, an interesting look at both "fill lights" at the same time.
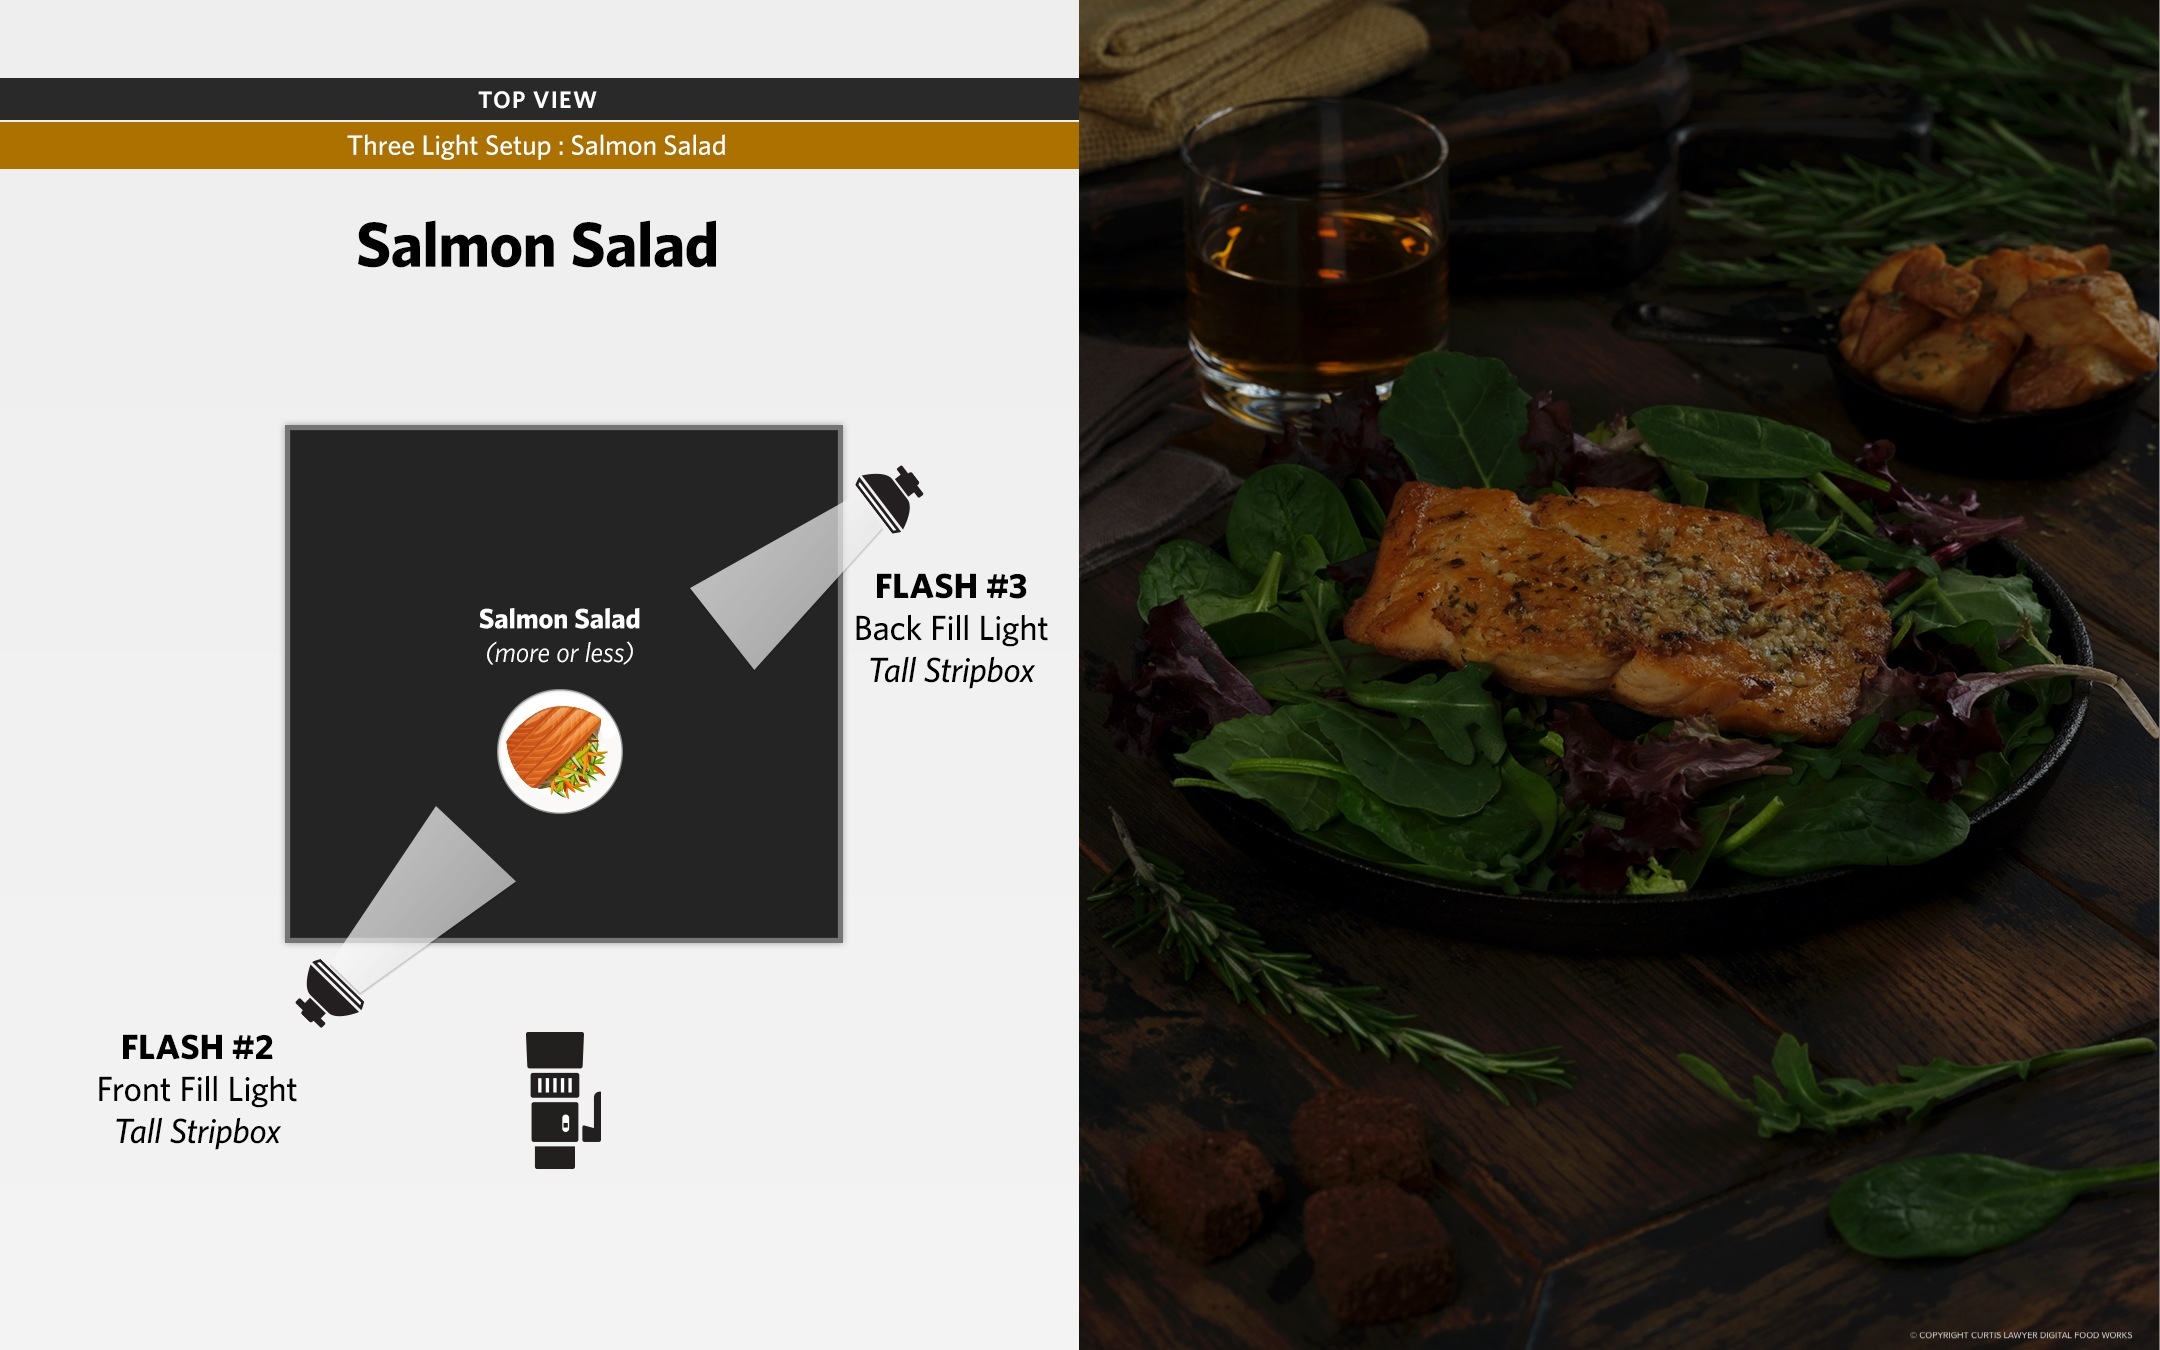
Here's a look at what Fill Lights #2 and #3 would look like, without the main light. These two flashes don't add much in the way of exposure (overall light), but they do add color, texture, and definition on areas of the scene, that the main light alone can't do.
These two lights are (more or less), bookending the fish — they're almost exactly opposite of each other and they're just about at the same power level. Together, they give the fish and the salad some great color, but don't really add much overall illumination to the scene.
Just for the sake of seeing what happens, let's turn them up and see what just lights #2 and #3 look like if the scene was property exposed.
If we were to "turn up" Flash #2 and #3, it would better expose the scene, but because both lights are pointing at each other, any shadows that are created, look rather unnatural which leads to a somewhat flat looking fish dish.
As you can see, the color is great, but the resulting photo is very flat and cold looking. Because the two flashes are pointing at each other, they cancel out most of the shadows that each light is creating. Which is why I have them turned down so low — we want them to add color and definition to the scene, but we don't want to erase any of the shadows that the main light is casting.
Let's take a last look at lights #2 and #3 turned back down — and then add in light #1 for our final photo.
Once we turn the Main Light (Flash #1) back on, along with Flash #2 and #3, we can still see the shadows cast from the main light, because Flash #2 and #3 have much lower power settings.
Once all of the lights are on, we can still see the shadow being cast by the main light on the left of the salmon… while the top and front flank of the salmon has color and texture. Yay!!!
But what if you only have one light? A couple of large white "bounce cards" could be placed where Flash #2 and #3 are located. Those cards would reflect a decent amount of light back onto the scene in just the right places… but the end result would be slightly less bright and "sparkly"… but "bounce cards" would still be a great option.
Thanks for reading along… and as always, I hope there's some small piece of information in these articles that everyone finds interesting and useful!