Lighting an Acorn Squash
January 15, 2020Food Photography
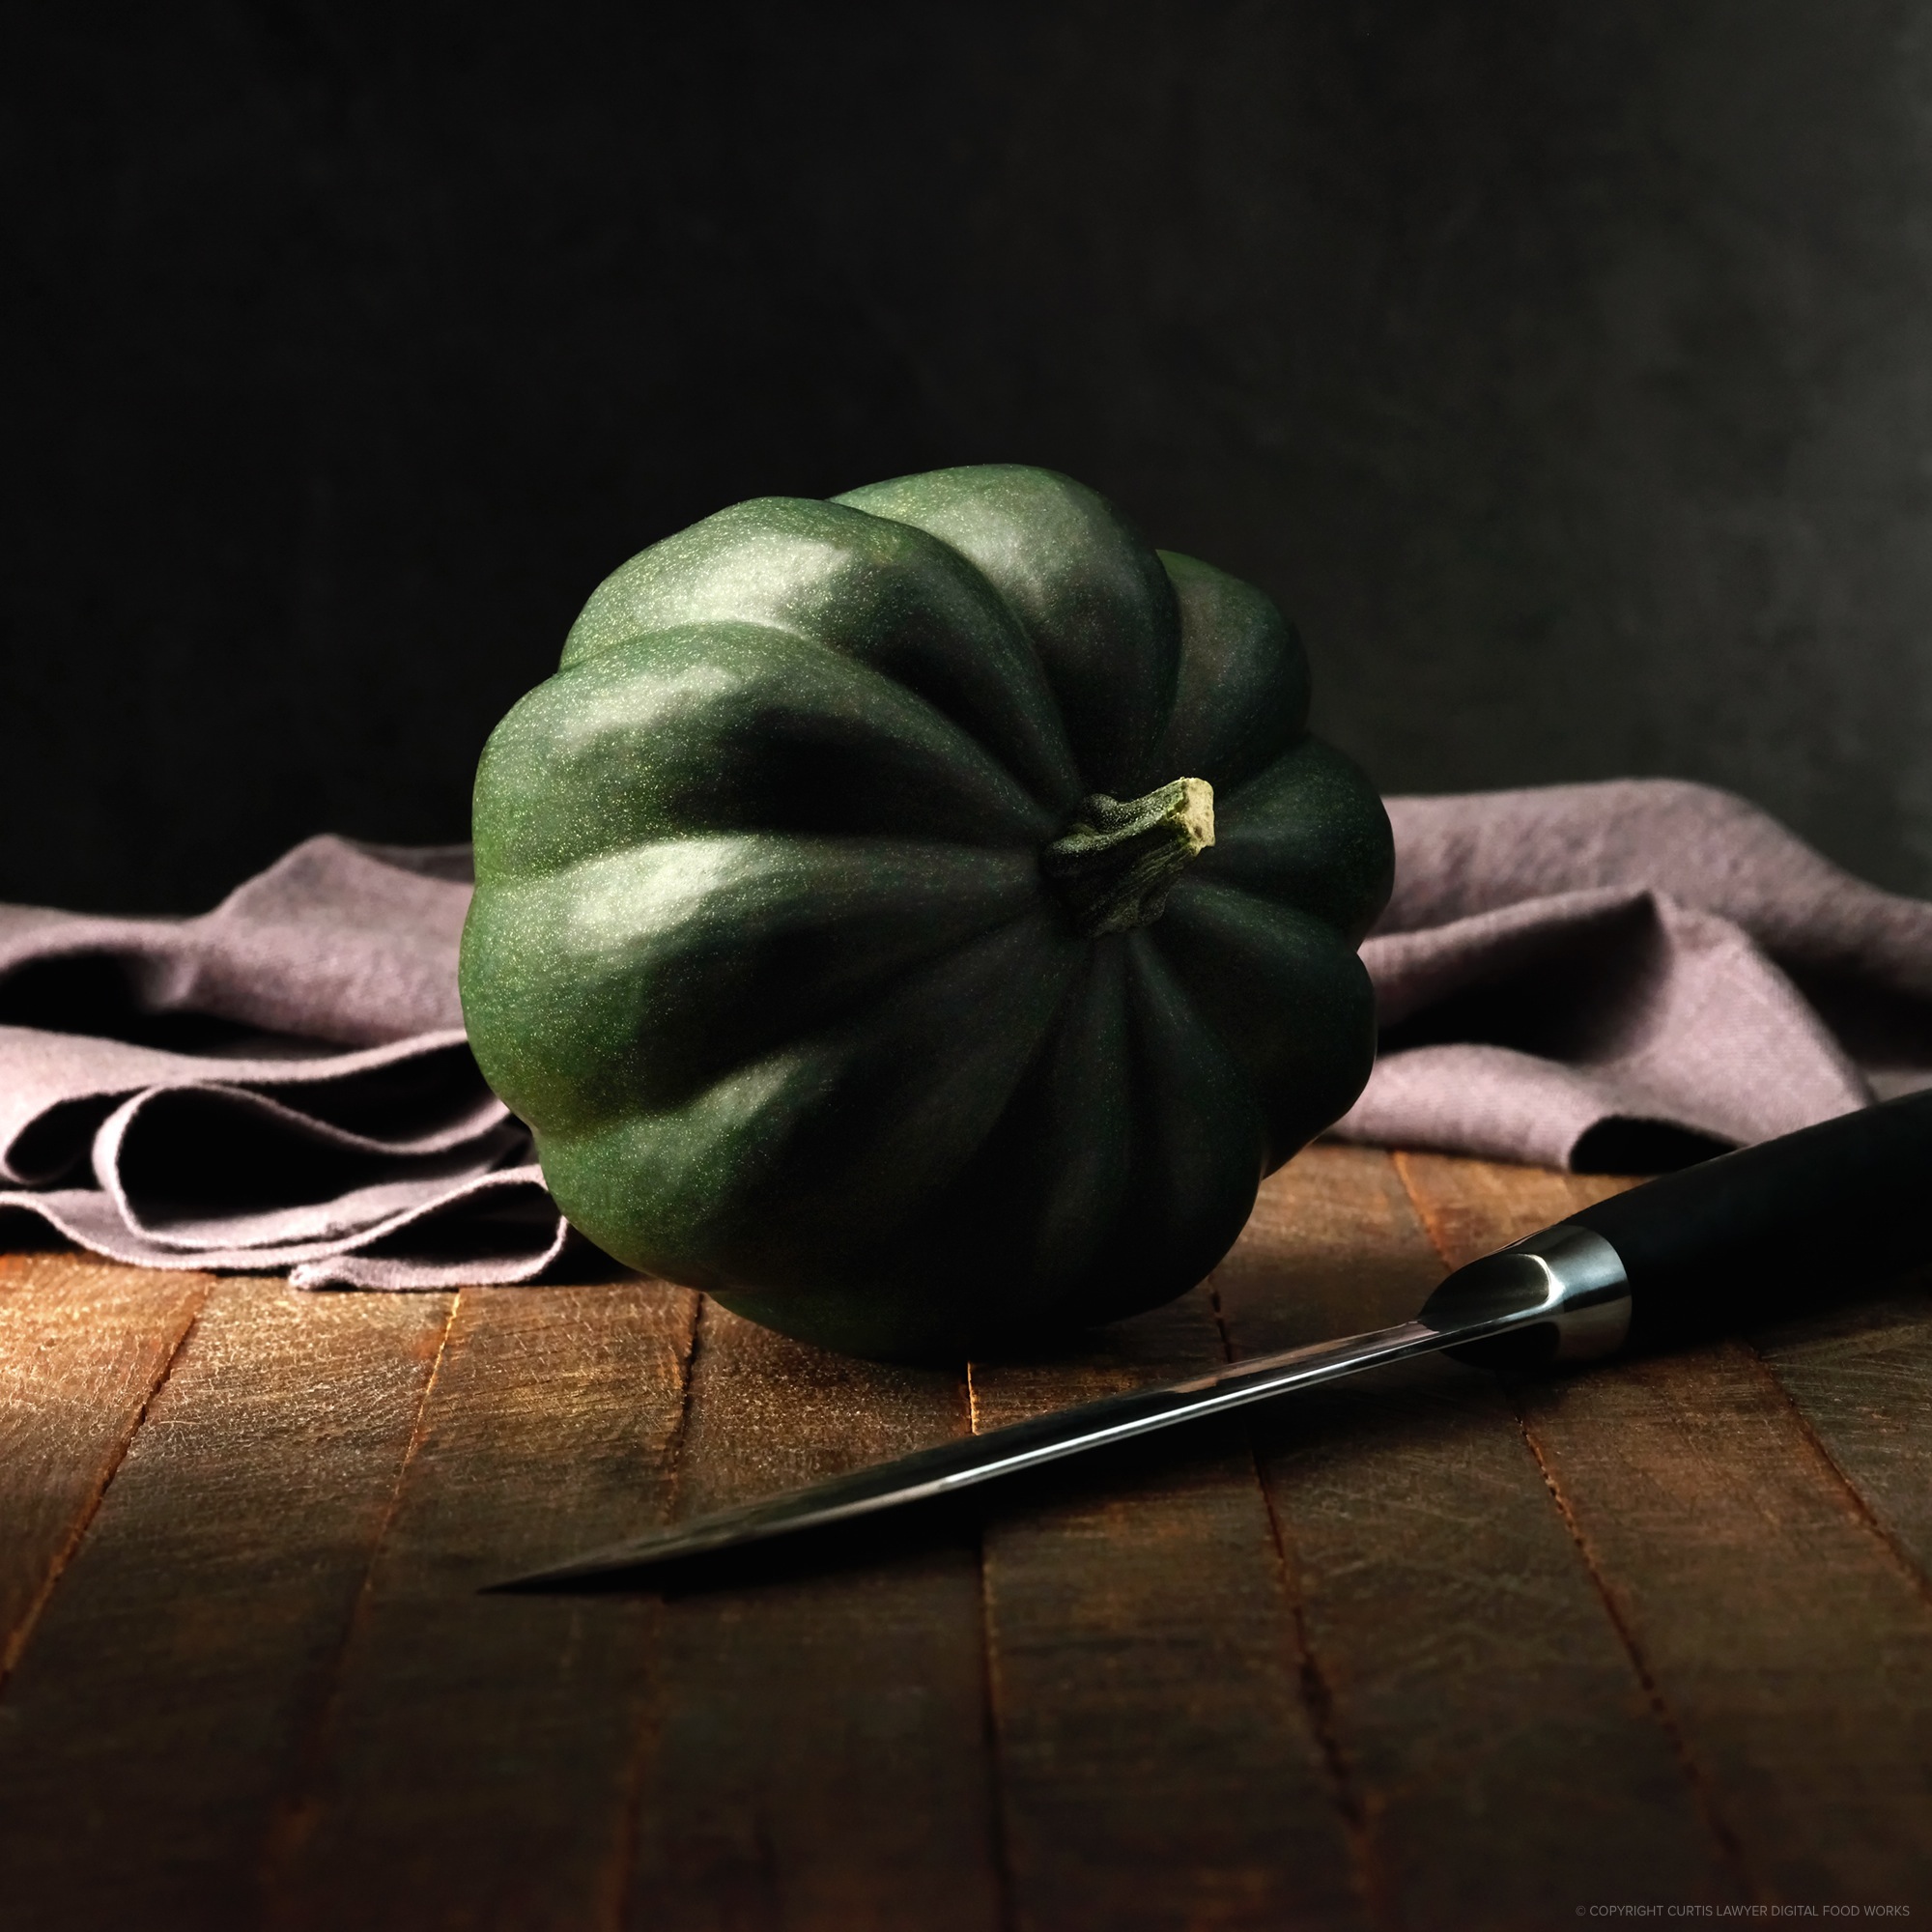 So I found this little acorn squash kind of late in the season, and for some reason, it was pretty much all dark green. It didn't have any of those orange variegation or patches you can sometimes find on this popular winter vegetable. It was however, pretty symmetrical, not very large, and had all of those cool fluted, geometric details of a typical acorn squash.
When I saw it, my mind instantly floated back to the "fruit planets" series that I did not too long ago — specifically, how the light wrapped around the lemon from that series, and wondered — if I could get the light to show off all the ridges in this squash, without flooding it with ambient light.
I didn't want to duplicate the glossy space theme though, because I'm currently in the tail-end of my darker autumn/winter photo series. The look for that is more woody and rustic, but not slick.
So I ended up staging this one (initially) as a "prep photo", a wooden surface that I have been using for this series, a knife, a linen, and a stark gray background — all of which would fit in with the rustic theme. After a little bit of finessing, this is what I ended up with.

Acorn Squash with a Knife.
I'm just going to quickly outline where the lights were positioned and why, without getting into any more backstory. Really, I just wanted to post the larger image of the acorn squash (above), because I'm not really sure how the color sync profiles are being handled over on Instagram. There's a lot of dark, smooth shadow detail in this one, that seems to get lifted out of the versions on Instagram.
The main light (a 12x56 strip box) was positioned to the left of the camera, placed behind a sheet of diffusion material, and blocked off even more with two pieces of black foam core. The whole idea here is to get a nice, even, tall, strip of light… that only hits the acorn squash, but doesn't spill or feather out across the scene too much.
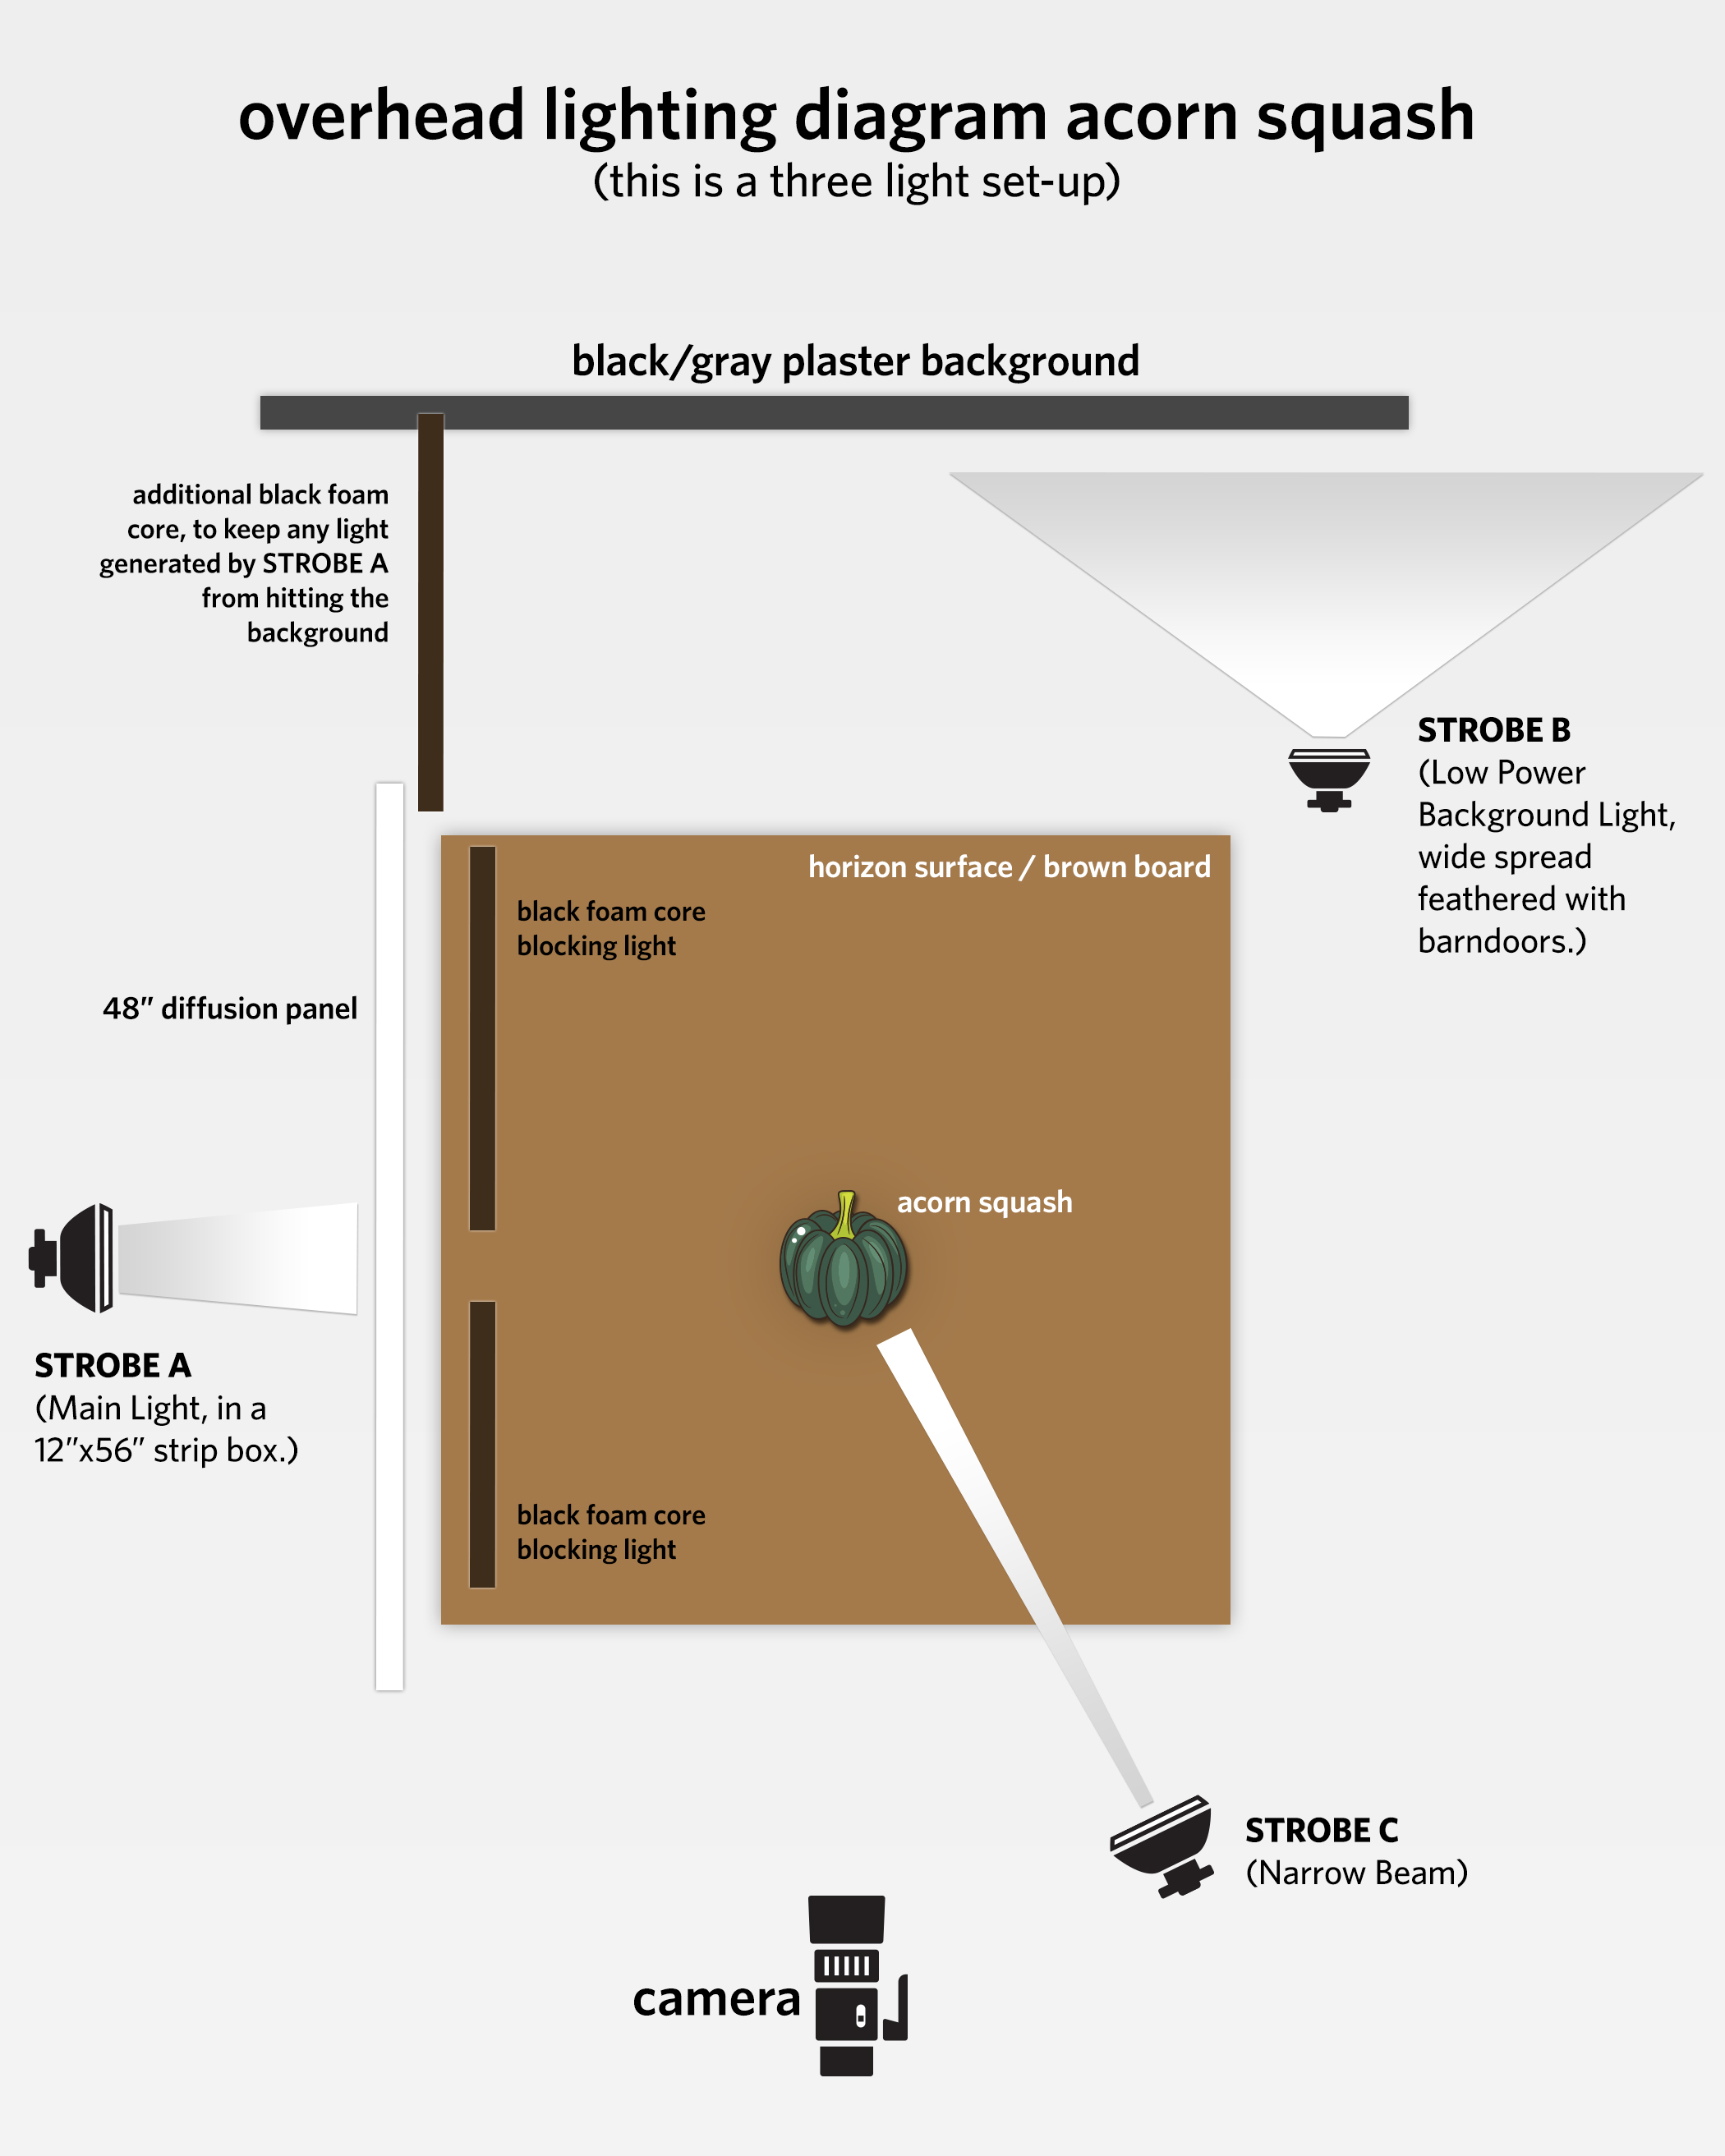
Lighting setup for the acorn squash photo.
Finally, I really felt like the coolest part of the squash (where the stem is, at the top) was being shrouded in darkness and you couldn't really make out where all the fluted ribs come together. That's mostly because the squash wasn't pointing directly at the camera, but rotated about… 25° away. Just enough for the higher sides to cast a shadow on the "top" bits.
So a third light was brought in and confined to a very narrow, focused beam, pointing directly at the stem. This light was just slightly higher than the stem (maybe by, an inch), and positioned off to the right side of the camera. I added a 1/2 CTO gel to this flash (CTO stands for "color temperature orange"), because it was looking a little too blue and cold. By the looks of things… I think I probably could have went with a 3/4 CTO and made it a little more orange or warmer… but it's close the way it is. The best part though… is that you can now see all of those ribs meeting up and going in at the stem!
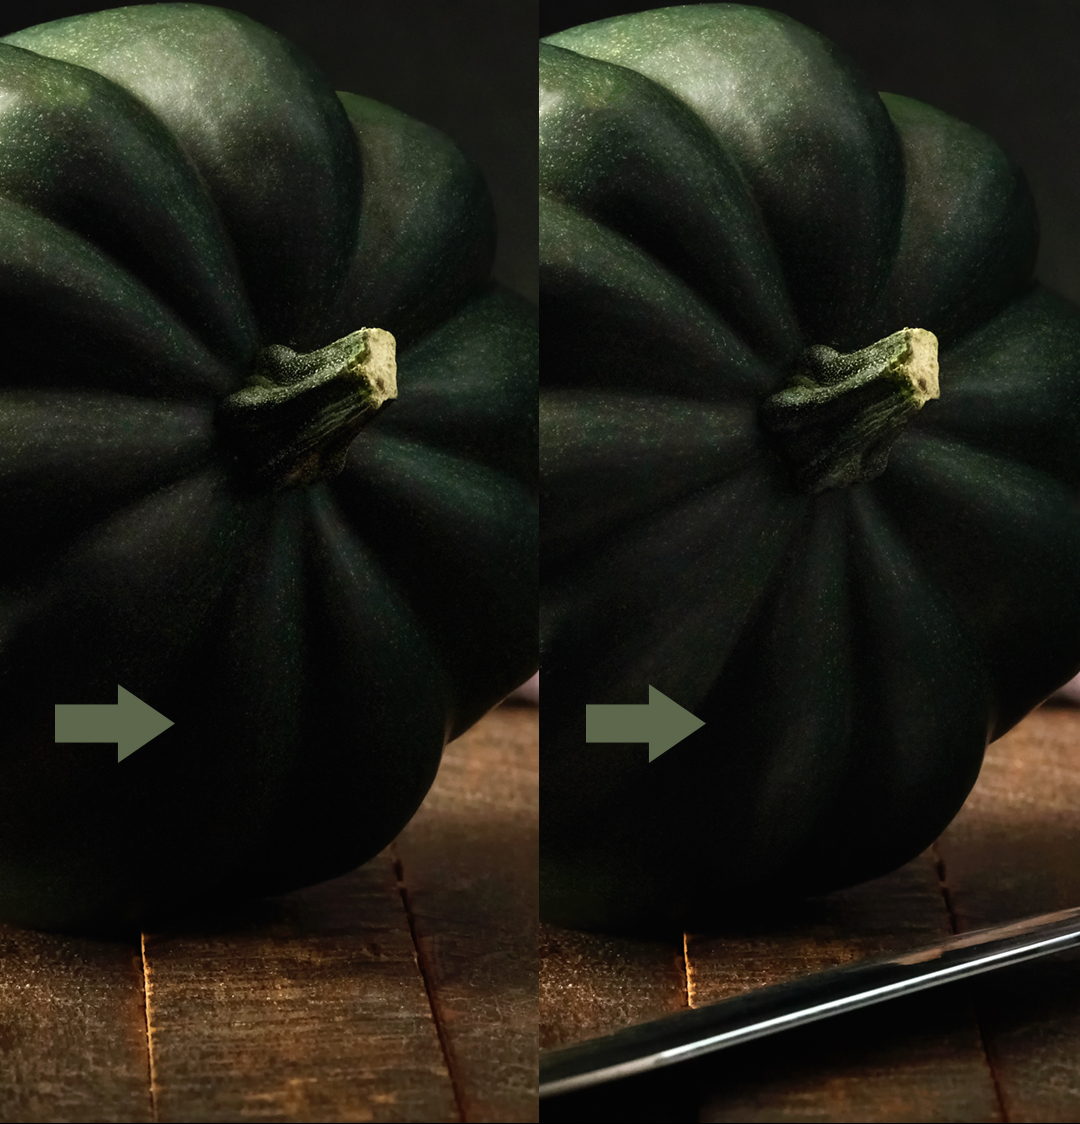
The light from the main light (which is to the left of the squash), is hitting the flat edge of the knife, and bouncing back up into the squash. The difference is very subtle, but it’s easier to see side-by-side — the squash on the right, is just a little brighter, under the stem.
To me, that extra little "bounced light" flattens out the ribs a little too much. I kind of like the knife-less version a little better. I guess a option would be to just Photoshop the underside of the knife-less squash, onto the photo of the squash with the knife… but I wanted to show everyone what that one little extra tiny bounce of light was doing!
Every once in a while, I post these lighting diagrams (and sometimes camera settings too) over on the @DigitalFoodWorks Instagram account. If you'd like to see more, be sure to follow on Instagram and over on the Facebook account. I usually post links to any new mini-articles that I post to the site … on both of those platforms.
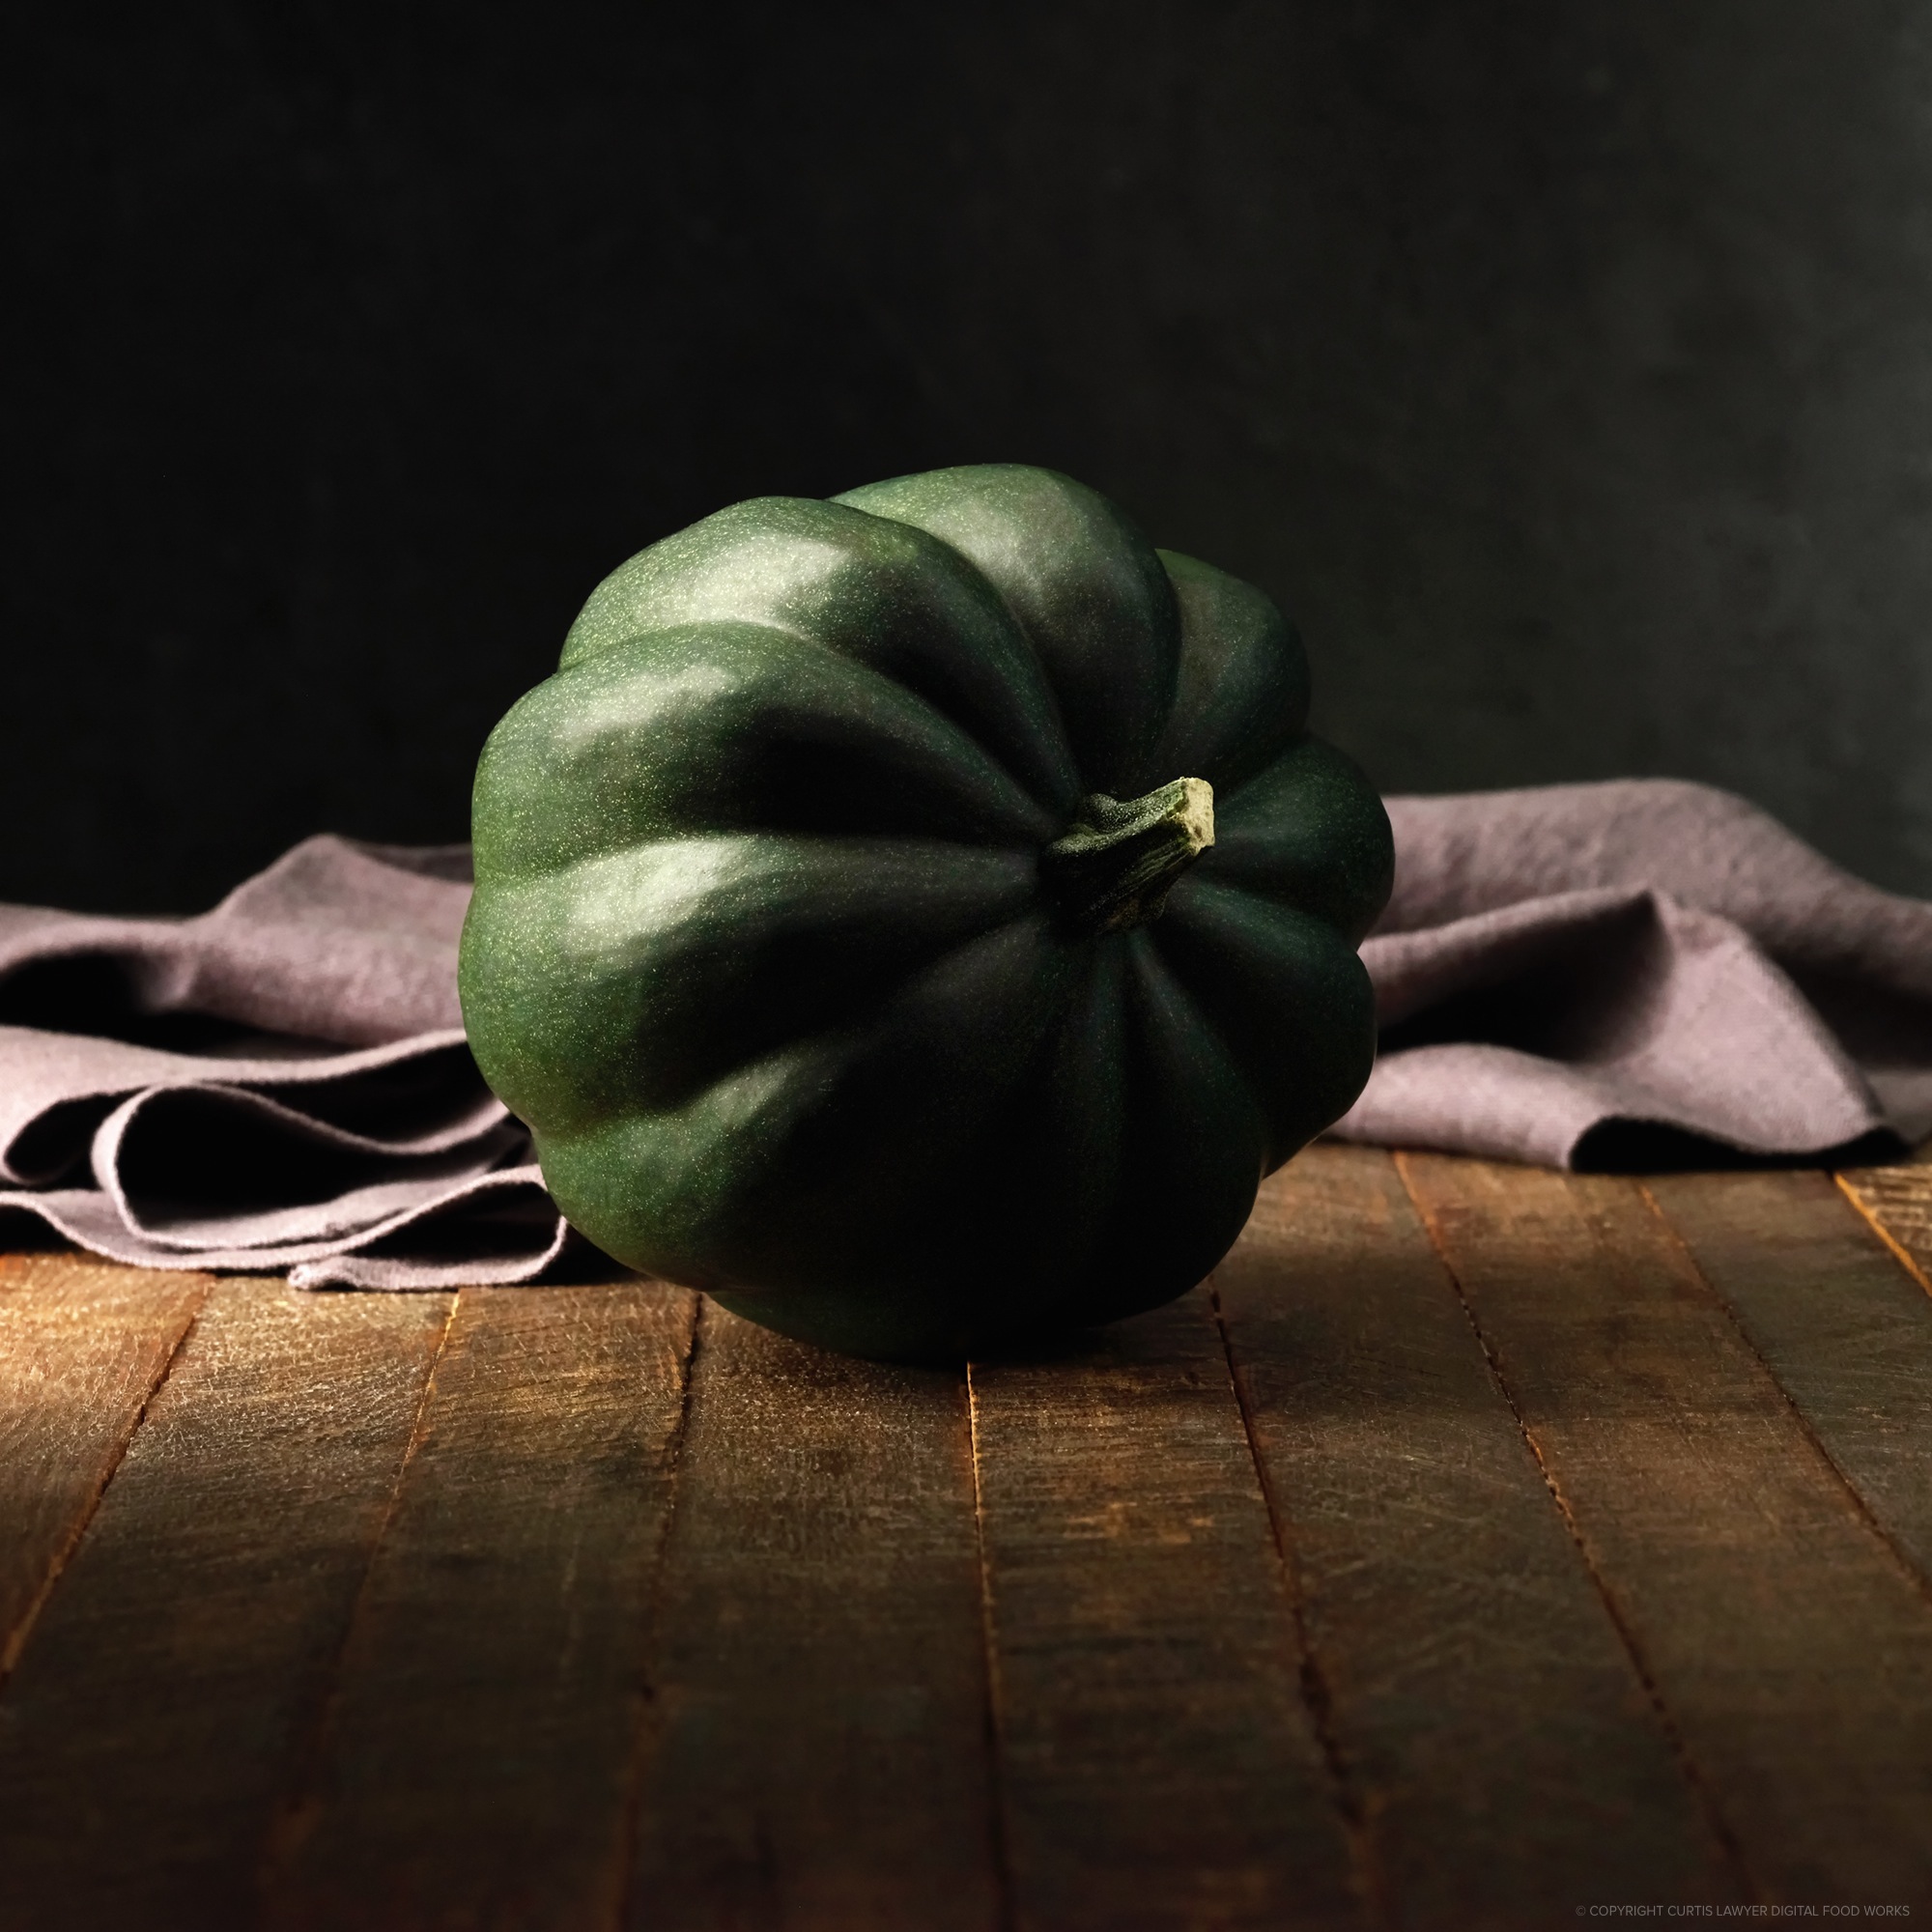
Acorn Squash without the knife.
If there's questions about this setup, any setup, or if you have a product that you'd like amazing photos for, please feel free to direct message me on either of those platforms!